Toys are an indispensable attribute of childhood that appear from the first days of the child’s life, bright rattles are gradually complemented by cubes and pyramids, soft toys and dolls, board games and balls. The number of toys is growing exponentially, and the moment comes when parents are simply forced to think about how to store them.
Content
- DIY basket for toys: ideas, photo
- How to sew a basket for toys with your own hands from fabric?
- Basket from newspaper tubes for toys
- Knitwear toys
- Video: How to knit a basket for toys from knitted yarn?
- Jeans
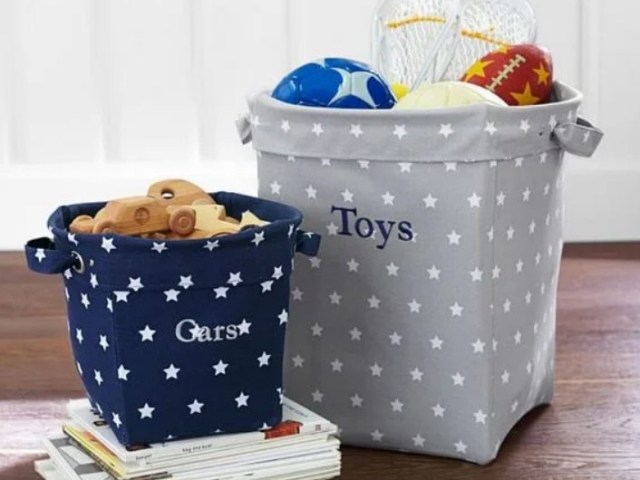
- Children's basket with handles for toys
- Basket for toys suspended
- Buy basket to buy on Aliexpress
- Video: Create a basket for toys
Even if you get rid of rattles and broken, spoiled specimens, there are still many toys. And then a variety of containers become the output, into which you can add all this wealth for storage. In our case, we will talk about baskets for toys.
DIY basket for toys: ideas, photo
- Of course, you can choose a ready -made basket for toys produced in an industrial way, in the nearest store, or order on the Internet. But it’s much more interesting to do it with your own hands, besides, with the child!
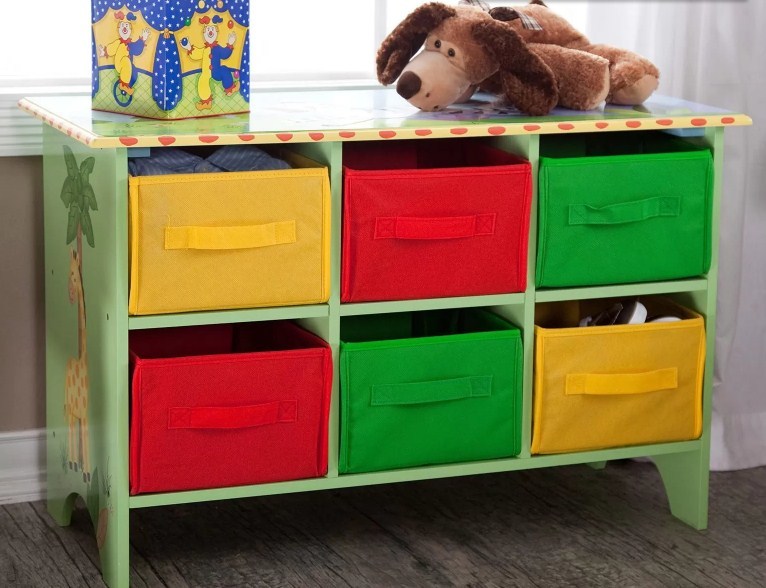
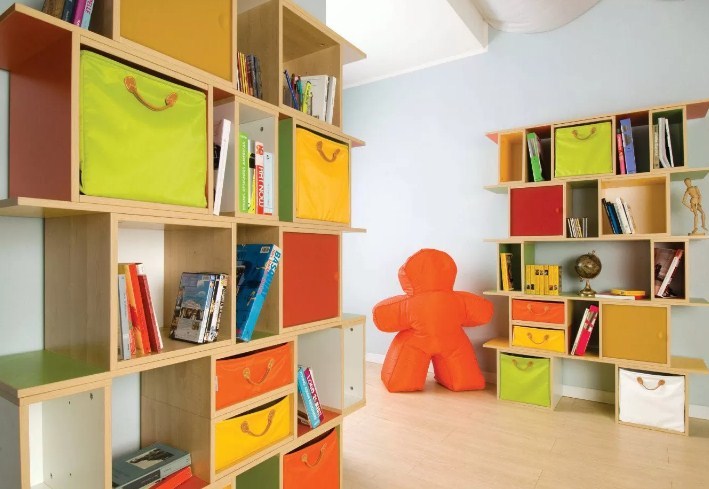
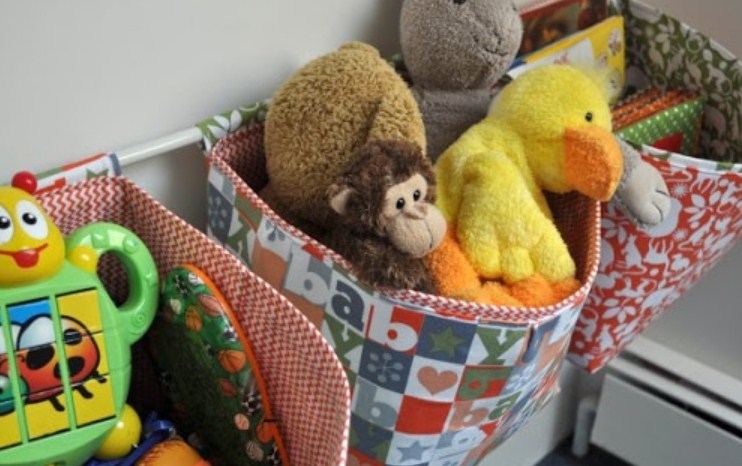
- It will be most correct to make several baskets at once. If you make them different in volume and colors, you can put each type of toys in a separate container: dolls, for example - in orange, balls - in green, soft toys - in yellow. So it will be easier for the child to quickly find the right toy, and there will be no confusion during cleaning.
- The basket can be made of almost anything: fabric, plastic, yarn, paper. Their dimensions are not at all limited by any framework: from a small basket for storing “fillings” from Kinder Surprise, to spacious containers for plush bears and dogs. The main criterion for selecting the material is its reliability and security for the child, for example, the lack of harmful impurities in the same plastic.
- The same scope for fantasy and in resolving the issue, where to put this or that basket. They can be put on the floor nearby in the corner, or can be placed in several places, hang on the wall, place on the shelves. The baskets in which toys are stored, which the child plays infrequently, can be put upstairs or removed from the eyes by placing under the bed.
- When creating a basket, think over its color so that it is combined with the tones of the decoration of the room. For a small child, this, of course, is not so important, but in this way you will gradually develop his taste, a sense of proportion. The main thing is to avoid screaming toxic shades when choosing a coloring, give preference to bright, but calm tones: pink, green, blue. Decorate the baskets to your liking, using the pictures that are understandable to the baby, embroidery with the heroes of your favorite fairy tales or cartoons.
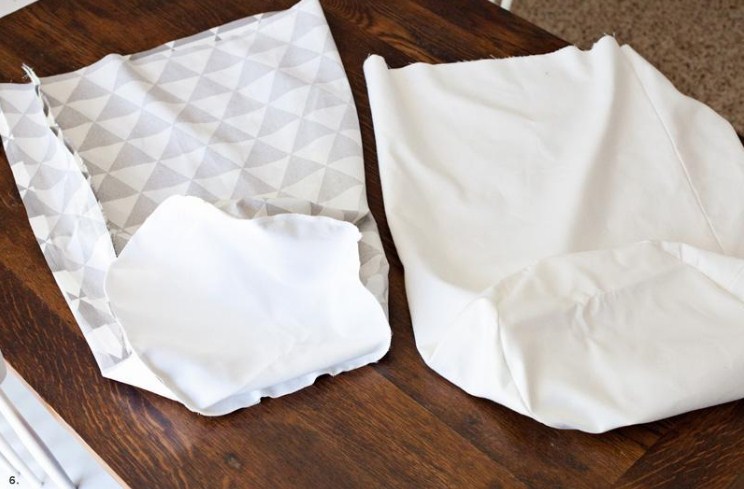
How to sew a basket for toys with your own hands from fabric?
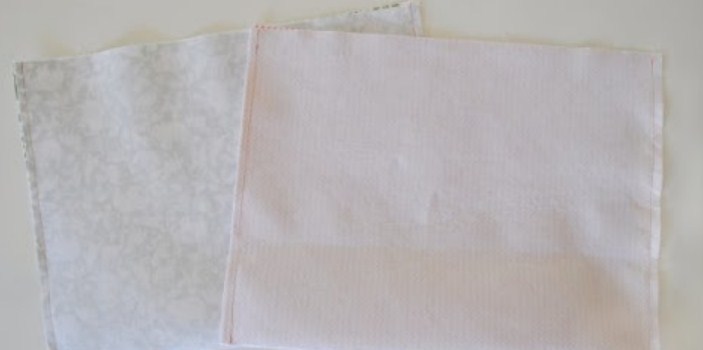
- Let's try to sew a basket for toys from a cut of matter, which has long been idle. For this, in addition to fabric, you will need Round template (You can use a dish, a large plate or just a lid from a pan or pan). We stock up on a centimeter and scissors, needles with threads, several pins. We will also have to iron the fabric, so the iron should also be at hand.
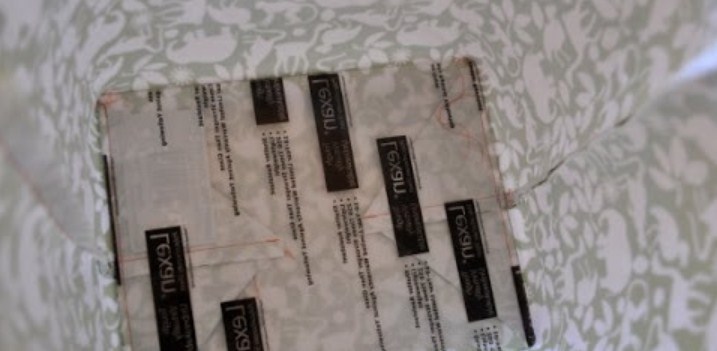
- So, we put the fabric by the wrong side and mark the circle on it, for which we circle our dish or other round object you have chosen. And now we cut it through the resulting template, at the same time measuring how much the circumference is. Measure the fabric so that in length it coincides with this indicator, and add another 5 cm for the seam, and make the width the way you need by leaving the gates for the gateway. By the way, the more gateways there are, the more durable and hard your basket will be. The width will affect the height of the product.

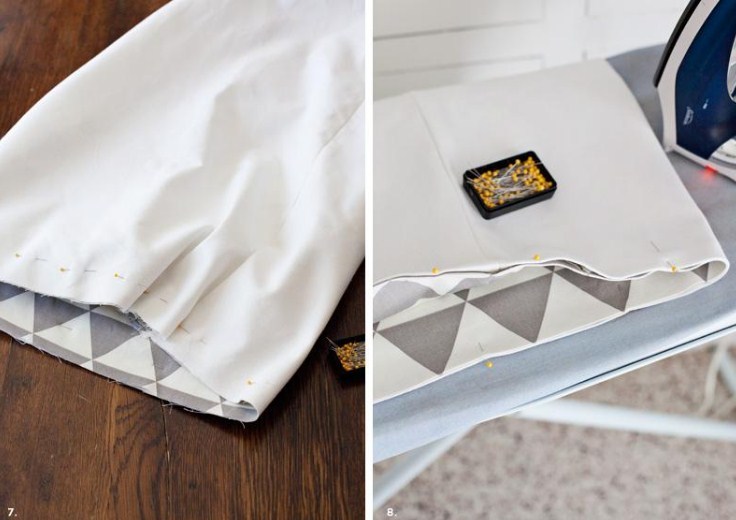
- Now fold the fabric in half in the face inward and toss the edges, riding them with pins. We try on whether the bottom coincides with the length of the fabric. If necessary, the width can be changed. Now we sew our canvas, after which we fix the bottom with pins. The edge is sewn (or stuck on a typewriter) along the length of the circle.

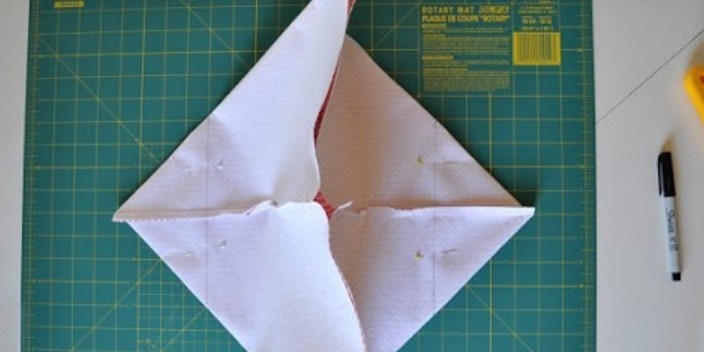
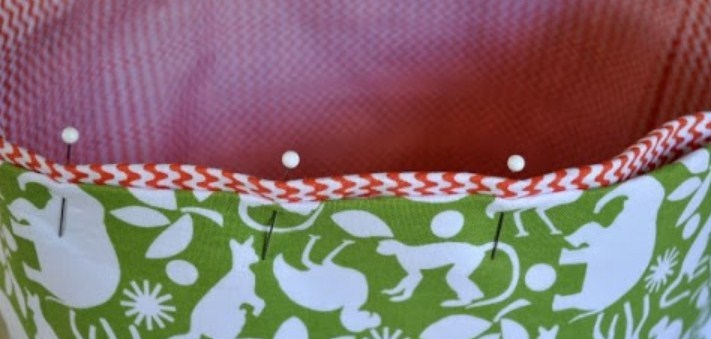
- If you need a stiffer basket, make another cover for it in the way described in the above way. We insert one into the other so that they are the wrong side to each other, and combine the edges, tugging and raining with pins.
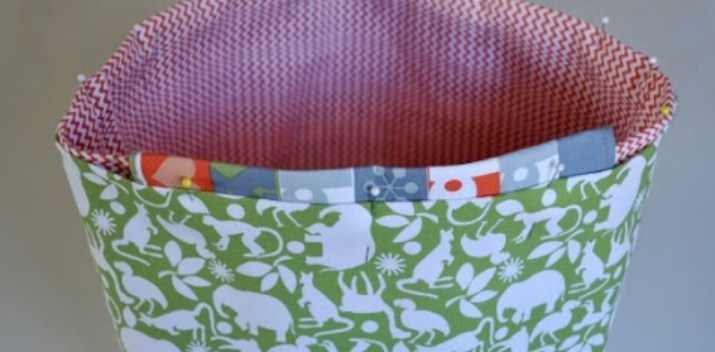
- In order to prevent the fabric from puffing, use the iron and bury bends. It remains to stitch our edge and a convenient beautiful basket in which we will put toys is ready.
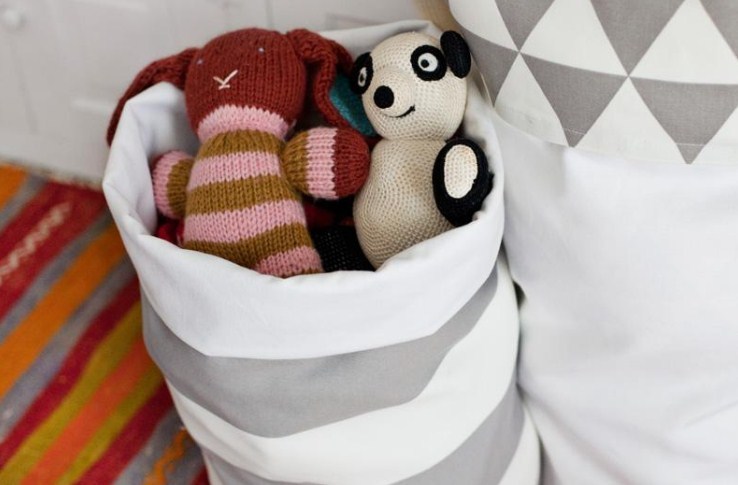
- Do not be alarmed if it seems shapeless to you - as soon as you put toys into it, it will be transformed.
Basket from newspaper tubes for toys
- Crafts from old newspapers are a very popular hobby, and a basket for toys with your own hands, made in this way, has a low weight and at the same time - stable dimensions and shape. Such simple things as paints, pencils, ruler and glue. You will also need boxes and sheets of cardboard, varnish and, of course, directly, the newspapers themselves.
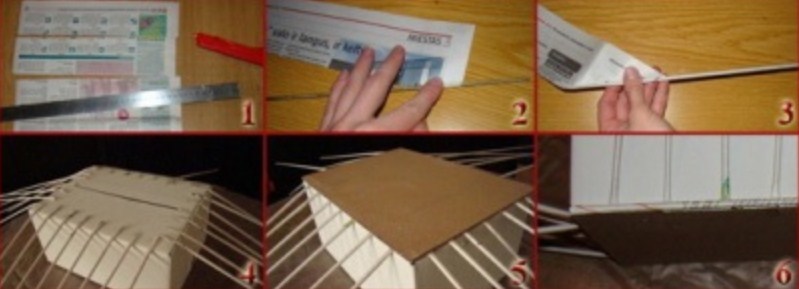
- Let's start by cutting newspapers into several stripes about 7 cm wide. We wrap each one around the skewer (knitting needles, pencil or any other similar object), compacting with the help of glue, gradually adding it as the newspaper is wrapped.
- The remaining edge of the strip, wound, first lubricate with glue, and then for several minutes let it remain on weight, drying out. How many such tubes will be needed - depends on how much you want to make the basket.
- Now take the prepared box and glue it to it edges In such a way, our tubes so that on each side they turn out an odd number, and let the corners of the box remain free, they will come in handy in order to beautifully bend the basket. We smear the bottom with glue and glue a sheet of cardboard to it, and then so that the glue grabs well, press the bottom with a load.
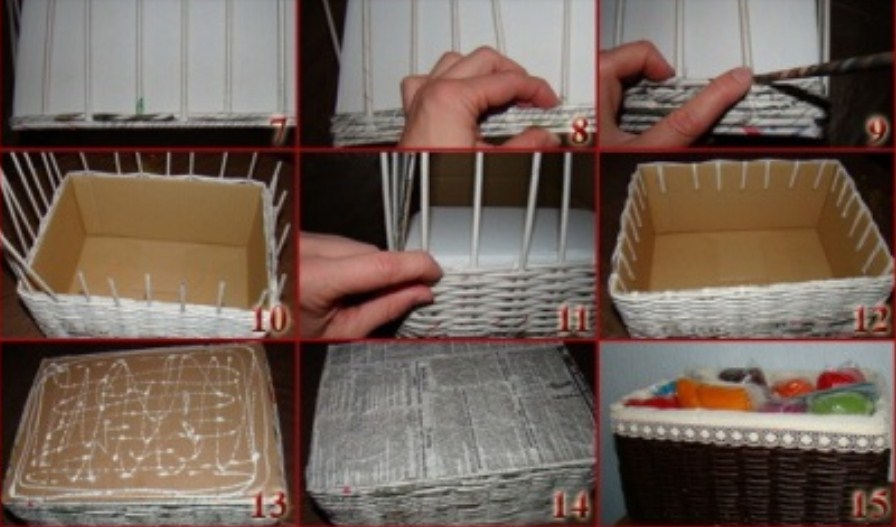
- And now - weaving the tubes themselves between the ribs of the box. You need to do this, carefully ensuring that the tubes neatly and evenly fit each other. Having reached in this way to the height that you would like to have, cut the extra edges of the box, and fix the pipe lying the last with glue. All tubes must be bent inside the future basket and also glued.
- It remains quite a bit-to smear the bottom with glue and lay a sheet of newspaper on it. Wait for it to wrinkle somewhat, and after the adhesive layer dries paint A basket using a stain or ordinary brown paint. The remaining bar is opening the product with varnish and decorating at your discretion.
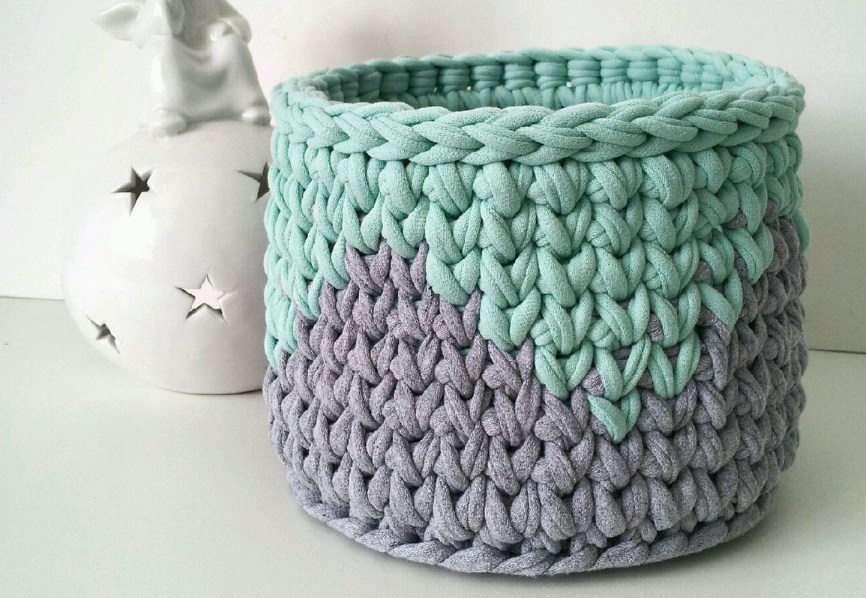
Knitwear toys
- For a needlewoman, astringent, making such a basket is a quick and simple matter. The main thing is to decide on the density of knitting and the thickness of the yarn. Now let's start knitting the bottom. To do this, we knit a crochet circle, starting with amigurumi rings. We make a loop of lifting and proceed to columns without crochet (only 7), closing the entire row, knitting a connecting loop. Then again the loop of the rise, but already airy.
- If you decide to make the basket not round, but a square shape, add the loop to each corner. And then add in the same places without missing a single row.
- To get rid of the “tail” of the thread that remains at the beginning, it must be laid on the edge of the bottom and tied, making a column without crochet - this will hide the “tail” in the middle of the columns. And if the edges still look out, just cut it or, using the hook, tighten it inside.
- We go to the second row, adding the loops: We knit two columns into one (and so we start each next row). We knit another crochet and add again, knitting three of the same columns into one. We finish the scheme with a crude column and so knit all the following rows - as much as you determine for the desired size. We finish the bottom, connecting the first loop of the row and the last using a connecting loop and knit another air loop to perform the upsurge row.
- There were walls that you can make, simply ceasing to add loops. Several rows - and the walls will already be formed before your eyes. Knit to the desired height. The basket can be provided with knitted handles, decorated with various fittings, not to mention what can be used in the process of knitting threads of different colors.
Video: How to knit a basket for toys from knitted yarn?
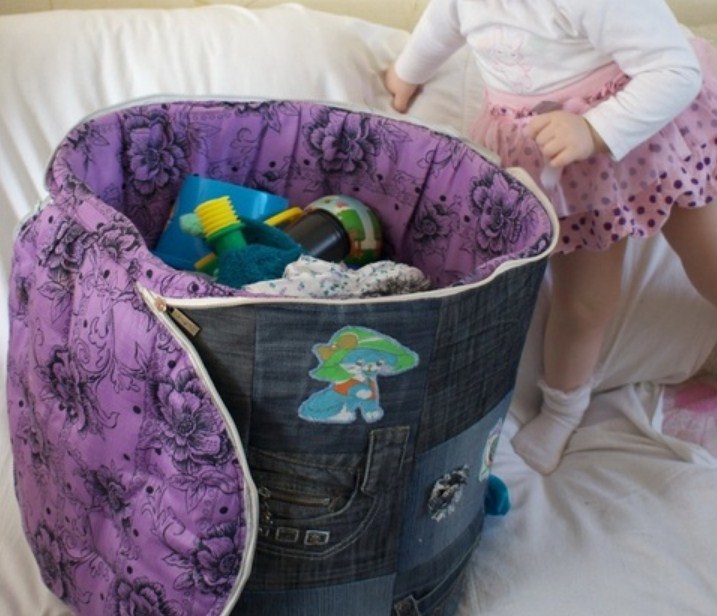
Jeans
- Each mommy always has a couple of old jeans that are idle in the closet. They can be put into business, making a funny and soft basket for toys with your own hands, in which the baby will be happy to put his toys.
- In addition to jeans, a piece of matter will be required to make a lining, cardboard or a piece of old linoleum for sealing, and you also need to stock up on synthetic winterizer and fastener. And, of course, scissors and other sewing accessories.
- We cut out 45 squares of 15 cm from trousers, taking into account the allowances for the seams. Do not forget that the most interesting is the upper part, where there are many rivets, pockets, lightning and other interesting elements. For the height of the wall you will need 3 squaresIn all, for them, we take 27 simple (without rivets and lightning) squares and decorate with embroidery, applications, figures carved from fabric, pictures - in a word, what you want. We fold them and sew them in the shape of a pipe - we get the walls.
- The next stage is the stitching of two squares: each consists of nine cooked. Then we cut out circles from them equal in a diameter of 45 cm, and get the lid and bottom. We cut out a piece from linoleum (it should be in height 43-44 cm, and in length-1.35 m with the addition of several centimeters per seams). Linoleum needs to be turned by the cylinder and sewed (this can be done with an awl). Then we cut out of linoleum A circle with a diameter of 43-44 cm And we fix on it on both sides of a synthetic winterizer. We also do with a fabric prepared for lining.
- Pipes from jeans and lining fabric must be put one in the other face to each other and insert a zipper between them. Sew everything, leaving about 20 cm so that you can sew the lid, and turn out. You need to sew a little lower than the lightning location so that the product does not turn out. We do the same with circles from jeans and lining, not forgetting only to insert a synthetic winter circle between them after they turned out.
- Those 20 cm that we left are sewn, the same - and on parts from the lining, thus sewing the lid. Then sew the circle from the lining to the walls and we will get the finished lining. Putting the basket with a lid down, insert a linoleum pipe between the denim and lining parts, previously sheathed with synthetic winterizer. The circle of denim should be sewn to the walls and bottom about half and inserted between the bottoms of jeans and fabric a circle carved from linoleum, which is also wrapped in synthetic winterizer. We sew the bottom using a secret seam. That's all, a basket of old jeans can delight the child.

We also offer you a phased photo instruction, thanks to which you can create a basket for toys yourself:


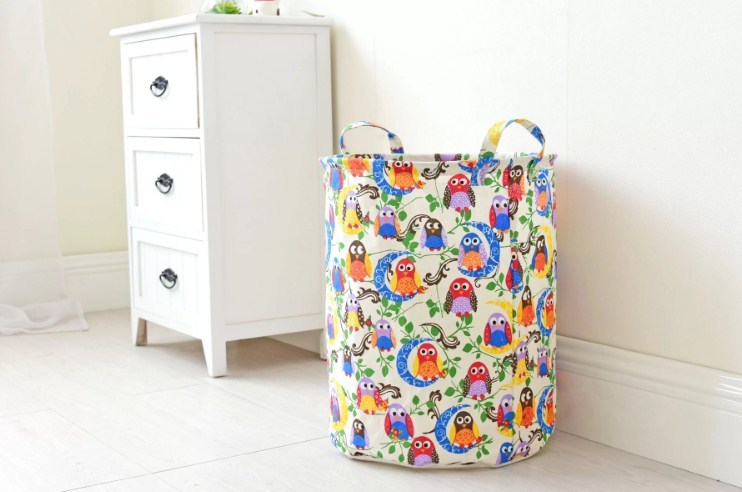
Children's basket with handles for toys
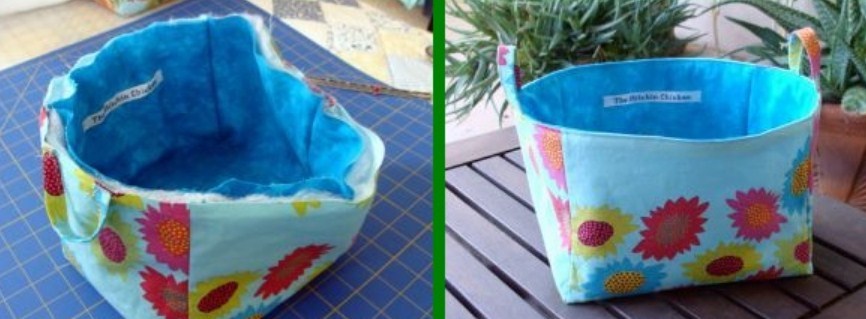
- A basket with handles for toys can be made of any material, but it is most convenient to make it also from fabric using a seal. Start with a pattern by cutting out three “crosses”: two tissue (one will act as a lining) and one non -woven or synthetic winterizer, which will become a seal. In addition, you will need to find rectangles from fabric, which will become pens.
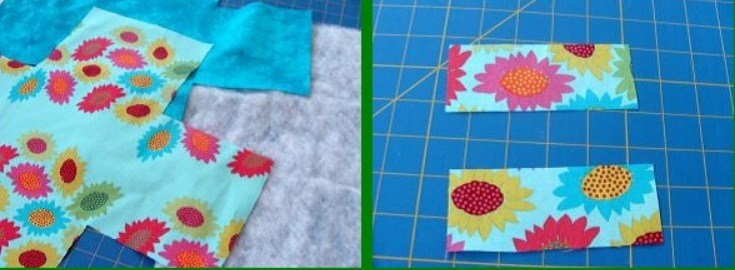
- Fold together the lining fabric and insulation and raise the stripes of the “cross” in such a way that the rectangle is obtained. Fasten with pins or outline with threads, then stitch on a typewriter. Also do with the main fabric, receiving the outer part of your basket. We carry out the pens using the principle called the "braid".
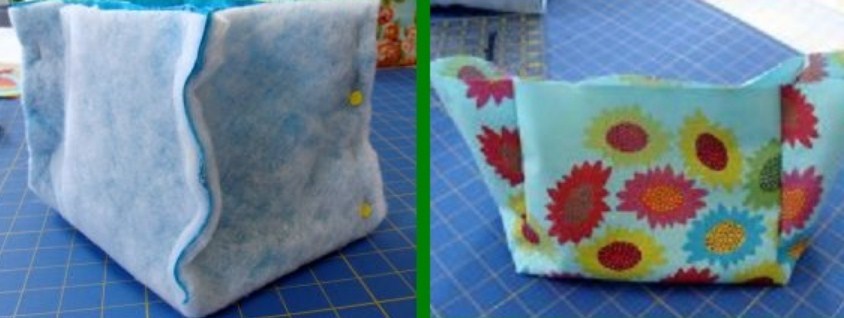
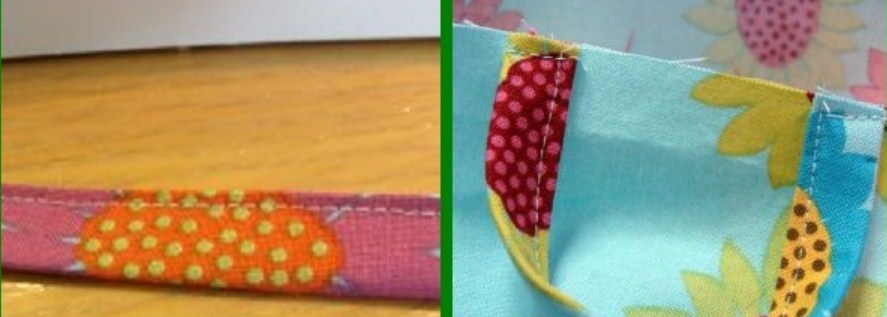
- Having calculated that they should be evenly and have to be just opposite one another, attach them to the part made of the main fabric. Turn out both parts and insert them one into the other, then sew on the upper edge, leaving a little to then turn out.
- Now turn out, straighten and smooth it with an iron. It remains to stitch again along the very edge - and that’s it!
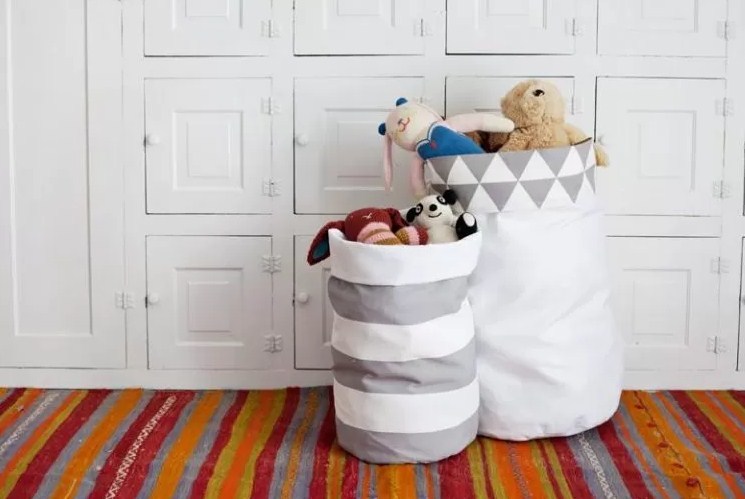
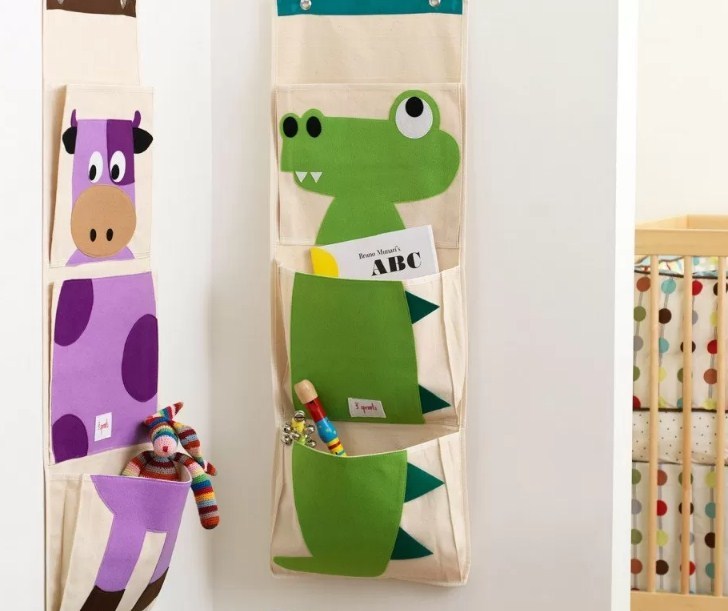
Basket for toys suspended
- If you decide that the basket for toys is a place on the wall, then stock up on a dense (the best option - linen) fabric. Given that the product is intended for the child, it is good if the fabric is funny.
- Sew the two rectangular flaps so that you have a square, and stitch the corner on two sides. To get a real hard bottom-put any dense material in it: a wrapping of linoleum, plywood, plexiglass. Insert the part that will be inside and bend the edges into the basket.
- Fixed with pins or sweep the extreme part, leaving a place to set up the loop on which the basket will hang, and stitch all the parts of your product. Well, you can put toys and hang the basket on the wall.
Buy basket to buy on Aliexpress
- Many of a variety of toys can be bought on a popular site Aliexpress. Their cost depends on the material from which the product is manufactured, sizes and other factors, and ranges from 160 to 700 rubles.
- Those who have already taken advantage of this opportunity leave positive reviews about the product that you can read on the site. They note a fairly low, acceptable for the family even with small incomes, cost, and at the same time the capacity and quite high quality of the purchased goods.
- For example, Lyubov Timofeeva emphasizes that you can choose an option that is suitable for your interior, and also speaks of comfort and beauty that bought to her house on AliExpress baskets for toys. Just Maria thanks the site for help in solving the problem of toys lying everywhere, since the basket was very roomy.
- Someone chooses a strict design for themselves-for such it is presented black and white gamut and strict geometric prints, otherwise loved lions or dinosaurs.
- Many buyers note that in ordinary stores they represent mainly plastic options, while AliExpress provides the opportunity to choose. Among the advantages of the site visitors are waterproof, a variety of colors and design, high -quality painting of the picture, which does not crack and does not wash off, the reliability of seams and gluing, and most importantly - its light weight and convenience for the child. And, of course, practicality, the opportunity to wash without fear in a typewriter.
We will also tell you how to do it yourself:
- Girlands for the New Year
- Suspended chair cocoon
- Theater dolls
- VAZ in the technique of Sgrafito
- Bizibord