We sew a fur vest: step -by -step guide
Content
Do you like natural fur? Want to have a chic fur vest in a single copy? In this article we will tell you how to sew a fur vest with step -by -step assembly.
DIY fur vest: Preparation for sewing
Do you have skills to sew and want to try yourself in working with fur? This year, fur vests remain at the peak of popularity, which we suggest sewing. Do you know how to sew a fur vest in one evening? The most difficult thing in this matter is to choose a beautiful, high -quality fur in advance.
So, it will take:
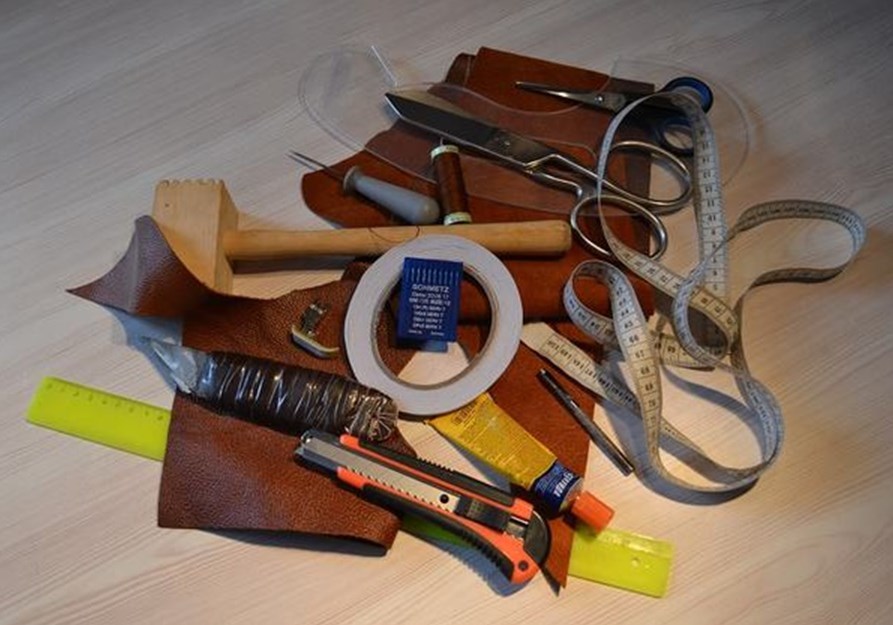
- Natural or artificial fur;
- Lining;
- Accessories, if one is present on the vest;
- Rubber glue or moment (transparent, elastic);
- Dublerin;
- Skornyny knife, or stationery, or T-shaped blade;
- If the skins are not prepared - a board for stretching;
- Pen or oily simple pencil;
- Centimeter;
- Wooden hammer;
- Comb with long teeth;
- Needle for sewing (if the fur is thin, you can flash on a conventional household machine);
- Paper for a pattern.
Having prepared the material and inventory, we proceed to the next step - we remove the measurements from the model. How to do it right in our article.
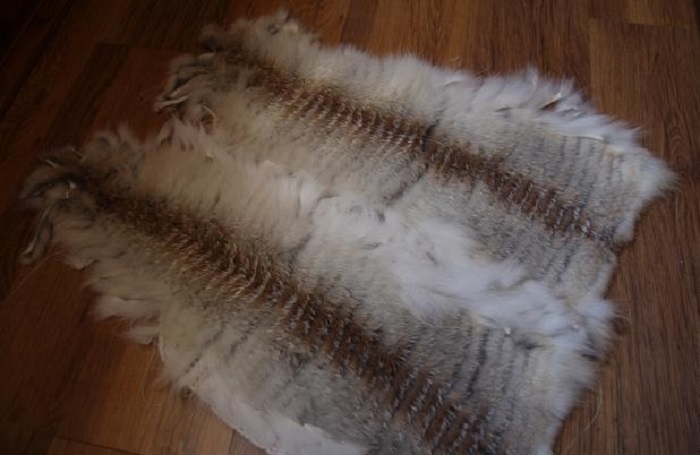
And before moving on to the construction of the pattern, we will check the fur. If it is efficient and ready to work, it is enough to lay out the skins on a flat surface and let them straighten in a few hours. Otherwise, we spray the back of the fur (pulp) with water until it becomes elastic. Lightly stretch and fix it on the board using buttons or stapler. We let it dry so that the material is perfectly soft and does not deform in the process of wearing.
How to sew a fur vest: pattern
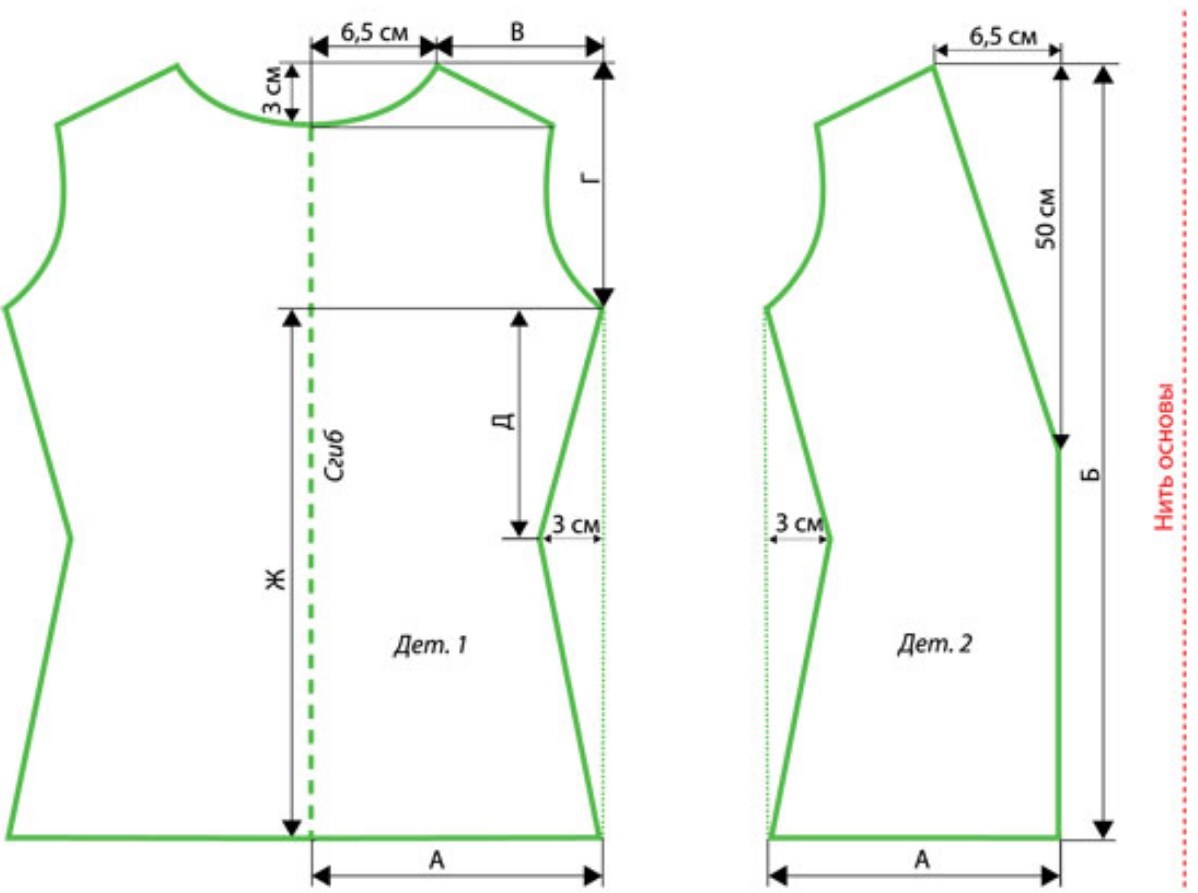
They wondered how to sew a fur vest? First you need to build a full size pattern. To do this, take tracing paper, Whatman or a piece of old wallpaper. The vest consists of three parts: the back and two shelves.
Everyone has different complexions, style and amount of material, so we give three options at once: a shortened, elongated fitted and elongated straight with a beveled shoulder.
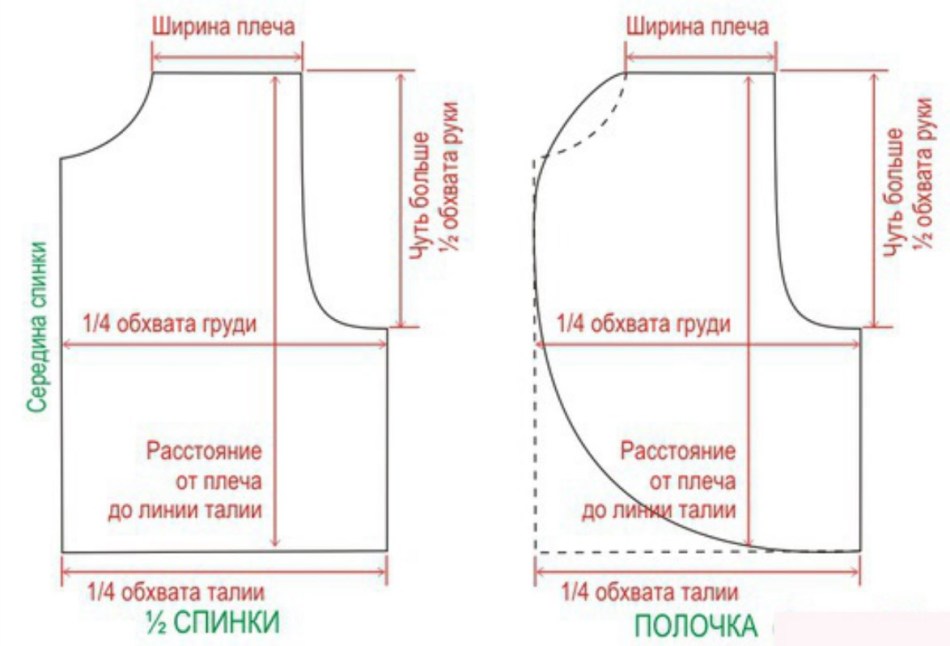
When building a pattern, do not forget to give allowances for free fit (up to 10 cm, depending on the desire), as well as give allowances for the seams (standard 1 cm per seam).
Recommendation: cut out first of all the lining. Sour it and try on it. Evaluate the length, width, as your shoulders sit. Everything suits me? Go to the cut of fur. This approach will not spoil the expensive fur.

When cutting, it is important to remember that the entire fur should be directed by the growth line from top to bottom. In the seams, the color palette, spots and other features should be combined. If the fur is of different lengths, make sure that the main volume is on the shoulders and hem, and the waist line is less fluffy so as not to add extra volumes.
How to sew a fur vest: assembly sequence
On the question of how to sew a fur vest, it is important to understand the thoroughness of the elaboration of each stage. The first stage is the selection of material: do not skimp on high -quality lining and accessories. Remember that the diamond is good in itself, but it looks with dignity only in a gold frame. The same can be said about the fur.
When cutting, there are several nuances without paying attention to these little things, you can get not the best result:
- Before making cutting linings, shake it with water and squeeze it. This is called moist-heat treatment (WTO). The fabric will “sit” and will not be modified in the future;
- When cutting the lining, see so that the direction of the pattern looks in one direction, both half and on the back. Yes, this is the inner part of the vest, but it is very clearly visible and adds a gloss;
- If there is a loop on the vest - do not forget to add a square of dense adhesive oak for cutting, since the loop is sewn to the lining and internal seam of the vest;
- Lay out fur skins so that splendor, pattern, etc. coincided. Then turn over and make cut;
- The pattern can be pinned to the lining with needles, but it is not recommended to do this to the fur. Put the scissors on the pattern or something weighing, but not deforming the sheet and circle with a pen or felt-tip pen;
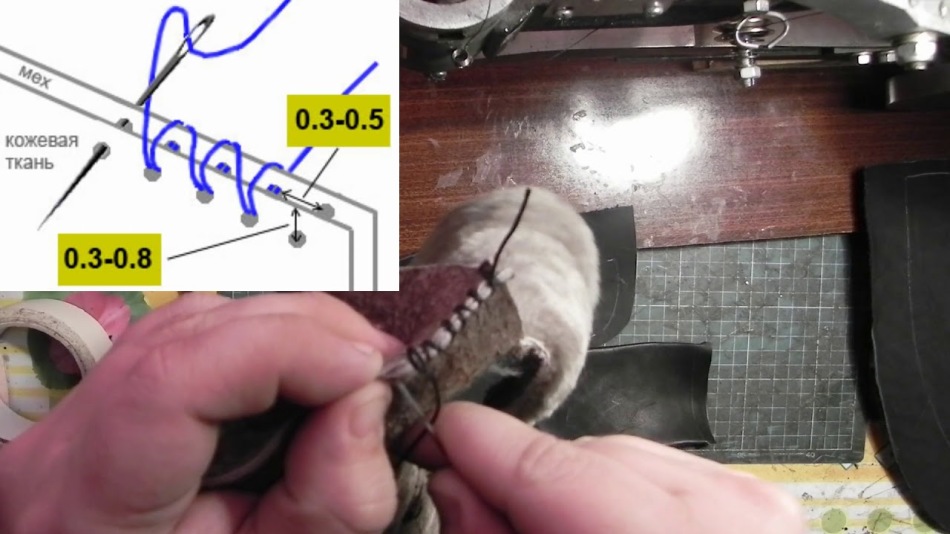
- The fur is cut by a scorching knife, a clerical knife or a T-shaped blade on weight, slightly stretching the cozer. The scissors will spoil the edge of the fur.
The process of assembling a fur vest:
- We sew the shoulder seams of the lining, process the cut and carry out the WTO;
- We sew the side seams of the lining, on the one hand leaving a hole in the middle of the seam by 15-20 cm. We process the edge and carry out the WTO. Also, in the process of this, we bend the seams of 1 cm around the perimeter of the lining of the lining. Do not forget about the armhole;
- We try on the lining, evaluate all the nuances and adjust, if required at this stage;
- We cut out the fur and sew with a fussy seam. This can be done both on a typewriter and hands. By the way, if the fur is thin - it can be sewn on an ordinary household machine. Make sure that the seam does not pull in the process of sewing;
- Cut a strip of 1.5 cm from an oak -bell;
- Close the seam with glue and brush along the seam (from the side of the Mazra) and glue the strips of the oak -up. This will strengthen the seams and will not allow the product to stretch in the process of socks;
- If the fittings are present, install it at this stage;
- If there is a loop, glue a piece of the oak -up to the wrong side of the lining 5*5 cm, and sew the loop to the edge so that its ends go 0.5 cm per line of the neck lining;
- Sew on the wrong side of the fur with the lining along the armhole. Make sure that the seam line is even and not tight. You can sew both with a fussing seam and ordinary, since these seams no longer carry a large load;
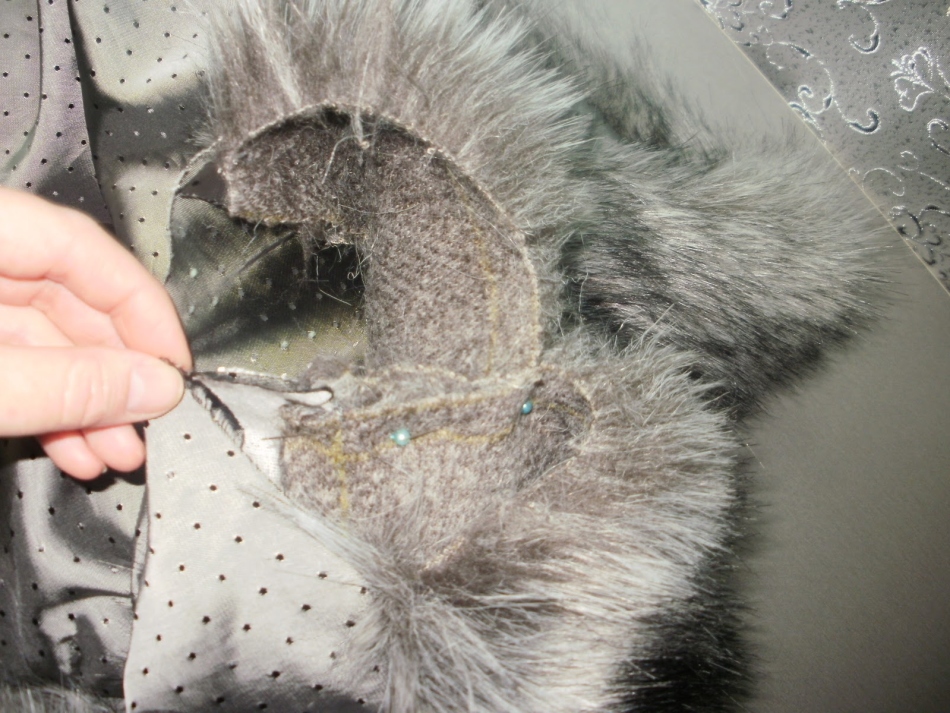
- Now turn the vest so that the pile of fur is in contact with the front side of the lining (turn inside out) and sew around the perimeter. Make sure that the seams of the shoulders, sides coincide between the lining and fur, and also sew without tension, so that later one of the parts does not pull;
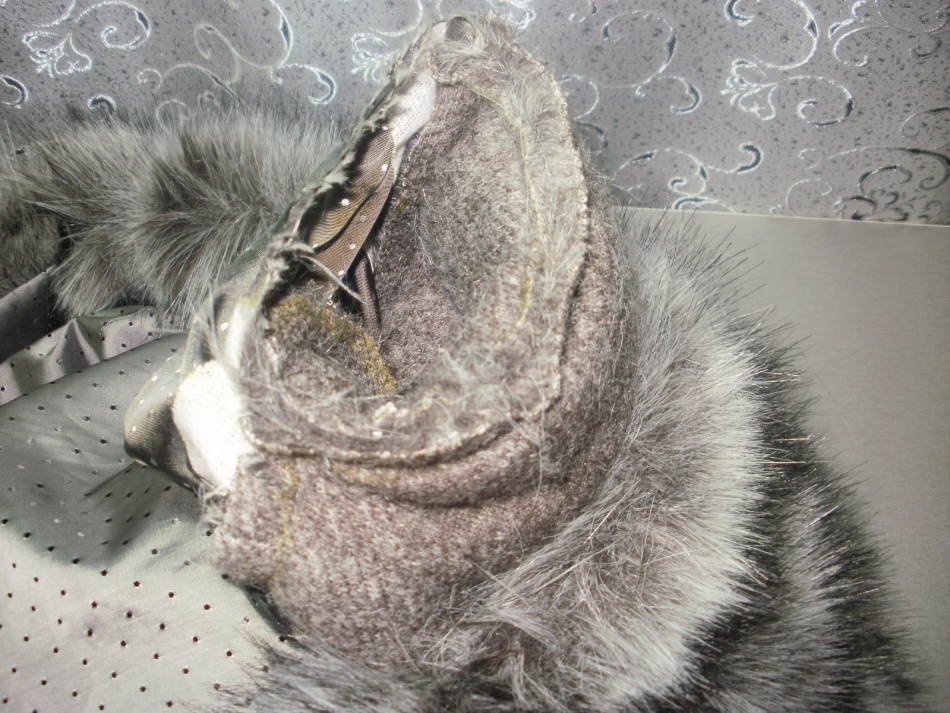
- Turn the product through the hole that you previously left in the side seam of the lining, and sew it with a secret seam;
- If necessary, walk at the seams of the steam in order to expand irregularities;
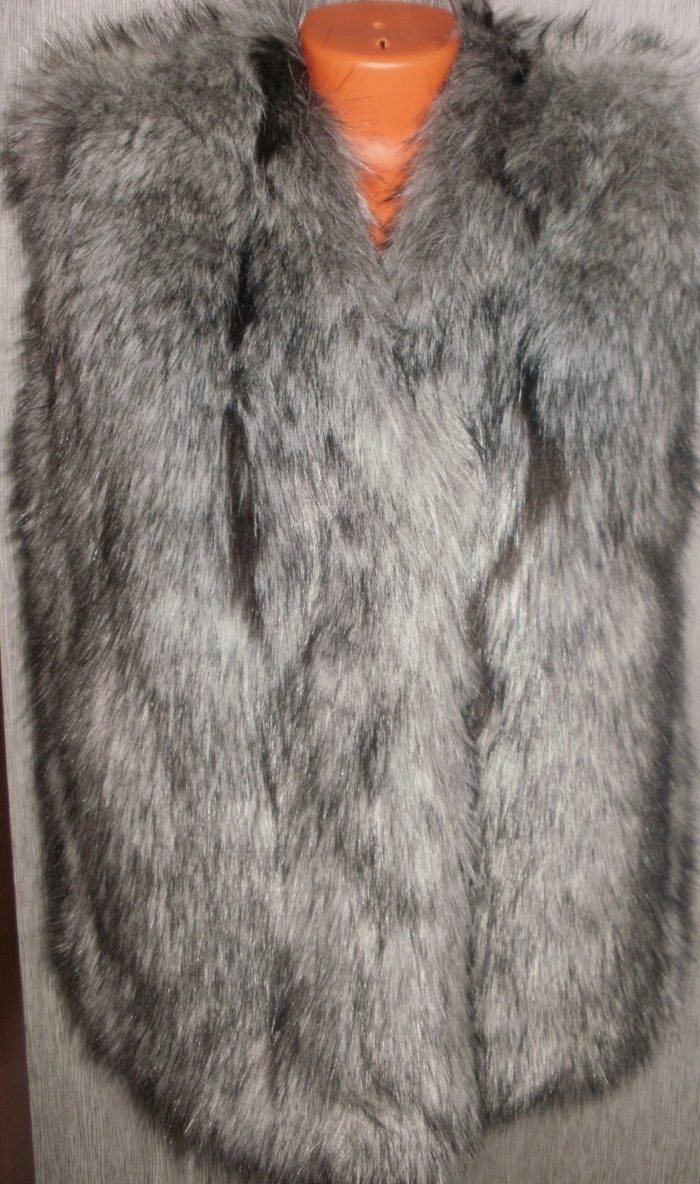
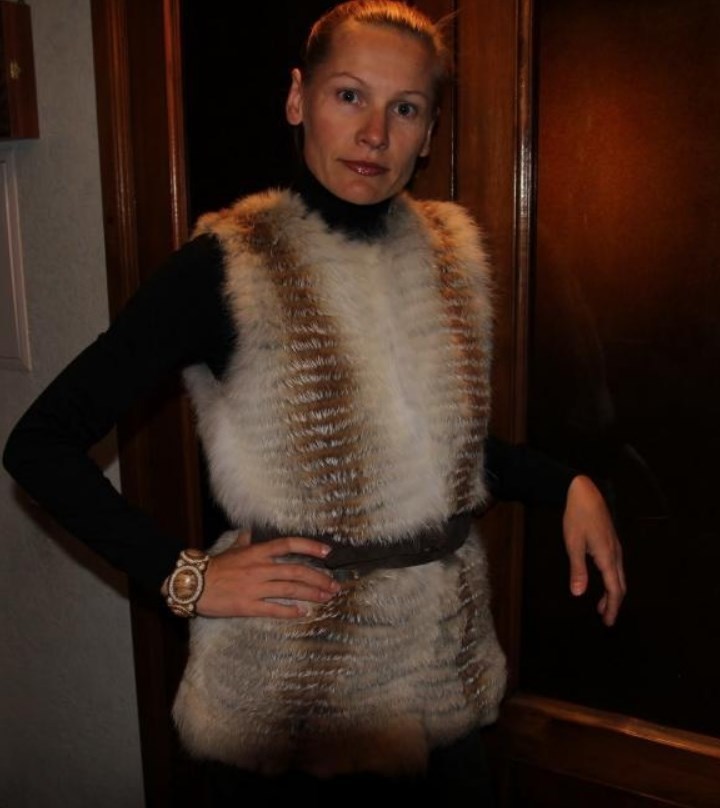
- Try on a fur vest - a luxurious product is ready!
How to sew a knitted fur vest: assembly sequence
If you have little fur, or many scraps that you want to put into business - we will tell you how to sew a fur vest of pieces on a knitted basis. It is also the perfect idea of \u200b\u200bsewing a fur vest from an old fur coat.
Assembly technique of fur vests from pieces on a knitted basis:
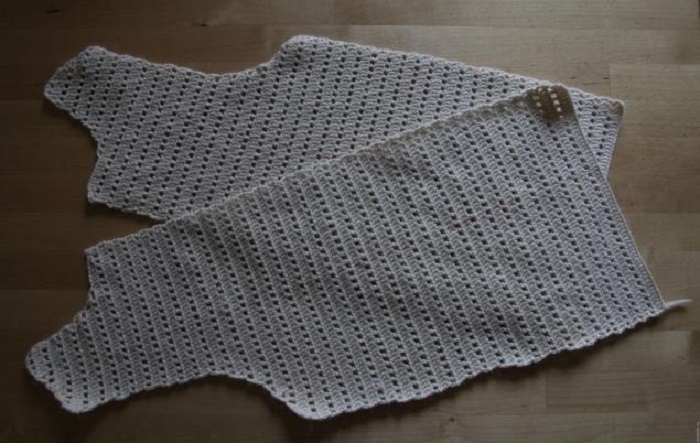
- Make an even (not fitted) pattern of an elongated vest;
- Tie a sample and calculate the number of loops;
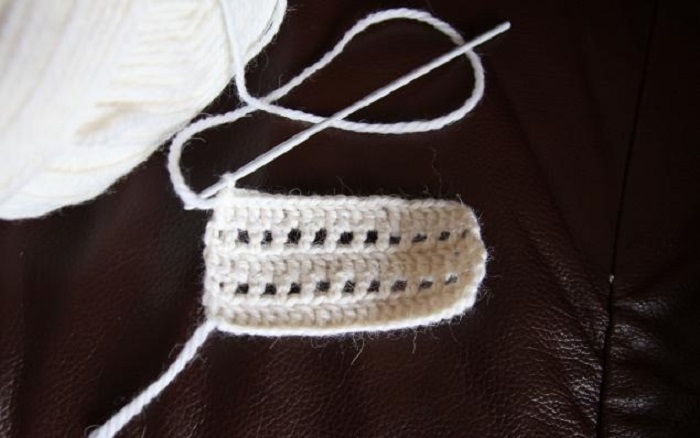
- By the pattern, connect the base on the principle of a number of crochet columns, a row - a crochet column, an air loop, a crochet column (the pattern is clearly visible in the photo). Such a pattern gives a dense basis, and facilitates the weight of the product;
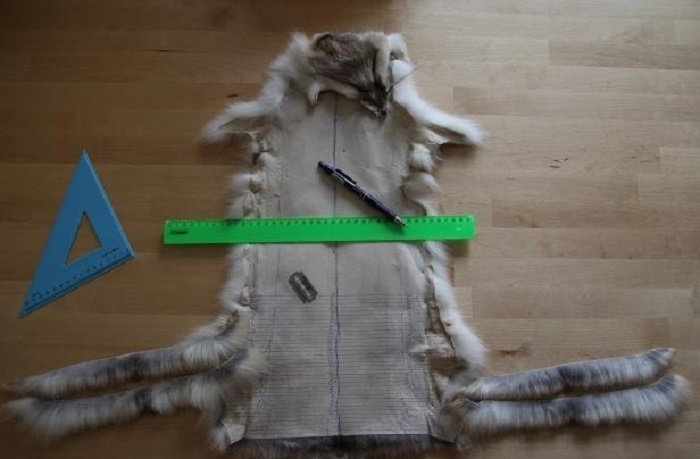
- If you have a whole skin-draw horizontal stripes 1-1.5 cm along the pulp (the thickness is the same for all stripes, but the width depends on the height of the crochet in a knitted product).
- Small the strips so as not to get confused in the sewing process. If you sew from pieces, also cut in thin lanes and lay out so that the fur looks organic. Numbered for convenience;
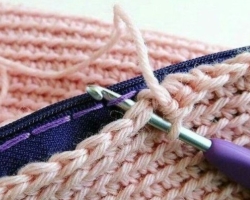
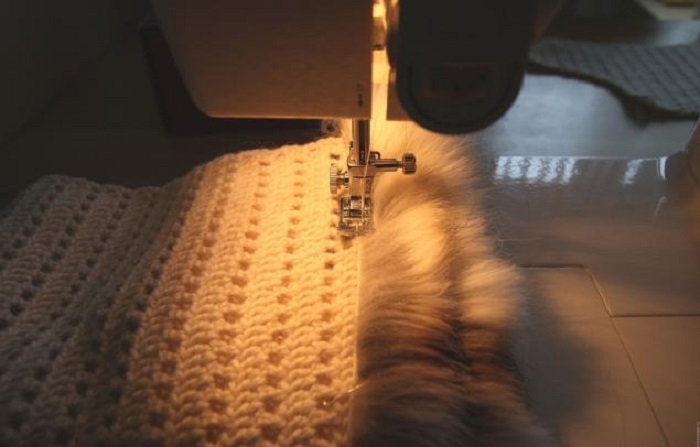
- Sew stripes to a knitted base (with hands or machine) with a skill seam along the edge of the crochet columns. Choose your upper or lower edge yourself, but adhere to in the process of all sewing so that there is a uniform distance between the stripes. We recommend sewing from below (from the hem) to the shoulder seam, since the fur growth line is directed to the bottom and this will facilitate the work;
- Comb the fur, cut the tail tails, if any at the edges;
- Sew the side and shoulder seams;
- If there is accessories - attach at this stage;
- Try the finished vest perfectly suitable for spring and autumn!
How to sew a fur vest: reviews
How to sew a fur vest - reviews:
- Arina: This year, the trend in the trend with a knitted lining. But did you see their prices in the salons? My grandfather is a hunter, and he handed me the skins of the fox. Several evenings - and the foundation was connected. But I had to sweat with the skins while I picked up the pattern. 30 percent did not fit. Therefore, the advice - or take more, the rest will go to other products, or pretend to be purchased immediately.
- Daria: Fur vests are not only fashionable, but also very warm. She sewed her daughter in the evening from her old short fur coat. Now we wear on the spring jacket, it turns out stylishly and warmly. In the process of sewing, I recommend carefully paying attention to the tension of the seams. I took it negligently - I had to change one shelf.
Video: how to sew a vest from pieces of fur. Combine fur, suede, fabric
Articles about working with fur: