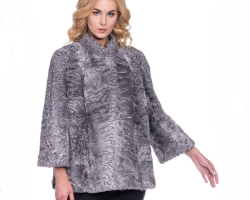
In this article, we will consider useful tips and life hacks for working with fur.
Content
- 1 life hack when working with fur: cut the stocking quickly and evenly
- 2 Council when working with fur: the fur mode is right!
- 3 life hack when working with fur: we cut the muzzle correctly
- 4 Life hack when working with fur: we are engaged in paws!
- 5 advice: stretch the skins to the desired size
- 6 life hack: we learn to count and translate the fur into decimeters
- 7 Tip: A tail and hind legs are also fur!
- 8 life hack when working with fur: Correct deformed places
- 9 Life hack when working with fur: a secret hole or hidden lightning!
- 10 life hack when working with fur: how to strengthen a loop?
- 11 Council when working with fur: an accordion made of fabric or to have a pure collar!
- 12 life hack when working with fur: how to sew a button on the fur?
- 13 Council when working with fur: insert and restore a broken hook correctly
- 14 life hack when working with fur: combine materials correctly
- 15 life hack when working with fur: we twist the fur easily!
- 16 Life hack when working with fur: add a highlight to the product!
- 17 Council when working with fur: create a harmonious and combined image
- 18 Life hack when working with fur as a bonus: create a beautiful shawl from scraps of fur!
- Video: Useful tips and life hacks of working with fur
- Video: 18 Lifhakov on working with fur
Working with fur is quite complex and peculiar. Not every seamstress, especially beginner, quickly and easily cope with the cut and sewing of the mezra. In addition, the difficulty is also not to damage the pile itself, to maintain its correct direction and ensure a smooth transition of shades. But there are several useful life hacks or tips from experienced masters, how to make work with fur not only fast, but also easy!
1 life hack when working with fur: cut the stocking quickly and evenly
Work with fur begins with the processing of the skin itself. If you have a whole unstable skin, then it is important to cut it correctly, strictly in the center. To do this, take a wooden block or a tall ruler, or even a board. The example shows a life hack with an ordinary wooden kitchen rug, folded in a tube.
- We lay out the stocking of the skin on the back
- We insert the block so as not to damage the lower coil
- With a sharp knife, we make a small incision at the base of the tummy
- And then, without tearing his hands, we lead to the very top. If necessary, the block, if it is short, can be moved

2 Council when working with fur: the fur mode is right!
If you already have a finished skin, but it must be cut into pieces or cut out figures from it, then remember - you can cut the fur Only from the wrong part, along the Mezr. At the same time, you need to do this only a canopy! In order not to damage the pile. And always draw a line with a pencil. After all, working with fur requires accuracy and clarity!
The second rule - Consider the direction of the pile, you need to follow it. The figure below shows the direction of the direction of your movements. Also additional advice: if you do not have a special knife, then you can arm yourself with an ordinary blade. And in order not to cut your hands, secure a strip of tape or island from the desired side.

3 life hack when working with fur: we cut the muzzle correctly
Work with fur is based on savings! And the point is not that fur is more expensive than fabric. It’s just that any pieces can be used to make accessories, scenery or, in case of critical necessity, they can even be added when sewing the product in an inconspicuous place. And the first thing that will help maintain the length of the skin is the muzzle.
- It is worth cutting the eyes diagonally
- With further stretching the fur, the skin will stretch to a length and width in the head
- And if you simply cut the muzzle through the eyes, you could save only a small piece of fur

4 Life hack when working with fur: we are engaged in paws!
The easiest option is to cut them according to the “fish” scheme. But, firstly, so you will get small pieces at the exit, which will not be useful in the future. And, secondly, the fur at the junction can lie down so that the seam will be noticeable from the front side. And then, with further work with fur, it will need to be hidden or even cut.

We suggest using the following advice - Cut the legs in the center of their axis. After stretching the skin, the base itself will become even, and the paws, although they will cut off when sewing, but already in a larger volume due to their stretching. In addition, when you cut the smooth edge (in any case, this must be done), the piece itself will be longer. We show clearly how it will look.

But for comparison - how many fur we have for crafts in the first and in the second case.

5 advice: stretch the skins to the desired size
To make the product beautiful, you need to take about the same pieces. An error of 0.5-1 cm is allowed. The first segment often goes 2-3 cm wider so that it can be beautifully wrapped and sewn to the lining. Therefore, it is so important when working with fur not only to stretch the skins, but to make them the same size or to reach the desired dimensions.

6 life hack: we learn to count and translate the fur into decimeters
Dear fur is measured in decimeters! By the way, parallel advice - this expresses the quality of the skin itself. But for yourself, you also need to be able to consider the dimensions of the skin correctly and translate them from centimeters. Especially if working with fur is not just a hobby for you!
- Measure the length from the ears to the beginning of the tail
- Celebrate the middle of this length
- And at this level we measure the width of the product
- Multiply the length by the width. We have 52*33 \u003d 1716 cm
- We transfer to decimeters, round to a whole value and get 17.2 dm

7 Tip: A tail and hind legs are also fur!
And this fur, although it is not used when sewing the product, can be involved for crafts or, for example, in the composition for the edge or collar. After all, working with fur is a field for fantasy and creativity. Therefore, they are worth it at the stage of stretching as much as possible!

8 life hack when working with fur: Correct deformed places
The first problem that can often be encountered when working with fur is cuts or cracks on the product itself. Moreover, this does not always happen from the time and wear of the fur. This can happen to a new product by chance or inaccurate.
- We disappear the bottom of the lining or lateral seam (depending on the location of the deformed area). The main thing is that there is simply access to it
- Turn the fur with a needle on the front side
- And pass by a fussy seam (2 times per one hole) along the entire length of the cut
- At the beginning and at the end, do not forget to fix the thread
- Then walk around, pressing and smoothing the seam. You can also stretch it a little. This will create the illusion that he is not!

Important: if the product is old, then for the guarantee, swim the seam with a adhesive plasterer. And ideally, the glue of the “moment” and the spanbond segment (or satin tape) will help to strengthen.

9 Life hack when working with fur: a secret hole or hidden lightning!
If you or your client has a fur coat in good condition, but already old enough, then inside the Mazdra can often crack or break. In order not to tear off the lining every time, insert a secret lightning into the side seam! This will significantly accelerate and simplify the restoration task when working with fur.

10 life hack when working with fur: how to strengthen a loop?
Often an ordinary loop does not withstand the weight of a fur coat or vest for a long time. We offer a beautiful and strong analogue of an ordinary ribbon! And then working with fur will become much easier. After all, it will not be necessary to correct the situation with a torn loop every time.
- We take a slanting box or just a piece of fabric about 30 by 2 cm
- Sew the front side inside. Cut the corners at the edges slightly so that it is exactly
- Without cutting off the thread, with a blunt end we insert the needle into the hole of the tape and turn it out. As a result, we get a thin lace
- We fix the needle into a blanket or other dense fabric through the edge of the lace
- And we begin to twist the cord. We lay down in half, wind and get a beautiful dense lace!

11 Council when working with fur: an accordion made of fabric or to have a pure collar!
When sewing a new, or restoration of an old fur product, you always need to insert a small piece of fabric on a collar near the loop. This is a small secret of working with fur from experienced craftswomen. This is necessary so that in the process of wearing the product does not get dirty and lasts longer.
- We need a segment of fabric to the color color of about 33 by 6 cm in size
- Fold it in half
- And make folds, starting from the middle, in one and the other side of about 0.5 cm
- We fix each fold with pins
- Cut the corners
- We pass through them with an iron
- We make a line, remove the pins
- And sew up with a loop to the collar

12 life hack when working with fur: how to sew a button on the fur?
It is not as simple as sewing a button to the fabric. Indeed, in the process you can get confused about the pile, and the work itself will turn out to be inaccurate. But working with fur also has its own secrets!
- Insert a small button under the button a piece of paper, Better twice as folded
- And keep in mind that everything should also be beautiful under the collar. Therefore, the knot should be from above. Behind the fur and under the button, it will still not be visible
- With neat stitches, sew the button according to the usual scheme. But so that the button does not “drown” in the pile, insert a toothpick or match under her
- At the end of the work, it is removed and the “leg” is made for the button

13 Council when working with fur: insert and restore a broken hook correctly
- If you need to replace a faulty already existing hook, then you need to tear off the lining and the secret tape from the fur
- Take out the old hook and insert a new one in its place
- If you decide to insert a hook into a new product or just add it to the old fur coat, then you need to make small cuts at the place of puncture of the hook
- Working with fur requires accuracy, so try not to cut holes hard
- After that, sew the tape and lining with manual stitches

14 life hack when working with fur: combine materials correctly
Working with fur requires attentiveness. Therefore, it is important to consider the direction of fur at the junction, especially when combining different materials. We explain on our example. The pile of fur closes the upper line, but the lower line, if the fur is allowed from above, will not look very beautiful. After all, the edges will be striking, which often differs in color from the main pile.
Therefore, in the lower part of the product, it is worthwhile to put sucks or skin upstairs. And in order not to bend the fabric, you can do with a decorative torn.

15 life hack when working with fur: we twist the fur easily!
Usually, during work with fur, such fur curls are used to decorate. But not all craftswomen know how to just make them.
- Take the desired segment of the fur or the tail of the required length
- If it is wide, then cut it in half, so that the strips are approximately 0.5-0.6 mm
- Sew the tips and fix both ends with clothespins to a conventional ruler
- Smear well with glue for the skin without affecting the pile itself
- And manually roll the strip into a dense spiral. At the same time, do not remove the upper clamp
- Fix the lower tip and leave for drying for 12-24 hours
- If the ends of the spirals are straight, then they can be cut off or cooked with glue and clamped for a while

16 Life hack when working with fur: add a highlight to the product!
Creativity is always welcome when working with fur. And this applies not only to sewing new products, but also to the restoration of old ones. You can not only refresh the image, but also hide some flaws.
- We cut a drop on the wrong side (you can take another figure)
- We sew on the front edge a dense but thin lace to hide the cut line from the front side
- We sew any openwork fabric from behind
- And to maintain heat, we close everything with contrasting suede or skin

17 Council when working with fur: create a harmonious and combined image
If your fur coat is not combined, for example, with a bag or other accessory, then you can always use fur scraps! By the way, they often help out when working with fur. Therefore, it is so important to cut economically and not throw scraps immediately into the garbage bucket.
- Sew, for example, to the handbag of fur pompons from a similar fur. How to make them correctly, you will learn from our article "How to make a fur pompom?"
- You can add fur decorations to the hat.
- And of course, you can use applications not only for accessories of the upper wardrobe, but also to decorate sweaters or trousers. They can be sewn manually or glued.

18 Life hack when working with fur as a bonus: create a beautiful shawl from scraps of fur!
In our example, the shawl will be 30 by 160 cm in size. You can independently adjust the dimensions of the product. We have 6 cells in width and 26 in length. Only 156. So we need:
- 156 fur rectangles 3 by 4 cm
- 156 leather (or other dense) laces of 8 cm
- 156 leather triangle, size 7 by 2 cm

- Sew the laces or glue them around the edges. We get small circles.
- At the junction of the junction, we apply the fur and glue it with the coin inward. Keep in mind that the direction of the fur should be in one direction, and the pile itself must close the joint. The fur is on vertical rows.
- But in horizontal ones - we connect the circles from the laces with leather triangles, wrapping them into a tube.
- For decoration, you can make small tails of fur according to the same algorithm.
Tip: It is better to take a quick -drying glue!


Video: Useful tips and life hacks of working with fur
Video: 18 Lifhakov on working with fur
You will also be interested to read our articles:


