If you do not know how to insert and fix the thread, then read the article. It contains detailed instructions and methods.
Content
- How to insert a thread into a needle: Instructions
- How to insert a double thread into a needle?
- How to make a knot at the end of the thread: instructions, video
- Video: How to insert a thread into a needle and tie a knot? Embroidery in one thread.
- How to insert the upper thread into the sewing machine, into the shuttle: instructions, video
- Video: How to tuck threads into a sewing machine?
- How to insert a thread into a double needle: instructions, video
- Video: How to sew a double needle? Secrets of settings
- How to insert a thread into a carpet needle?
- How to insert and fix the thread when embroidered without a node: how is the thread at the beginning of embroidery with a cross, at the end of the work?
- Video: Cross embroidery. Fixing the thread at the beginning and at the end of the work.
- How to fix the thread when embroidery with beads: Methods
- How to fix a thread on a plastic canvas: Methods
- How to fix the thread of backstich?
- How to fix an elastomeric thread: instruction, video
- Video: How to tie a knot in a bracelet correctly?
- How to fix the thread crochet after knitting?
- Video: finish fixing the thread when sewing with hands. How to finish sewing, so that the seam does not bloom?
Any creation of a sewing project requires work for special equipment. Naturally, each craftswoman should know the rules and technique of the execution of a particular procedure. One of these elements is the process of fixing the thread manually and on the sewing machine. Read more about it in this article. Read further.
How to insert a thread into a needle: Instructions

Read the article on our website about embroidery on clothes with beads. You will not only learn how to embroider, but also find many interesting ideas.
Any moment in sewing begins with a needle with a thread. For simplicity, it is better to use a large sharp object with the corresponding size of the ear. In front of the process, it is worth cutting the tip of the yarn (to reduce fluffy fibers). So, how to insert a thread into a needle?
The instruction is simple:
- Prepare the tools and cut the thread item for work.
- Take the needle in one hand, and the thread in the other.
- Cut the tip of the latter, moisten and stretch through the ear.
- Make the same length of the two remains.
- Fasten a dense knot.
Important: A strong knot is required at the end.

How to make a good knot is described below in the text. It is worth noting that the needle should be the thickness that the yarn used itself. If the ear is too small and narrow, then you should use a special threaded man.

How to insert a double thread into a needle?

This technique is practically no different from the classical process. Difference: threads need to be taken 2 times more than in a similar procedure. How to insert a double thread into a needle?
Technique:

- Turn the thread in 2 times And combine the ends with each other.
- Conduct a classic nourishment.
- Pull the tips.
- Not reaching 10 cm To the edge, stick the tip of the object into the resulting opposite loop. Close.
- Fasten the last part of the fiber with a regular node.
The ear of the needle should be wide for convenience.
How to make a knot at the end of the thread: instructions, video

The knot plays an important role in sewing. It allows you to fix the yarn and stabilize the tension during the entire needlework process. You will need fabric material and hand. How to make a bundle at the end of the thread?

Here is the instruction - the algorithm:
- On the middle finger, wrap the tip, and pressing its rest with the same arm.
- It should turn out a large loop. With a double thread will also be.
- Twist the fiber 2-3 times for the formation of curls.

- Close a tight twisted loop between your fingers.
- Pull the working end with force.
Everything is simple. By the way, for simplicity, you can use the physical law of wetting - moisturize either the material or the hand itself. However, there is an alternative, if you need aesthetically beautiful knot, you need to repeat the first 2 points The described methodology and draw a needle to the formed loop. Watch a video in which the craftswoman tells in detail how to insert a thread into a needle and make a knot.
Video: How to insert a thread into a needle and tie a knot? Embroidery in one thread.
How to insert the upper thread into the sewing machine, into the shuttle: instructions, video

The basis of the work of the shv. machine: connection of two threads (upper and lower) and stitching products. Moreover, the first from the coil (insert into a special hole of a sharp object), and the second - comes out of the bangs (it is necessary to display from above - out). Not only the quality of the line and the entire project, but also the activities of the equipment as a whole, depends on how preparatory work is carried out.
In an automatic machine, the process is quite simple: it is enough to follow the index arrows and the filamentor. How to insert the upper thread into the sewing machine, into the shuttle?
Here is an instruction for a hand -free car (upper thread):
- Put the coil on the rod.
- Check the location of the attractor and needle. Correction: Application of a flying ring.
- Pull the fiber to the left to the front board through its upper neckline.
- Get it in the middle of the regulatory handle for tension and raise the remains to the top.
- Enter a threaded spring in a loop.
- Direct the fiber to the top and strike at the back in the ear.
- Spend through special hooks.
- Insert into the hole of this sharp object.
Next, the lower refueling is performed:
- It is wound on a coil - a spool. The design of the shuttle is different, which means the algorithm is individual.
- For horizontal type: refueling at the instructions of the arrows.
- For a vertical type: a specially designed cap is used for fixing.
So, the algorithm:
- Insert a bobbin with a thread into a special cap.
- Pull the fiber through the hole with the oblique label part.
- Pour the cap to the stiletor of the shuttle part. A click must sound.
- If everything is done correctly, then the end of the lower will hang calmly. Next, you need to stretch the lower thread up.
- It is worthwhile to just hold the other with one hand and rotate the flying wheel of the other.
That's it, the car is ready to work. Watch the video in which the craftswoman refules her sewing equipment with threads.
Video: How to tuck threads into a sewing machine?
How to insert a thread into a double needle: instructions, video

Using a double needle, you can scribble parallel seams with different threads and make other stitches on a sewing machine. Be sure to make sure that you work in the same thickness and composition of the fibers before work. And do not forget about the tension. How to insert a thread into a double needle?
Here is the instruction - the algorithm of actions:
- Insert the necessary sharp object in your place.
- With the help of hands, season the upper thread into the hole of the left needle. And from the front side.
- Install the rod for 2nd coil For winding bobbin. Put the coil and season the upper thread.
- Near the upper thread for the right needle in the same way.
- Install the foot "Zigzag".
- Turn on the car.
- Slowly turn the flywheel on yourself (counterclockwise) and make sure that the needle does not apply to the crush foot.
- Select the needle by clicking on the corresponding button.
That's it, you can proceed to sewing. Watch the video below. In it, the craftswoman teaches not only to tilting the thread into a double needle, but also to sew with it.
Video: How to sew a double needle? Secrets of settings
How to insert a thread into a carpet needle?

The carpet with the carpet needle is used for original embroidery. This is a special tool that allows you to create beautiful patterns and texture on fabric. How to insert a thread into a carpet needle?
In this case, refueling technology will not differ. The only point: the direction of the fiber is from top to bottom. For convenience, you can use a thin wire folded in half. An alternative to the improvised product is a fishing line. But then you will have to spend more time.
How to insert and fix the thread when embroidered without a node: how is the thread at the beginning of embroidery with a cross, at the end of the work?

The insertion of the thread is similar to classical technology. But there are a lot of consolidation options. Let's look at them. How to insert and fix the thread when embroidered without a node? How is the thread at the beginning of embroidery with a cross? Most Popular:
- Variations of the loop method. Everything is quite simple, you need to get a hole between the seam and the base, stretch the working fiber into it and tighten it. Alternative - the thread is delayed on the square of the base under 4 fibers.
- Micro-steering wheel at the beginning. Pierce the canvas with the equipment at a small distance from the future consolidation. Then, from the wrong side, bring it to the other side between the threads of the side sides of the canvas. Next, stretch the thread through the center, remove the needle from the inside from the opposite side. The last time enter a sharp object into the center of the "square", in the same injection. Alternative: micro stitches are made in different squares of the base.
- Under the stitches at the beginning, middle. The first is used when working in a row. Enter the sharp object into the place of one corner and take it to the edge of the final cross. Cut the left yarn closer to the base. But the second option is needed directly during operation. And you can do it from any side. You just need to skip under a few stitches and withdraw from the other side.
For fixing the thread at the end of the work, there is 2 methods: One is similar to the 3rd point of the previous algorithm, and the second is a micro-story. In the latter, it is important to find the center of the square under the stitches. In general, the technology is the same.
What is the best method, each craftswoman will solve for himself, based on goals and work as a whole.
Video: Cross embroidery. Fixing the thread at the beginning and at the end of the work.
How to fix the thread when embroidery with beads: Methods

A neat picture with beads requires a special approach to fixing the thread. Thanks to the correct implementation technique, the “drawing” will turn out to be beautiful, without sticking threads. How to fix the thread when embroidery with beads?
Here are some ways:
- Perform a stitch that is pierced and stitched with a needle.
- Stretch the thread through the fabric, then, pressing and fixing the tip, perform 2-3 stitches Cross.
- Hide the thread from the inside in this way: after the end of embroidery, cut off, leaving the tail 6-7 cm, which is then displayed on the wrong side of the work, then stretch under the stitches made earlier.
- Pierce the canvas with a needle in two places to form a loop, pass a sharp object with a thread into it, then tighten it.
- Remove the needle to the wrong side, then on the front part, without pulling out to the end, make a few crochet with a thread, then remove the needle.
Everything, aesthetic appearance is kept in integrity.
How to fix a thread on a plastic canvas: Methods

Many needlewomen create paintings using embroidery on a plastic canvas. In this case, it is also important to correct the thread correctly. How to do this, we will tell you below. How to fix a thread on a plastic canvas? There are different ways:
At the beginning of work
Options:
- Skip the fiber under 3-5 located nearby already embroidered crosses from the wrong side. A similar method is better suited when embroidery in an even and odd number of threads.
- Loop on the wrong side. It is used when embroidery into an even number of threads of one color scheme.
- Similarly to the previous oneonly on the other side.
- Free knot.
- Leaving at the beginning on the front side of the tail of the thread. In the end it is cut.
Everything, you can work.
At the end of the work
Options:
- Stretch the thread under already stitched crosses from the inside. Cut the tail carefully.
- Stretch the thread under embroidery crosses on the front sideCut the tip of the thread carefully.
- "Snake" - Fasten the thread under embroidery vertical stitches on the wrong side.
Everything, the work is completed.
How to fix the thread of backstich?

The needlewomen make Bacostich's execution in the sewing process. Sometimes the picture, made using this technology, looks more beautiful and interesting. But how to secure the Besostich thread?
Here, needlewomen also use common knot methods and passes under the seams. In general, experienced craftswomen advise using several ways at once. However, do not forget about accuracy. Therefore, use the methods described above. Choose anyone and use.
How to fix an elastomeric thread: instruction, video

The elastomeric thread is used by needlewomen to create crafts from beads, etc. It is difficult to tie it, since the nodule turns out to be fragile and can be untied. How to fix an elastomeric thread? In this case, a special surgical node is used.
Instructions - an algorithm of actions:
- Fold the left cord over the right, forming X.
- Wrap the left cord around the right twice.
- Squeeze the two ends, forming a wavy pattern.
- Fold the right cord above the left and tie a simple knot.
- Tighten the cords.
All is ready. You can safely cut the ends of the thread. Watch the video how the craftswoman deftly fixes the thread on the bracelet.
Video: How to tie a knot in a bracelet correctly?
How to fix the thread crochet after knitting?

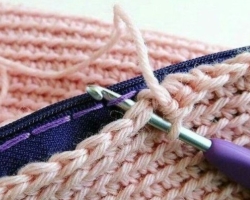
In crochet, you also need to fix the thread at the end of the knit. Otherwise, the product will be blossomed and you will have to be knitted again. How to fix the thread crochet after knitting? Everything is simple here.
- It is necessary to firmly fix the rest.
- Make an air loop, leaving the tail in 8-10 cm.
- Dig the free residue through it and gently tighten everything. Ready.
Sewing production and needlework is always relevant. The main element: proper work with a needle and thread. As well as compliance with all recommendations and instructions. Each needlewoman and seamstress should know numerous ways of inserting and fixing the fiber in a needle. After all, it is from this that the sewing work begins. Good luck!
Video: finish fixing the thread when sewing with hands. How to finish sewing, so that the seam does not bloom?
Read on the topic:


