From our article you will learn how to make stamping at home.
Content
- What is nail stamping?
- Stamping for nails with varnish gel - how to apply properly, how to use: step -by -step instructions
- Stamping for nails with acrylic paints
- Why can't stamping?
- Stamping on nails: design, ideas, photos
- Stamping with transparent varnish
- Color stamping
- Stamping jacket
- New Year's Stamping - Snowflakes
- How to buy plates, stamp, varnish, gel, wheels, paint, stem stamping on aliexpress?
- Video: Stamping plates. Aliexpress purchases. Stamping step by step
Until recently, a beautiful painted manicure could only be made in a beauty salon. And, although such a pleasure was not quite cheap, the fair sex was in order to make their pens look perfect, they were ready to pay any money for it.
But due to the fact that modern technologies reached the beauty industry, girls have the opportunity to do such a manicure at home. In order to decorate the nails with a beautiful pattern, it will only be necessary to purchase a set of stamping and show a little patience.
What is nail stamping?

- Stamping - This is the transfer of a certain pattern from one surface to another, in this case from the plate to the nail. This technology involves the transfer of the picture first from the stencil to the silicone stamp, and then from it to the nail plate. If you are interested in this technology for applying patterns, then look at Aliexpress and purchase everything you need there.
- At the end of the article, we will give you a few links, by crossing by which you can purchase on the resource both ready -made sets, and just metal disks with drawings, varnishes and top coatings. But remember, although the Stamping technique seems very simple at first glance, not all women and girls manage to apply the pattern perfectly the first time. Therefore, it will be better if before you start making such a manicure you watch the training video (it can be found at the end of our article), and only after that you will begin to try to apply the drawing.
- But even if even after that you can’t create the perfect painting just calm down a little, and then repeat all the manipulations again. If you ordered a high -quality set for stamping, it is likely that after the second or third time you will figure out all the nuances and you can apply a perfectly clear pattern to the nail plate.
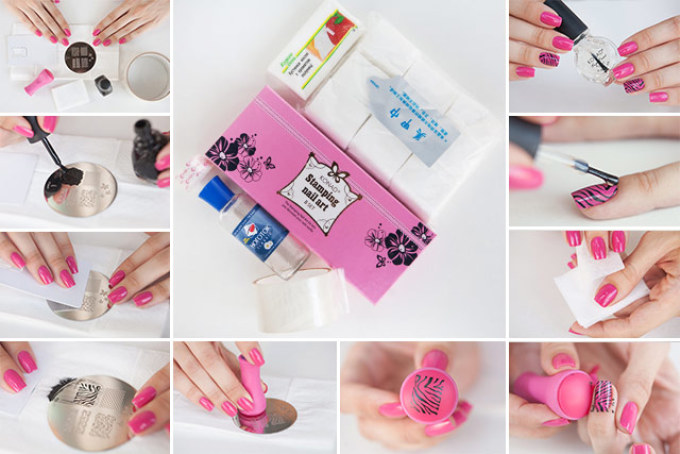
Stamping for nails with varnish gel - how to apply properly, how to use: step -by -step instructions
As you already, probably, understood with the help of Stamping technique you can make a fairly original and beautiful manicure. But if you do this for the first time, then first try to transfer the drawing to an ordinary piece of paper. So you can understand at what angle you need to lower the stamp on the nail plate and how much it needs to be pressed.
Step-by-step instruction:
- First of all, you need to do the preparation of nails. They must be cleaned of the old coating, gently fed and rid of the cuticle. If you see that they are in poor condition, then you can additionally make a fortifying bath.
- After the hands are completely dry, it will be possible to proceed directly to the application of the picture. To do this, first it will be necessary to degrease the nail plate, and then apply the base coating on it. It is advisable to apply it in two layers, giving each of them it is good to dry.
- At the next stage, we begin to deal with the pattern directly. To do this, we take the plate and apply it with a rather thick layer of gel varnish. When applying, be sure to see that all the smallest parts of the picture are evenly filled with varnish. If some part of the plate remains empty, then the picture will not work as it should. Next, take a scraper and with one quick movement, remove excess varnish.
- Then we take a silicone stamp in your hands, bring it to the plate with an ornament and with one rolling movement we transfer the pattern to it. Remember, you need to do this only once, with repeated movement, you are unlikely to be able to accurately get into the same lines and the drawing will turn out to be smeared. After that, without waiting until the decorative coating dries, we transfer the pattern to the nail.
- If you want your painted manicure to serve you as long as possible, then be sure to open the picture with a special fixer or simply transparent varnish. Repeat these manipulations with all nails and your fashion manicure will be ready.
- After everything has been done, do not forget to bring a silicone stamp and plates with a pattern in order. To do this, take the varnish liquid and thoroughly rinse off the remaining decorative coating from them. Wait until they are completely dry, and then fold all the hermetically closing box.
Stamping for nails with acrylic paints

- If you wish, you can try to make a pattern on the nails not with special varnishes, but by acrylic paints. The main advantage of this coating is a rather low cost and a large selection of colors. Some fashionistas use acrylic paints not only to create a fashionable nail art, but also decorate them with ready-made stamping, drawing a thin bone of the line or simply adding interesting curls.
- If we talk about the technique of applying the drawing with acrylic paints, then it is no different from the one with which we introduced you above, just in this case you must take into account the features of this decorative material. Acrylic paint has one unpleasant property, after applying to the surface, it dries quickly enough. And since you will apply it with a relatively small layer, this process will occur almost instantly.
- Therefore, if you decide to make a stamping design using this particular coating, then first estimate where you will place the picture, and only after that proceed to apply acrylic paints to the plate and silicone stamp. After they are applied to the stencil, you will have literally five seconds to transfer the drawing to the stamp, and from there to the nail plate. If you are delaying, then the paint will dry out without getting on the nails.
- And remember, acrylic paints are ideal for large drawings, but for elegant patterns with many small curls they are not suitable. Due to the fact that acrylic paints quickly dry out, you can simply not have time to paint the drawing to the end.
Why can't stamping?

Although stamping is considered a fairly simple technique for making a painting on the nail plate, there are some rules that violate which you cannot get the perfect nail art.
So:
- Remember, stamping is very afraid of fat, so in this case it is best not to remove the old lacquer coating with means of oil containing. If you do not have any other product, then after processing nails with a solvent, be sure to wipe them with medical alcohol as thoroughly as possible.
- Also, the reason that stamping cannot be a silicone stamp. If it has a too glossy surface, then this will interfere with the uniform absorption of varnish. To get rid of this problem, it will only need to be treated with a fine -grained nail file. This will make the surface of the stamp more rough and will help ensure that the pattern is transferred as accurately as possible.
- Try to remove the remaining varnish from the plate with the pattern as correctly as possible. This must be done exclusively by a cross with a thin blade and hold it at an angle of 45 degrees. If you hold it strictly perpendicular to the plate, then the mechanical effect will be very strong and this will lead to damage to the picture. As a result of this, your fashionable nail art will turn out to be fuzzy or greased.
- Another important nuance that has a sufficiently strong effect on the final result is varnish. To create such a manicure, it is best to use special stamping varnishes or high -quality acrylic. If you decide to use the usual decorative coating, it is likely that you simply will not be able to achieve the desired brightness of the picture the first time.
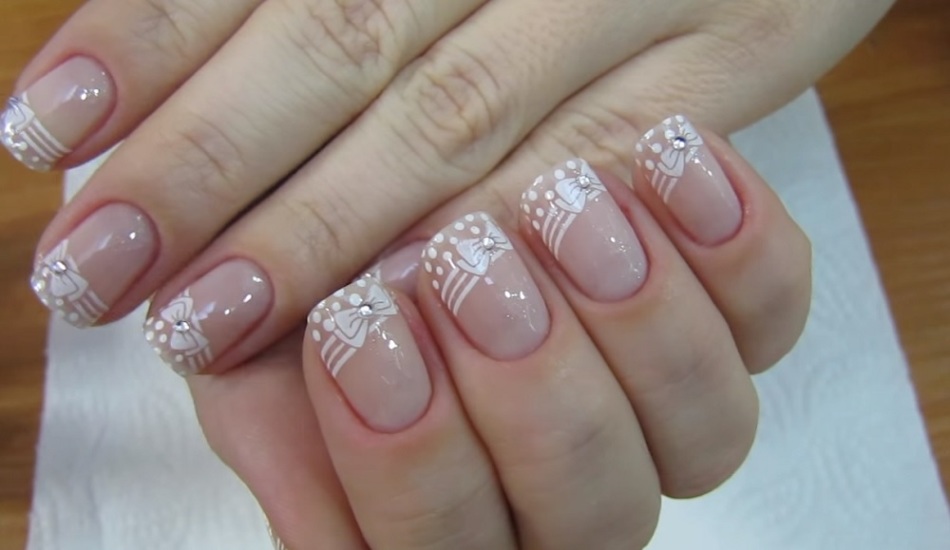
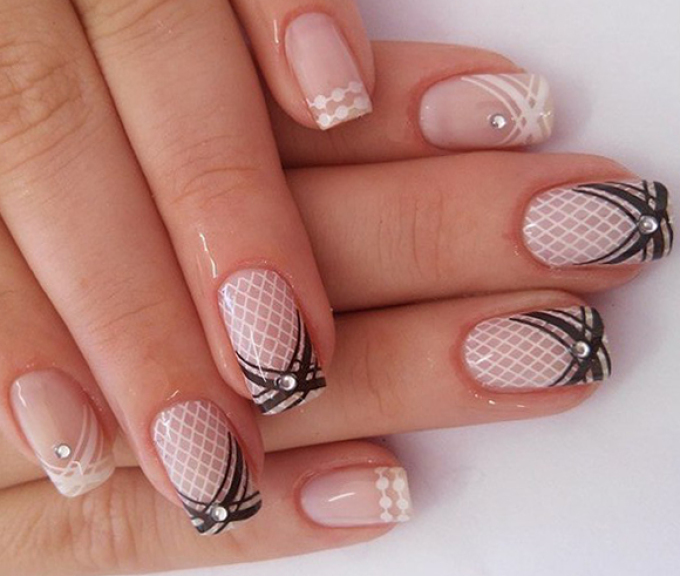
Stamping on nails: design, ideas, photos


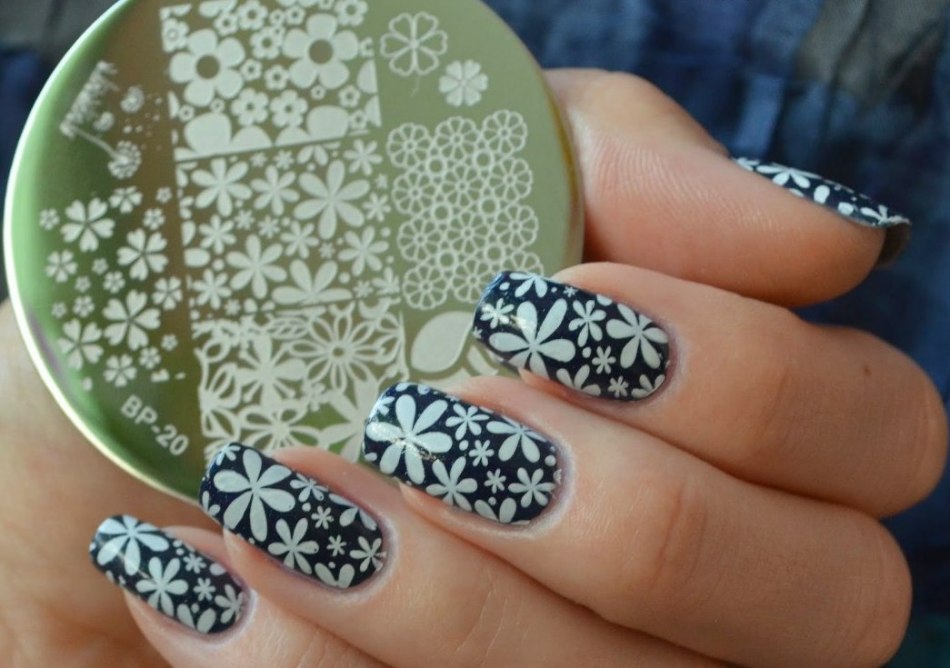
- Stamping technique allows a woman to turn on her whole imagination and paint the nails so that they look as attractive and original as possible. To create such a nail art, you can use both one and several drawings at the same time. If you want to apply several drawings to the nail plate at once, then give preference to delicate floristic ornaments or geometric abstraction.
- As practice shows, such drawings are better than the rest, and, most importantly, they are much easier to properly place on the nail. Separately, I want to say about the color scheme of such nail art. If you want it to be as original as possible, then do not use more than four different colors when creating it. This amount will be enough to convey all the brightness and originality of the stamping.
- Ideally, in general, it is best to use only two colors, just so that your manicure is as noticeable as possible combine light and dark shades in it, for example, take beige or light brown varnish as a basis, and apply the pattern itself in black. A combination of blue and golden will also look good. In this case, the blue color is best taken as a basis, and use golden color to draw an ornament.
Stamping ideas:
- Silver curls on a red or burgundy background
- Black lace on a blue background
- Geometric shapes on holographic varnish
- Black-red roses on scarlet nails
- Green embossing on a lemon background
Stamping with transparent varnish


- Most women use transparent varnish simply as a fixing agent of the finished nail art. But with the technique of stamping, you can create a delicate manicure with it, which will make your handles very beautiful. As a rule, not only a transparent varnish, but also the same transparent stamp are used to create such nail art. It allows a woman to see how the finished manicure will look even before the pattern is transferred to the nail plate.
- You can do a similar manicure in two ways. In the first case, the picture will be applied to a transparent base and fixed with the same transparent varnish. Such stampling involves the use of stencils with a geometric pattern or intricate curls. In the case of you will use the second method of applying transparent stamping, then you will first need to apply a pattern on a low -fat nail plate, and then cover it with the same transparent varnish. To create such a manicure, you can use more voluminous drawings and even whole compositions.
- Yes, and remember, stamps for transparent stamping in structure are slightly harder than the rest, therefore, you need to take care of them a little differently. After removing the remnants of the varnish, they cannot be rubbed with any napkins and rags. All these, at first glance, soft things can scratch its surface, and it will become unsuitable for use. Therefore, if, after processing the stamp with a solvent, the remaining varnish is still visible on it, then try to get rid of them with ordinary tape.
Color stamping


Colored stamping always turns out very bright and beautiful. As a rule, from 2 to 4 different colors is used to create such a manicure, which allows you to create quite interesting and voluminous drawings. But what is the most interesting, volume of the ready-made nail-art also gives a special way of application. Since in this case you will create a drawing without using a stencil, it will turn out to be more embossed and bright.

So:
- To create colored stamping, you will need acrylic varnishes of different colors, transparent varnish, silicone stamp, thin brush, tweezers and toothpick. After preparing all these things, conduct standard nail preparation and you can start creating a picture.
- Take a small amount of varnish on the brush and draw any pattern on the stamp on a stamp. It can be flowers, leaves, stars or just geometric shapes. Let the pattern dry a little, and then gently open with a transparent varnish. When it delights, apply another such layer to the drawing and wait for its complete drying.
- When this happens, you will see that the edges of the picture began to slightly move away from the surface of the stamp. As soon as this moment comes, take the tweezers and carefully remove the resulting workpiece. Put it on a paper towel and proceed to the manufacture of the following. Make them exactly as much as you plan to decorate with colored stamping.
- When all the blanks are ready, you can start transferring them to the nail plate. Pre -apply a layer of transparent varnish to it, and then, using tweezers, transfer a previously prepared pattern to this layer. If required, then turn it more correctly, and then using a toothpick, indicate a clear contour of your nail and remove all the extra. At the end, process your nails with the fixing base and let them dry well.
Stamping jacket


A classic jacket is a manicure in which the tip of the nail is painted with a white varnish. Women love a similar nail art for its versatility and ease of application. As for the jacket in stamping technique, it can also be made very easily. You will just need to paint your nails with a colored base, and then apply a pattern on them using a stamp.
It’s just that in this case you will need to apply it not to the entire nail plate, but only to its tip. If you want the jacket in the Stamping technique to be the most similar to the classic as possible, then first draw a white line on the nail plate, and then apply the pattern directly to it.
New Year's Stamping - Snowflakes


- Almost all winter is associated with beautiful and white snow, which is why the fair sex likes to make a manicure with snowflakes at this time of the year. And if earlier they had to draw them using needles or toothpicks, now for this they can use the Stamping technique.
- Not only does this technology significantly reduce the time of applying such a drawing, as it also allows you to apply the maximum realistic ornament to the nails. New Year's stamping, like any other way of applying a decorative coating allows women to show their individuality as much as possible. If desired, they can decorate their nails with a scattering of small snowflakes or place one large and fluffy on them and additionally decorate it with small rhinestones.
- If we talk about the color scheme of such a manicure, then here in the first place is white and blue. Of course, if you wish, you can paint the nails with red, green and yellow snowflakes, but be prepared for the fact that such a manicure will turn out to be very screaming and will definitely not be in harmony with an elegant evening outfit.
How to buy plates, stamp, varnish, gel, wheels, paint, stem stamping on aliexpress?

- If you want to try to master stamping, but do not know where to buy everything you need for this, then look at Aliexpress. Here you can literally find in a couple of clicks and stamps, and plates, and gels for this manicure technique. In order to quickly find stencils and stamps on the resource, find category on the main page beauty and health and select the section in it Manicure and tools.
- Further, you will need to carefully study the filters located on the left side of the page, and indicate that you are interested in sets for stamping. If you wish, you can immediately adjust the price category of goods. This can be done using filters that are located in the upper part of the page.
- Gels and paints You can also find in the same category by just using the filter system. If you cannot find what you are interested in, then just drive into the search engine Stamping varnishes. After that, you will immediately be redirected to a page with the right product and you just have to indicate in the filters what color you need.
Video: Stamping plates. Aliexpress purchases. Stamping step by step