Many housewives are fond of knitting. Now it has become fashionable to wear it with your own hands. In this article you will read a master class on how to tie the neck with knitting needles with different methods.
Content
- Wooden with knitting needles - product options
- Neckline - knitting pattern for beginners with the help of fakes
- How to knit a neck with knitting needles is a step -by -step guide
- Kettvka neck with knitting needles
- Video: False Kettlevka with knitting needles
- Beautiful neck with knitting needles
- How to knit a rectangular neck?
- Neckline-V-shaped neckline
- Video: knitting the neck with knitting needles
When knitting any thing, it is important to pay attention to all the subtleties of work, so the product will turn out to be neat. You can knit the neck with knitting needles in different options. It doesn’t matter which one to choose from them, the main thing is that at the end you get a beautiful appearance of a sweater or pulver. Further, the knitting methods will be described with knitting needles, thanks to which the thing will acquire a finished look.
Wooden with knitting needles - product options
All edges of the knitted product should be finished. This statement is also suitable for the neck of sweaters, dresses, sweaters, pulver and other knitted things. You can process the edge of the neck with different methods. We will consider them further. Below is an option where the knitted neck with knitting needles has a round shape.

Of course, you can crochet a neckline, and there are many knitting techniques there, but this requires knowledge and experience.
By type of shape of the neck of clothing, there are different options:
- rectangular
- round
- V-shaped
- in the form of a boat.
Therefore, they tie it with diverse methods. You can tie a regular box or make a neck with a steering wheel, or you can decorate it with beautiful cloves.
IMPORTANT: Look below the descriptions presented in the picture to create such products. Moreover, the process is not necessarily strictly according to the picture, you can independently experiment with the color of the threads, make separate stripes on the box.

The neck of the neck can be tied with an elastic band. And there are a lot of variations to perform this technique. All these options are suitable for processing the neck with knitting needles. It will still be good if you apply a patch for creating a bike-roller, or the surface.
Neckline - knitting pattern for beginners with the help of fakes
For inexperienced needlewomen, it is better to use the next knitting technique so that the neck with knitting needles looks like a whole with a sweater, pulver, a vest. To do this, apply circular knitting needles. And the rest of the process of straining the neck with knitting needles, see below.
Knitting knitting pattern with knitting needles:

Take a knitting needle to knit down on the very edge of a sweater or vest. It turns out that all the loops around the neck will be on circular knitting needles. It is advisable to pick up the loops from the neck is not the only hem, but a little lower. In order for the neck do not look stretched, it is advisable to pass every fourth loop. Then the uniform distribution of the box around the rounded neck will be released.

After the loops have been scored, proceed to knitting the gum.
Knitting scheme:
- The first row: knit 1 loop - the front, the other - wrong.
- The second row: when you reach the last loop, continue to knit a new row according to the drawing (one front loop, the other is wrong).
- The last row: having gained the desired height of the box, close the loops, and fix the rest of the thread and cut the excess.
IMPORTANT: To get an elastic edge of the box, it is better to close the loops with a needle.
How to knit a neck with knitting needles is a step -by -step guide
You can connect the box separately for any shape of the neck. It is practical and suitable for any product. If the neck with knitting needles is processed in this way, then it will have a finished look.
For the decoration of the neck you will need:
- Knitting needles of the desired size
- Threads for the color of the product
- Needle
- Scissors.

Step -by -step knitting guide:
- Take the right number of loops on the knitting needles. You can calculate them by creating a probe of about 10 by 10 centimeters in size. To do this, tie a square, calculate how many loops are per centimeter.
- Next, knit the flap of the canvas with an elastic band: one loop is facial, the other is wrong.
- Knit the second row according to the drawing so that the wrong loops coincide with the front. Do not forget about the brown loops in each row (do not knit the first, and always knit the latter).
Sew the finished knitted canvas (elastic band) to the sweater or jacket with a needle. Use the same color for sewing a thread as for the box. The seams are undesirable tightly, otherwise there will be problems with putting on a thing. The head may simply not crawl through the neck.
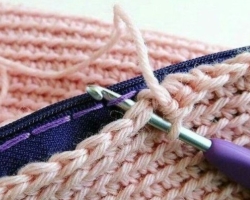
Kettvka neck with knitting needles
False Kettlevka gives the product a neat, finished look. If you make a neckline with this method, then the thing turns out like a store. The bottom line is that the box or collar to the neck is tied with knitting needles.
To perform kettale will need:
- gray threads, as in the photo below
- the knitting needles are circular
- needle.
IMPORTANT: The knitting needles must correspond to the thickness of the yarn. Choose them differently. To get the knitting of normal tension, take the knitting needles in size, which are indicated on the marking of the yarn. To get dense knitting, they buy knitting needles thinner by one size than indicated on the labeling of threads.

Process:
- Dial the first row of loops around the neck of the product. Just grab not the extreme row of loops, but the next behind it.
- Now knit the row: one loop of the front, the other wrong, each next row according to the drawing, until you tie three centimeters of the box.
- Then knit one row with facial loops and start knit again an elastic band 1 on 1 (1 - front, 2 - wrong).
- Close the loops. Then, with an ordinary needle, wears on the wrong side so that a smooth seam is obtained with the front or it is not visible.
The video below is how to make a false kettale so that the neck with knitting needles looks perfect.
Video: False Kettlevka with knitting needles
Beautiful neck with knitting needles
The neck with cloves
Do not know how to tie the neck with knitting needles beautifully? The neck tied to the crochet looks pretty, because you can do the openwork edges or attach whole gates. Knitting a beautiful neck with knitting needles comes out if you use different special knitting techniques. For beginners, the neck option is suitable. Kniting this pattern is simple, further in more detail.
Knitting process with dentists:
- First, knit 1 on 1 on 1 bike to the required height.
- Next, knit the row as follows: two loops together with the front + cloak and so according to this scheme to the end of the row.
- Knit the next row with the wrong loops.
- And then knit the second part of the box with a pattern: 1 loop is wrong, the other is facial, and so knit a row behind the drawing until you reach the same height as the first half.

After the end of the process, you should bend the elastic in half so that the cloves are at the top of the neck and sew it with an invisible seam.
How to knit a rectangular neck?
If the neck has a square shape, then in the corners you will have to connect the hinges of the box so that the perfect shape comes out. And at the end of the process, the elastic band on a sweater or pulver did not stick out.
The process of knitting the neck occurs according to the following scheme:
- Pick on circular knitting needles around the perimeter of the neck. The first row knit with facial loops.
- In every corner, make marks for yourself with pins.
- Now proceed to knitting the gum: one front loop, the other is wrong.
- When reach the neck of the neck, do this: the front loop and the one that are nearby, remove the next, knit the next front and stretch two removed through the knitted loop.
- Perform this technique of knitting down every time you pass the corners of the neck.
Thanks to this technique, the elastic band on the neck will repeat all the outlines of it and will not stick out anywhere.

Upon achieving the required height of the box, close all the loops. Keep in mind that even when closing the loops, you will have to make decreases in the corners.
Neckline-V-shaped neckline
The V-shaped neckline can be designed, in practically the same methods as the round or rectangular. The neck with knitting needles is tied with a separate bark, or the box is immediately connected to the neck loops, then it comes out with one -piece and knit it with circular knitting needles.
The box can be knitted with any pattern, starting from a conventional elastic band, and ending with a pantyhous viscous. It will also look beautiful on the neck, connected by a pattern across and along. Below, in the pattern of the bike, one -on -one elastic band is connected, and the loops were typed along the perimeter of the neck so as not to sew the edging at the end of the knitting.

In order to get such a box, the following should be done:
- Type loops on circular knitting needles around the perimeter of the V-shaped neck. First row Then knit with the facial loops. Below in the corner, do the following: remove two loops onto the knitting needle, then knit the next loop with the front loop, and stretch the two loops on the knitting needle through the loop.
- Second row Knit with an elastic band one on one (1st front loop, 2nd wrong). In the corner, repeat the process of decorating this very corner: remove two loops on the knitting needle, and the first should be the front, knit the third with an ordinary front loop, then stretch these two loops taken to the knitting needle through it.
- Do so until you completely tie the base on the neck and do not forget to decorate the V-shaped corner.
When completing the design, close the loops.

You can also perform the neckline by knitting a separate fake, and you can knit it in length and even perform a pattern in the form of colored stripes, as in the photo above. To do this, you will need the threads of three different colors of white, black, yellow.
The process of knitting the neck with knitting needles:
- Type the required number of loops on the knitting needles so that there is enough gate to the entire length of the perimeter.
- Start knitting with white threads an elastic band 1 on 1 or 2 by 2.
- When knitting a centimeter, change the threads to black and continue to knit according to 1 to 1 or 2 to 2 loops.
- Then knit several rows of yellow yarn.
- The next strip should be equal to the one that was knitted in black and accordingly knit it with black threads.
- At the end, it remains to tie as many rows with white threads as at first knitting, so that everything is symmetrical.
When you reach the desired height of the box, close the loops. Sew the finished box to the neck. Make the angle in the same way as drawn in the picture above.
Next, see examples of knitting different products on our website:
- A bat and a bat, how to knit?
- How to crochet a backpack?
- Hand knitting-master classes
- Crochet turtle
- What can be tied to a newborn?