This article describes master classes on the creation of a rat, mice.
Content
- Rat: crafts in kindergarten
- Rat: Crafts to School
- How to make a rat or a mouse from a plastic bottle yourself: Instruction
- How to sew a rat or mouse from socks?
- Video: DIY mouse-wry mouse
- How to make a rat or a mouse from plasticine yourself?
- How to make a rat or a mouse from paper yourself?
- Video: Origami Rat
- How to make a rat or a mouse from pompons yourself?
- Video: Pompon from threads: master class
- How to tie a rat, a crochet mouse?
- Video: Rat, mouse with amigurumi crocheted. Detailed description
With the approach of winter, all people, and especially children, begin to dream of approaching such a beloved holiday as the New Year. In kindergartens, educators adorn groups in advance toys in advance, who make babies with parents with their own hands, and in schools teachers ask to make crafts so that they can be used as a decor for a Christmas tree, an assembly hall, classes and corridors.
- It is easy to make some kind of craft, and the memory of this process will remain in the child for a long time.
- In this article you will find many ideas on how to make a rat, a mouse from different materials. It is worth noting that you can do the mouse, since in the Chinese calendar the rat and the mouse is the same animal.
- All materials for work are available, cheap, but help create a real decoration of the holiday.
Rat: crafts in kindergarten

Kids love to sculpt something with their own hands, and it is not necessary to be plasticine at all. You can add creativity and create with a tiny mouse from salty dough. Such material is very plastic and beautiful figures are obtained from it - original and durable. It is impossible to commut with or damage them, like plasticine crafts, since the dough after modeling dries during the day.
- A rat blurred from salty dough can be glued to a magnet or just put on a children's cabinet in a group.
- For modeling, the dough prepared according to various recipes can be used.
- From one recipe you can only make large details, and the other is designed for fine modeling.
- In any case, the product will turn out to be smooth, original and it will be convenient to sculpt even a 3-year-old baby.
So, we are starting.
The following materials will be needed:
- 1.5 cups of wheat flour of the highest or first grade (does not matter)
- 1 cup of small salt "Extra"
- 0.5 cups of ice water
- 3 tablespoons of PVA glue for the strength of the future product
- Watercolor paints of different colors
- Wood varnish - colorless
- Rnoice for rolling dough, knife and stacks, as for plasticine
Now start work:
- First mix the ingredients for the dough: combine flour and salt, add water.
- Knead a steep but plastic dough.
- Add PVA glue and again knead the resulting mass.
- Lay a paper sheet on the table and roll a small piece of dough on it. It will be a cheese on which a rat or mouse should sit. You can not roll out, but fly out a piece of cheese in the form of a square or rectangle, as in the picture above.
- Squeeze the holes with the end of the pencil. For reliability, make holes of different sizes.
- Now take a piece of dough and make an oval blank. Pull a little on one side - it will be a mouse nose. Set the future mouse on a piece of cheese.

After that, proceed to the formation of small parts of the mouse:
- On two pieces of dough, squeeze small recesses with a stack. These will be ears. Glue them to the body, wetting the junction of the connection with water.
- Blind round eyes. Pupils and nose can be made from peas of black pepper.
- For the tail, make the workpiece, rolling it into a thin tube, as shown in the image above.
- Pull the tail in place with water.
- All - the mouse is ready. Leave it to dry on the table. No need to dry in the oven, otherwise cracks may appear, and inside the workpiece will still remain not entirely dried.
- You can blind a few more of these mice, because all children in kindergarten will want to touch the craft and consider what and how it is made.
- When the craft dries (after 24-48 hours), paint the mouse and a piece of cheese in the desired color and put it back again.

Everything is the next day, you can carry crafts in the kindergarten.
Rat: Crafts to School
In school, a high school child will be able to make crafts on his own. The baby who is studying in elementary school will have to help a little. Students of grades 1-4 can make a mouse from salt dough, and high school students can be sewn from felt. So, for work you will need the following materials:
- A section of the material 15 x 15 cm of blue or other dark color, for the ears you also need a felt felt.
- Beads or buttons of small sizes for the eyes and nose.
- Filler in the form of cotton wool or synthetic winterizer.
- Scissors, needle, thread in tone.
Work on the sewing of the mouse consists of such stages:
- First make a pattern: two barrels, one part of the abdomen, 4 details of the ear.
- The tail can also be cut out - this is a strip of felt in the form of a semicircle, and you can also make this part from the thread for knitting to the tone of the body.
- Cut all the details and cut them out of paper.

- Now transfer all the patterns to the fabric and cut it out of the fabric.
- Be sure to make small allowances for the seams, otherwise the toy will be too small.
- The following details should turn out:

- The abdomen additionally seal the part of the cardboard. Glue the cardboard and tissue parts with any glue: for fabric, PVA and so on. Thanks to this, the mouse will turn out to be more stable.
- Now sew the sidewalls, leaving the abdomen.
- Then sew the abdomen in 2 edges, leave one edge so that you can put the filler inside.
- Turn the stitched details on the front side.
- Fill the mouse with synthetic winterizer. Make sure that the filler is evenly distributed throughout the inside.
- Put the tail and go the remaining one edge with a hidden seam.
- Fold the ears and go.
- Turn them on the front side and attach the mouse to the head.
- Sew the beads to the place of eye and the nose.
- If you want to make a mustache for your mouse, then you can just flash with black threads in the places where they should be located without delaying to the end. Then cut the threads and smear with glue to stick out like real mouse mustache.
- All - the mouse is ready.
On such a pattern, you can sew different models. Fethter is a dense fabric, so such small details like ears are not necessary to sew from two parts. You can simply find and glue them to the head. It will also turn out beautifully, but much faster.

Here are a couple more patterns of rats, which can be sewn from any fabric. This is the New Year's "Rats Santa Claus" and a cheerful rat on a snow tuber.

Girls will be happy to make such mice to school for a Christmas tree, and we offer the boys more interesting. For example, make a mouse from a plastic bottle. Read further.
How to make a rat or a mouse from a plastic bottle yourself: Instruction

Any boy can make such a mouse from a plastic bottle. You will spend no more than 15 minutes of free time on such a craft, and the materials are the simplest:
- Plastic bottle - 1 piece
- Scissors
- A small section of dense material: felt, drape and so on
- PVA glue or fabric
Do the work like this:

- In one and a half liter bottle, cut the middle part, leaving the bottom and the upper part with the lid.
- You can remove the cut out the middle to the side, it is not needed.
- Combine the resulting two parts. The body of the mouse should turn out, as in the picture above.
- Wrap the body of the mouse and nose (lid) with the fabric. Glue along the edges so that the fabric firmly holds on the "mouse body".


- Cut the eyes, nose, ears and tail from the fabric. All this can be done from cardboard, as well as the body, if there is no dense material.
- Glue all these details in your place.

- From the material that you glued to the body (felt or cardboard), twist 4 legs.
- Glue them in your place.

- All - the mouse is ready.

See how funny cartoon mice turned out:

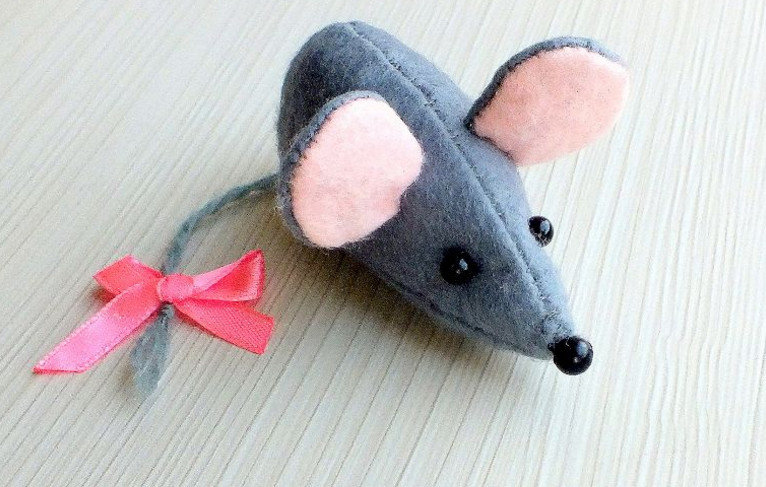
How to sew a rat or mouse from socks?

If you have an old sock in bright color, which has lost its pair, then you can make such a cute mouse from it. In addition to the sock, you will also need:
- Filler in the form of synthetic winterizer or cotton wool
- A pair of black buttons
- Threads and scissors
- A piece of felt or cardboard for the nose
When all the materials are ready, start work:

- In the area of \u200b\u200bthe sole on a folded wear, draw a fire torso mouse, as well as the details of the ears.
- Cut out what happened.
- Sew all the details from the wrong side, leaving on one side.
- Fill the mouse tightly with a synthetic winterizer to make it like the body.

- Then make a tail from the sock elastic band. Just cut a thin strip and sew from the edges.
- Insert the tail in the body and sew the last remaining hole.

- Sew the ears and sew them to the head.

- Then sew your eyes and make a nose of fabric or cardboard. Glue it in place.
- Make the antennae with threads that are sewn, but do not fully delay.
- Lubricate the ends of the mustache with glue so that they look like antennae.

Everything - the mouse is ready. You can make one more thing. They will look great under the Christmas tree or decorate the interior as a whole for the New Year.

Look in the video below how the craftswoman sews the mouse from the sock. Another option for such a craft is original and beautiful.
Video: DIY mouse-wry mouse
How to make a rat or a mouse from plasticine yourself?

The well -known material for modeling from childhood is plasticine. Now there are many varieties of this material: ordinary, honey, clay, modeling, plasticine balls, wax and so on. Therefore, choose the plasticine that you or your child likes to work the most and create a New Year's mouse. Before starting work, you should prepare everything you need for modeling, as well as prepare a workplace:
- Modeling board
- Stacks
- A set of multi -colored plasticine
It is necessary to work with plasticine on a flat surface, for example, on the table. Be sure to use a modeling board and tools. When everything is ready, you can proceed to the beginning of the creative process:

- Mash the plasticine mass of black or gray in your hands.
- Roll the ball, and then make an oval out of it.
- Lengage a little on one side of the oval - it will be a rat face.

- Return from the elongated edge of our workpiece a couple of centimeters and attach ears. Making them simply, they resemble a ruble coin in size and shape.
- Also attach a nose - a small ball of black plasticine.

- Roll the tail in the form of a long “sausage” and attach it to the place - to the torso of the rat.
- Make your eyes on the head by pushing small recesses with the back of the pencil, as shown in the picture above.
- In these openings for the eyes, insert circles of red plasticine. Also make black pupils.
- Then blind the paws of pink plasticine. First make balls, and then with a plastic knife, turn them into legs.

- Attach 4 paws to the body.

Slightly press the body of the resulting craft to the bottom, while the plasticine is still soft. This is necessary so that the rat is similar to the real and that its body is well attached to the paws.
How to make a rat or a mouse from paper yourself?

There are many different ways that allow you to make a rat or mouse from paper. You can make a craft, gluing parts of the body on paper or cardboard - you get a panel, or cut the details and glue them together - you get a cute paper mouse. You can just draw a mouse on a sheet of gray sheet, cut, draw eyes and nose.

However, you can go and a more complex, but very interesting method, and make a mouse or rat of origami. To do this, you need only a sheet of paper and your patience. Below is the Origami master class on the manufacture of an animal from a sheet of yellow paper.

Arrows show how to bend or turn paper. Do everything strictly in the described stages and such a rat will certainly become an adornment of your holiday. If something is incomprehensible, watch the following video.
Video: Origami Rat
Another master class of the Origami mouse. You will get an interesting model. Making it is simple and fast.


Evaluate the next master class. An even simpler model of the Origami mouse.


How to make a rat or a mouse from pompons yourself?
The craft of pompons is elegant and stylish. This is a real soft toy that will perfectly decorate the Christmas tree or interior of the apartment. It can be presented to a child or even an adult as a souvenir. You will need a little thread and a little fantasy for this craft. So, we are starting.

In addition to threads of a suitable color, prepare a small piece of soft felt to match the body, beads for the eyes and nose. As a decor, use a cut of beautiful fabric for dresses, bows and other elements.
The work consists of such stages:

- Wrap the threads on the finger. Leave the beginning of the thread free, then we will need it.
- If you want to make a slightly larger craft, then wind the threads on 2 or three fingers to make a large pompom.
- Do not worry about how many threads you need to wind. It's okay if the pompom is not too dense and small - it will be the head of the mouse.

- After you wound the threads without removing them from your finger, cut the end of the thread and pass through the entire skein several times. Then tie a knot with a thread at the beginning of the skein.

- Cut the threads in a circle. Make the same second pompom, but wrap a little more threads - it will be the body.

- Now sew two pompons together. Make and sew the ears.
- From special threads with wire inside, make pens, legs and tail. Sew clothes made of lace or other material.

- Make eyes and nose from black beads. The mouse is ready.
- You can make several more similar mice and hang them around the apartment. You will get a beautiful and original New Year's interior.


Watch the video how you can make a pompom using a special device. You can use this advice when creating a mouse. However, you can do without it.
Video: Pompon from threads: master class
How to tie a rat, a crochet mouse?

Such lovely rats can be crocheted. The knitting scheme is simple, and even a novice craftswoman will be able to bring it to life. It uses the main tricks of crochet. This will help improve your skills or even add something of your own to the knitting process.
Such small amigurumi rats will be a great gift for the New Year. You can experiment with color and make a different mood of rats, changing the location of the eyes. The toy will turn out small - 8 centimeters in length and 7 centimeters in width. You will spend a little free time on knitting, but in the end you will get a beautiful rat.
Advice: Knitting should be dense. Therefore, use hook No. 3, yarn of medium thickness.
The necessary materials for work:
- Yarn of medium thickness (any color for your choice is about 60 meters). The nose and tail - the yarn of the other color - is a little. Eyes - white yarn - a little
- Hook number 3
- Filler - synthetic winterizer or cotton wool
- Needle and threads for sewing parts
- White and black felt
- PVA glue or special glue for fabric
Knitting perform according to this scheme:


Now that all the details are connected, start the assembly rat:
- Sew your hands to the body, in the place just below the neck.
- Sew the face to the body.
- Attach the nose with a needle and thread.
- The ears are attached on the sides of the head. Sew your eyes so that the rat is funny. You can sew the pupils close to each other.
- Sew the tail so that it is directed up.
Everything - the rat is ready. The result was a very original and beautiful gift or decoration of a Christmas tree, room. Do not be afraid to experiment with the color of the body and other parts of the rat. Below we publish a description of knitting another beautiful toy - mice. It is also simple to tie such a toy, but imagine how it will be interesting to give it to one of the children for the New Year or even to present an adult.

You can use any yarn. But the Alize Happy Baby is very beautifully knitting - 402. Prepare also a hook for one and a half, needle, a cut of tulle and ribbons. Here are the stages of knitting each detail:


Now make an assembly of the mouse:
- Sew your head to the body, pens.
- Ears: First, sew the pink part to the gray, and then to the head.
- With the help of black threads, embroider your nose, eyelashes and eyebrows.
- The cheeks can be cut from pink felt and glued.
- Make a skirt from Fatin and sew it to the body.
- Decorate the mouse with a bow, buttons and ribbons.
Fantasize and make clothes to your liking. No one will have such a mouse. This is an original gift that will appeal to both the child and the adult.
Knit, glue, sculpt. In general, do everything you like. Thanks to this, you will be able to create a unique gift that will surprise the one to whom you will give it. If you decide to decorate the interior of your home for the New Year with such mice and rats, you will turn out very thematic, stylish and beautiful. All funny holidays!