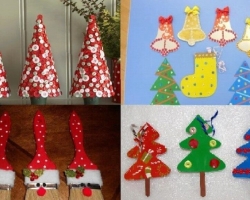
In this article we want to talk about how to create origami. Having mastered this type of needlework, you can spend time with your child with interest and benefit or surprise your hands with the dexterity.
Content
- How to make origami-journal: master class, scheme, photo
- How to make origami-heart for beginners: master class, scheme, description, tips
- How to make origami-cat: master class, scheme, tips
- How to make origami-rosa: master class, scheme, description
- How to make Origami-Korobochka: scheme, master class
- How to make origami-killer sheet: description, scheme
- How to make a frog-orgas: a master class, scheme, recommendations
- How to make origami modular: master class, tips, scheme
- How to make origami-lifting modular: master class, photo, schemes
- How to make an orgal bird: master class, tips, scheme
- We offer to make origami-zontik, guided by the following videos:
Did you know that previously the secrets of manufacturing paper figures were transmitted exclusively in orally and only in the female line? Now anyone can do origami, and it is easy to find schemes. We offer to get acquainted with some of the most popular of them.
How to make origami-journal: master class, scheme, photo
To make origami in the form of a crane is a kind of classic. We offer it to master it:
- A piece of paper is necessary for a start Fold the diagonal.
- The protruding extra areas should be cut off so that it turns out in the hands triangle.
- Another more carefully bend.
- In the triangle a square is created, Why do you need to straighten the corners. Repeat this algorithm and you need to and on the other hand.
- Now the edges follow fold in the center.
- Formed from above the triangle is bent.
- Then the angle below is needed fold horizontally.
- Two corners are bent to the center. Eventually it turns out rhombus. The same algorithm must be duplicated on the other side.
- Next, you need to take the rhombus and bend the edges towards the inner contour. So it will come out neck.
- According to the above scheme, it is created tail Crane.
- Where the neck is giggled carefully corpourine.
- The wings bend At some angle.
- The final stage - coloring Crane. But it is performed at will.
Interesting: the Japanese believed that a person who created a thousand cranes would definitely get what he dreams about.

How to make origami-heart for beginners: master class, scheme, description, tips
To make origami in the form of a heart is worth everyone who wants to tell a loved one about their attachment to their loved one, friends, and parents. We offer readers to the most simple scheme:
- To begin with a square sheet of paper folds So that each corner is connected to the opposite. But you do not need to leave the sheet in this position - it is only necessary to indicate the fold line - and again return The corner is in the previous position.
- The deflection must be worked out Good on all sides.
- Next, the square of the paper must be put so that it resembles rombic.
- One of the corners of the rhombics - lower - Folding in the direction to the center of the leaflet. This time it needs to be left in a bent position.
- Opposite to the described above corner Also needed bend.
Important: however, now the corner should not be attached to the middle of the sheet, but to the opposite parallel to the table.
- Next is visually necessary to measure the middle On the bottom of the craft. From this middle the side parts are turned sideways - In the diagram, these places correspond to the dashed lines in Figure No. 4.
- Now you need Bend sharp corners So, as shown in pictures No. 5 and No. 6.

How to make origami-cat: master class, scheme, tips
Fans of the Usato-Clotted will probably be happy to make origami in the form of a cat:
- Come in handy square A piece of paper. It needs it Fold So that the fold lines stretch from one corner to the other opposite. That is, the fold lines must cross the square crosswise.
- Next, the square sheet is placed on the table the rhombic face down.
- All corners Need to fold towards the center - You will get a square.
- Left corner need bend back.
- Then the sheet is folded along the horizontal dashed line as indicated on the scheme number 5.
- Next, you need to bend the workpiece as indicated on the scheme No. 6, and turn it over. You can already guess the shape of the cat!
- Corner, which remained from above, it is necessary bend.
- Further, as in Figure No. 8, ears are formed.
- The acute part of the muzzle bends up, and the resulting sharp tip rushes down again. So a nose and cheeks are formed.
- It remains to bend the lower part of the workpiece as indicated on schemes No. 11 and No. 12 - And now the cat is ready!
Important: it remains to decorate the origami. It is recommended to do this with pencils, felt -tip pens. Drawn eyes, mustache look in the case of origami more organically than glued accessories for toys.

How to make origami-rosa: master class, scheme, description
To make origami in the form of a rose with their own hands, and then presenting it as a gift is very romantic! We offer readers to the following simple scheme:
- To begin with a piece of paper in shape square It is placed the front side is down On the table.
- Now he Bends in half first vertically, then horizontally and it straightens. The resulting lines should resemble a cross.
- Further every corner superimposed on the one that is located diagonally to him.
- Then the leaflet returns again in the original position.
- Now he needs it fold in half along the horizontal line And leave in the indicated position.
- Obtained rectangle have to take For the upper corners And as if bend them inside.
- Then the upper corners are bent up. The result is a figurine of a rhombus.
- Further rhombus need expand.
- Lateral corners The rhombus follows bend inside According to the example, captured in the photo.
- Next remains straighten the petals paper flower, bend them figured At the discretion of the master.
Interesting: a rose of red paper should be made as a sign of love, from white - as a sign of devotion, from pink - trust.

How to make Origami-Korobochka: scheme, master class
Fans of giving gifts created with their own hands will certainly appreciate the box in which such gifts can be presented. About how to make Origami-Korobochka, we will tell you below:
- First of all, a piece of paper is folded in half, and then again in half. The result should be 4 squares outlined by the fold lines.
- In the same way outlive The fold lines diagonally. You need to work out all the corners.
- It’s time for everything Bend the corners to the middle. You will get a square.
- Further, this square is laid on the table as rhombus.
- Two parts of his diagonal turn around.
- Now you should raise and fold one part as indicated on the scheme 7.
- Then the protruding parts must be bent as shown In the picture 8.
- It remains bend the last protruding part - And the box acquires a complete shape.
- If you repeat the entire scheme of creating crafts and create a second such box, it will turn out lid.
IMPORTANT: For Origami, it is recommended to choose a tight sheet of paper.

How to make origami-killer sheet: description, scheme
You can make origami in the form of a maple leaflet, guided by the following scheme:
- First, a square of paper is folded In half diagonally. You only need to add up once - One diagonal line should be obtained.
- Further obtained The triangle must be straightened And put the formed square again so that it looks one angle down. That is, before the master should lie rhombus.
- Then the right side sides must be folded as indicated on the scheme No. 2 dotted.
- It will turn out what is depicted on the scheme number 3.
- Next, the workpiece must be placed so that it lay vertically.
- Upper angle need hide.
- Then the side upper corners are also bending. The bend is carried out inside.
- Further, the corners must be bent as indicated on schemes No. 7 and No. 8.
- Now it remains to do the same way a few details.
- Then the details gluing each other.
- Left glue the base-wlick Leaf - and origami is ready!
Interesting: maple leaves in Japanese culture symbolize the revival. Therefore, such origami can be considered a kind of amulet, a symbol of the beginning of something new.

How to make a frog-orgas: a master class, scheme, recommendations
To make origami, which would also jump - what could be more interesting? We offer a diagram of such a craft in the form of a frog:
- First of all, a sheet of paper folds in half on vertically the front side up. In this case, you need to try to make sure that the fold line was on the right.
- Next, the resulting rectangle bends horizontally and unfolds again.
- Now Each of the upper corners Need to attach to the horizontal line of the bend diagonally. As a result, a cross-steam line will be obtained.
- In the middle of such a cross need to do horizontal line By bending the upper square doubled.
- Now side lines should be bent towards the master, and the diagonal - from him.
- It was the turn to take up the lower square of the structure. His lower Territory Need to attach to the upper - That is, fold the square in half horizontally.
- The upper triangle should bend the lower corners up.
- Below at this stage it turned out rectangle. He needs fold the side sides towards the middle. At the same time, they should not be taken out until the middle.
- Lower part The resulting rectangle is needed again fold in half horizontally.
- At the bottom, you need to bend and bend the upper corners right there. Eventually the lower part will resemble a boat.
- Corners "Boats" sow way down.
- And then they bend to the sides as indicated on the scheme number 11.
- The lower part is then bent up and immediately begs down again as on schemes No. 12 and No. 13.
- The frog is ready! To jump, it is necessary click on the ledge below.
Interesting: it is believed that the smaller such a frog-arches, the further it can jump.

How to make origami modular: master class, tips, scheme
Fans of origami who have already tried familiar flowers and cranes can try to make origami modular. That is, a figure consisting of many small parts invested in each other like a puzzle.
The module is made as follows:
- To start rectangles are cut Small paper.
- The rectangle folds in half along the horizontal line.
- Then it folds by vertical.
- Next, the upper corners are bent down so that the sides of the rectangle come together in the middle. The triangle should turn out.
- In turn, this figure it folds along the vertical line.
- Next is with her the lower part bends On the horizontal line.
- The workpiece takes place - It turns out a triangle with raised lower edges.
- The sharp angle drops down - The triangle should bend to the lower edges.
- Then the triangle returns In the original position.
- Triangle Bends again on the vertical line - The module is ready!
Important: colored thin paper is not suitable for modular origami - it is fragile on the bends. But office and coated are more suitable.

How to make origami-lifting modular: master class, photo, schemes
In order to make origami modular in the form of a swan, we suggest using the algorithm described below. First, two modules must be put into the third pocket.


Next joins another couple of modules.

Then you need to pocket modules So, as indicated on the scheme-photo below.

In order for the design to be stable, one row of modules is better not to limit yourself. Let them be at least 3! And best - 4 or 5. In each row there may be about 30 modules.

It turns out something like skirts. You need to carefully take it on both sides, and then turn out. You will get a figure resembling silence.


Above the edges It will take a little work separately.

It was the turn to create the sixth modular row.

Now it's time make wings. To do this, wear 12 details. Then you should skip a couple of corners - and attach 12 modules again.
Important: the missed 2 corners should be removed under the mounting of the neck, and a wider area with the tail.
The next row need to do a little smaller - Let there be not 12 details there, but 11. According to this scheme, it is worth continuing to create wings until it remains one single module.

Now you need Create a tail. A similar scheme is used with a gradual decrease in the number of puzzles in each row.

Stayed neck and head with a beak. To begin with, one puzzle is simply lung in another.

Now in the same manner is formed The whole picture.
Important: the beak needs to be glued, otherwise it will seem to be “bristling”.

Left attach the neck to the body - And Origami is ready!

How to make an orgal bird: master class, tips, scheme
To make origami in the form of a bird-bearing is very simple:
- The leaflet is placed the front side is down so that the sheet resembles rombic. This rhombica has the corners must be attached to the center.
- Then received lower cornersalso applied To the center, and the design folds vertically So, as indicated in schemes No. 2 and No. 3 and turning over horizontally.
- The left upper corner bends So that the outlines of the beak are formed.
- From the right lower corner in the direction to the middle an incision is performed.
- The resulting parts next to the cut are bent up from two sides - it will be the wings of the pigeon.
- In this case, mentally, you need to continue the diagonal line from the incision until the beak of the dove. And on this line you need bend the craft. So formed tail birds and will finally take shape The body.
- A little remains bend part of the tail So, as shown in Scheme No. 6 - and here Origami is ready!
Interesting: such origami can be presented to people with whom you want to achieve understanding and reconciliation. No wonder this bird was a symbol of the world.

Initially, the Japanese - the ancestors of the origami - put them for ritual purposes. Centuries have passed - and people in the same way continue to make beautiful paper figures. Only now just for beauty. We hope that the master classes given in our article will inspire readers to such needlework.
We offer to make origami-zontik, guided by the following videos:
Those who want to make even more paper crafts, we offer to familiarize themselves with our following articles:
- About the creation of a paper house
- About the creation of a paper star
- On the creation of New Year's paper balls
- On the creation of paper sweets
- On the creation of paper tulips
- About the creation of a paper butterfly
- On the creation of a bat mouse
- About the creation of paper snowflakes
- About the creation of a boat-arches