Tunics are a universal wardrobe item. They can be put on both on the beach and on a date, combining with jeans or using as a dress. A tunic that will become the highlight of your image can be knitted - using a hook or knitting needles.
Content
With the advent of summer, all fashionistas want shine in beautiful outfits. An important attribute of both beach and everyday fashion is not only a beautiful swimsuit or short shorts, but also tunic.
In the markets and stores there is a variegated variety of such goods, but it will be a pleasant occupation tie a tunic with your own hands. In this article, we will consider a variety of options and knitting patterns of tunic.
Crochet beach tunic: photo, diagrams, description
If you have never held a hook in your hands and do not know which side to start knitting from - do not despair, all this is quite you can learn. Over time, you will have a hand well and can knit beautiful products for yourself and children.
But at first you should not take very difficult work with intricate patterns, it is better to practice in advance in simpler work. In order to correctly tie the product, you must thoroughly study knitting scheme. It will be better if your eyes have a detailed description and an approximate type of finished product.

The most important thing you need to understand is even if you pick up a hook for the first time, you should not buy to it cheap yarn. Because if you get a tolerable outfit, then a different thickness or color of the threads, which the inexpensive yarn sins, can drive all the invested work.
Also an important nuance will be correctly selected hook - He should lie well in his hand, not to be too small and sharp enough. Select the tool so that you it was convenient to keep it, and check the severity - the hook should pass well through the loops, but not to injure your hands.
The simplest knitting pattern of tunic crochet It consists of three parts. The first part is located in the chest area, so it is important to correctly measure the chest girth and add a couple of centimeters so that the future product does not constrain you in movements. For convenience, tie one line and measure yourself to understand how many loops you need to connect part No. 1.

First row You will knit air loops. After that, it will be necessary to deploy the work and start doing the second row. Initially, choose a pattern, because from the second row you will already start a viscous with the selected elements.

For your first work, you can simplify the viscous of the tunic - do not make tucks. For this, the first part will need to be tied with a length of no more than 8 cm.
The second detail It starts from the middle of the chest and ends where you determine your length. Start knitting above. In order to do the work as accurately as possible and bring all the measurements in line, it is best to do pattern. In this case, during knitting, from time to time you will need to attach your work to the pattern and verify the accuracy of measurements.

To get started, you do the second detail 2-3 air loops, three air hinges and then, if desired, knit one or two mock loops. Thus, you will knit a beach tunic to the bottom of the product, but it is important to understand what you make this part in duplicate - it will be in front of and your back.

Detail number 3 There will be directly straps of the product. It all depends on your desire and imagination - you select the desired width, length and pattern of straps. The simplest option would be a width of about 3 centimeters, where at first there will be air loops, and then nakid loops.

Your beach tunic is almost ready. Now you are in front of you four separately connected products And you need to sew them in one beautiful summer tunic. First, moisturize the knitted parts a little and put them on a flat surface, after which they they will purchase the desired shape.
After the products dry, you need sew the back and before.
Make sure that the tunic is in front and back had the same length, if initially you did not think that behind it will be a little longer. When the second detail is ready, sew it with the first, and then sew the straps.
Your beach tunic anyway will have a wonderful view, after all, you will choose a favorite color for her, a beautiful pattern and put your work and a part of the soul into the product.
Video: Crochet Beach Master Class Class
Crochet tunic for full women scheme
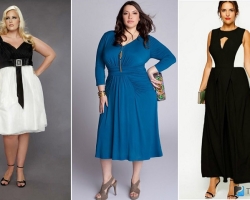
Beautiful knitted products It looks equally refined on women of any age and physique. For lush women There are many options for schemes and patterns for knitting a tunic. The only difference in the knitting of tunics for large women is the amount of yarn used.
A very beautiful outfit for full women will be a tunic associated with a crochet with a pattern called "A pineapple". Such a tunic will look modern, but at the same time it looks beautiful and elegant on ladies with magnificent forms.

The advantages of such a product are:
- Good combination with trousers or skirt
- Stylish and bright view
- When washing, the product does not sit down and does not stretch
- Excellent outfit in hot weather
- Price
It is the cost of goods that can become an important criterion in order to buy yarn And train knit at home. Ready -made knitted products, and even handmade, cost fabulous money.
Pattern "Pineapp" is one of the most beautiful knitted patterns, which can be used not only for tunic knitting, but also skirts and light cardigans.

In order to tie the product you need 500 g yarn and hook with number 2.
A tunic with such a pattern is knitted in a circle and begins with the neck. In order to make this part, you need to first 199 loops. From the first loops, it will seem to you a very complex and long process, but over time, all your movements will reach automatism.
After two hundred loops knit three rows of chains Seven loops. Further in the diagram you see how to knit the remaining five rows. With such patterns you will knit your back and before.

After that, you need to do the sleeves. You also need to knit sleeves in a circle - knit 22 loops And connect the edges of the sleeve at the notch level. The number of loops is determined depending on the desired length of the sleeve.
Tunic with Pattern "Pineapp" Undoubtedly, it will be striking not only for people who know in fashionable trends, but to everyone around them, since the beauty of the pattern cannot but draw attention to your outfit.
Video: Crochet Patter
Beach tunic with knitting needles: photo, diagrams, description
No less beautiful and stylish outfit is obtained if you use not crocheted, but knitting. Many people remember from childhood how grandmothers and mothers in the evening in front of the TV took yarn and knitted blouses, sweaters and warm socks. You yourself can tie for yourself beautiful tunic For a vacation at sea. A detailed description and scheme is provided below.

A few colors will be very beautiful in the beach tunic - It will be good to use blue, mint and white. Blue and mint will look good against the background of a sea breeze, and white - shade tanned skin.
For such a tunic, you will need 150 g yarns of three colors and knitting needles from the fourth to the sixth number. It will look very symbolic wave pattern For beach tunic.

Number of rows Each craftswoman will have different ones - it all depends on the desired length. It is important to make a pattern in advance in order to navigate in measurements and the number of loops in a row. Knit all odd rows facial loops, even - wrong.


Back and before It is necessary to knit in separate parts, after completing, sew two parts in the finished product. A prerequisite will be control over colored stripes - See that the stripes on the back and front are on the same level, otherwise the displaced patterns will not look quite successful in the finished form.


If you have not previously picked up the knitting needles, then you can perform a simpler patternwhich will not require comparing the level of lines. A tunic relevant on the beach with a wavy pattern can be tied after several training on simpler products.

Tunic with knitting needles for full women
Regardless of your physique, you can choose a beautiful pattern for the tunic A woman with magnificent forms. In order to connect such a blouse you need 600 g of yarn and knitting needles With a number four and five.
It is advisable to make a tunic is a little freer and buy for its manufacture acrylic yarn. Thus, the flowing thread will make your silhouette more slender. To give lightness and freedom of action, you can make cuts on the sides.
To get started, it is necessary make a pattern The desired product is a prerequisite for the tunic to get the right size and shape.
An excellent solution for the pattern will be payer knitting Or a pearl pattern and surface. You can look at the patterns on the schemes. Even if you knit the tunic with knitting needles, neck, sleeves and bottom better fix it with hook.


Before starting to knit the thread must be folded in half. Initially, the product will consist of two parts - in front and back.
On the back, we start a viscous with a pearl pattern. We knit six rows to them 86 loops. After that, we continue the viscosity of the smooth stitch and knit this pattern about 12-15 centimeters and four rows of a gastard viscous.

At about this level, we should have a place for the sleeves - this part we tie it with four loops at both sides. Then we look according to the scheme and alternate the patterns, as shown in the figure.
We also start in front from 86 loops and six rowsthat you need to knit with a pearl pattern and continue facial surface alternating with a pearl pattern And a gastard viscous. In more detail, the number of rows can be viewed in the diagram.

After you have made two parts of the future product, you need put the details on the pattern, moisturize a little and wait for their complete drying. Thanks to this, the product will be evenly stretched and there will be no blown or excessively compressed loops on your tunic.
In many tunics, for simplicity and convenience, the back is made simple monophonic pattern. In this case, the back will be in the same style before - contain three patterns, which will positively affect the beauty and sophistication of the tunic.
After the details are dry, it is necessary sew them in one product. If you knit this tunic according to the induced scheme, then, of course, you will get a very beautiful product that can be dressed both on work and meetings with friends.
Other options for a tunic associated with the help of knitting needles: