Crochet Master class to knit: step-by-step description with a photo.
Knitted toys are again in fashion! Knitted kids can be presented to the child, or you can add comfort in the interior. In this article we will tell you how to crochet a turtle.
How to tie a crochet tortil tortoise: step-by-step master class
If you know how to make an air loop and crochet columns, then this master class will be affordable and it's time to start knitting a tortoise tortila. This green beauty from a cartoon about Pinocchio, has a cheerful disposition and bright shell.
To work, we need: Green thread for the head and paws, white and chocolate red for the shell, wire and beads. And also a hook for the thread number and filler for parts.
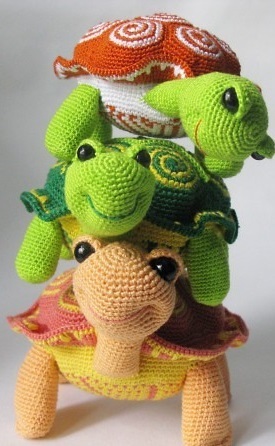
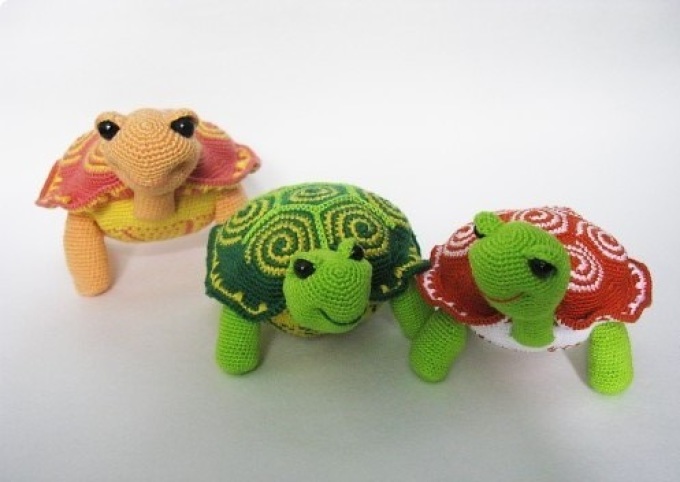
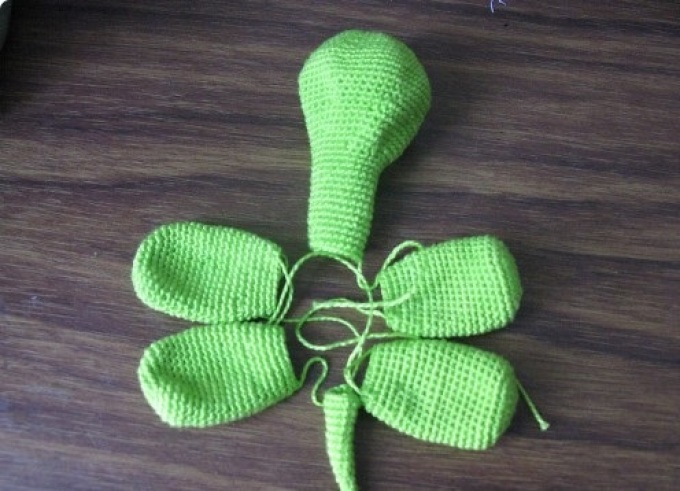
And here the photo of the turtles tormented. Please note that the size can be adjusted with the thickness of the thread, and changing the color of the thread, you get a completely new model.
So, let's start!
Do you know how to crochet a turtle? Gradually! And let's start with the head:
- We make a magic ring with Amigurumi;
- Raise 1 air loop. We knit 6 columns without crochet from the ring and tighten the tail. Subsequently, we invest between the rows and tie it. This gives additional strength;
- The next row: from each loop we knit 2 columns without crochet. By the end of a number of only 12 columns;
- 4 row: 2 columns without crochet (SBN) and from the 3rd we knit 2 columns, 4-5 columns without a crochet and an increase again;
- 5 row: 3 SBN and add: from 1 loop we knit 2 SBN and so on until the end of the row;
- 6 row: 4 SBN and add: from 1 loop we knit 2 SBN and so on until the end of the row;
- 7 row: SBN without additives;
- 8 row: 5 SBN, and add: from 1 loop we knit 2 SBN and so we knit 6 repetitions;
- It should turn out 42 columns without crochet. We knit a row without increase;
- 7 SBN and again add 2 columns from 1 loop and so 6 repetitions;
- Total should turn out 54 SBN. We knit a row without additives;
- 7 SBN, from 2 loops 1 SBN and so 6 times, until there are 48 SBN;
- Row without decreases and additives;
- 6 SBN, from 2 loops 1 SBN and so 6 times, until there are 42 SBN;
- Row without decreases and additives;
- 5 SBN, from 2 loops 1 SBN and so 6 times, until there are 36 SBN;
- 3 rows without additives and decreases;
- 4 SBN, from 2 loops 1 SBN and so 6 times, until there are 30 SBN;
- Row without decreases;
- 12 SBN, 1 decrease and so 6 times;
- 4 rows of 24 SBN on the pattern;
- 10 SBN, 1 decrease of 2 loops in 1, only 2 repetitions;
- 5 rows without decreases and additives of 22 SBN;
- 9 SBN, 1 decrease and so 2 times;
- 2 rows unchanged, close and tighten the tail.
Now we knit the legs. We describe one, then we make identical repetitions so that there are 4 pcs:
- We make a magic ring with Amigurumi;
- Raise 1 air loop. We display 5 SBN from the ring;
- From each loop 2 SBN, only 10 SBN;
- 2 SBN, 1 additive from a loop 2 SBN and so on to the end of the row;
- Repeat the previous row, an increase through 2 loops;
- 13 rows without additives;
- 2 SBN 1 Reduce: from two loops 1 SBN and so on until the end of the row;
- 2 rows without additives and decreases;
- At the beginning and middle of the row, 1 decrease;
- The final row without additives and decreases.
And it's time to crochet turtle tail:
- We make a magic ring with Amigurumi;
- Raise 1 air loop and 4 SBN, tighten the ring, we get the thread;
- 2 SBN from one loop, 4 SBN we knit without additives, 2 SBN from one loop and 5 SBN we knit without additives;
- We continue to knit in 1 increase in the same place on each new row, then there will be a tail bent. We knit until there are 14 SBN in one row. Close.
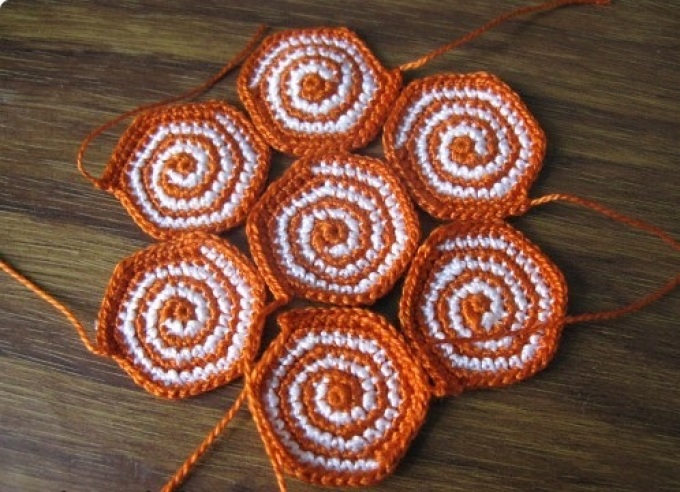
Now we move on to a slightly more complex, but very interesting moment - the first element from the striped shell by hook:
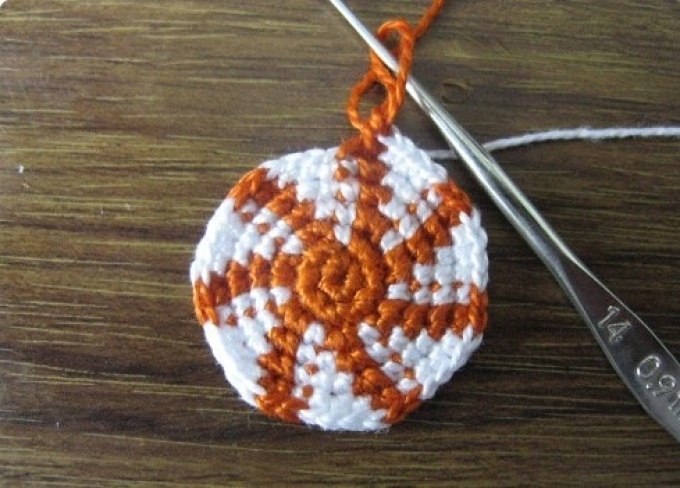
- We take a chocolate-red thread and make a magic ring with amigurumi;
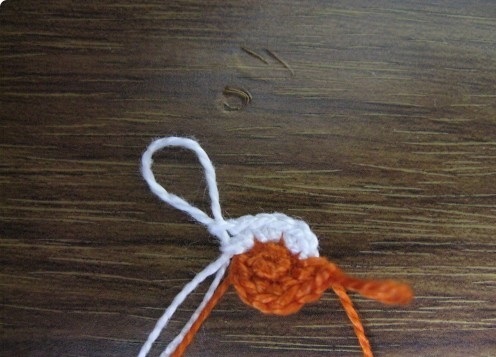
- Air loop from the ring and 6 SBN. We tighten the ring, we get the thread;
- Now we make a “snail”: additive 3 SBN with white thread from one loop;
- Additive in the same loop as with white chocolate thread, also 3 loops;
- And now we knit in a circle first with white yarn, then we duplicate red yarn and so all knitting. The first row is red: 2 SBN, 1 supplement, 2 SBN, 1 additive;
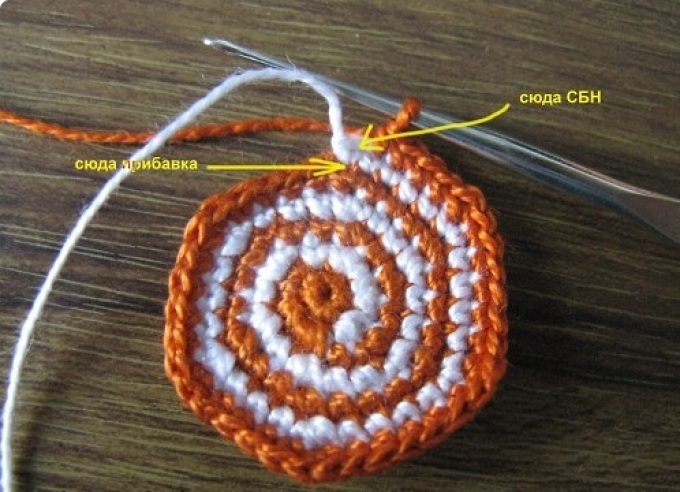
- White thread: 1 SBN, 1 additive and so 3 repetitions;
- Red thread: 1 SBN, 1 additive, 2 SBN, 1 additive, repeat 3 times;
- White: 2 SBN, 1 additive and so 3 times;
- Redness: 2 SBN, 1 supplement, 3 SBN, 1 increase and so 3 repetitions;
- White: 3 SBN, 1 additive and so 3 repetitions;
- Redness: 3 SBN, 1 supplement, 4 SBN, 1 additive and so 2 repetitions;
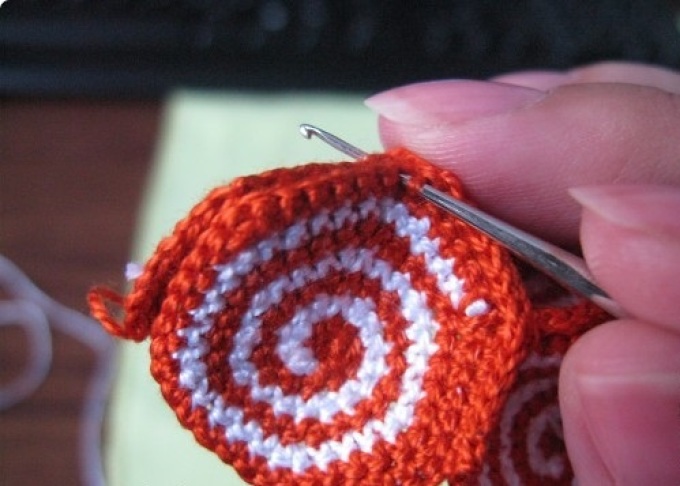
- White: 4 SBN, 1 additive, 2 repetitions, 4 SBN, connecting loop, close the loop and cut;
- Red -haired: 4 SBN, 1 additive, 5 SBN, 1 supplement, 2 repetition, 5 SBN, additive in a red thread, 5 SBN, 1 additive and so 3 repetition, close and cut off.
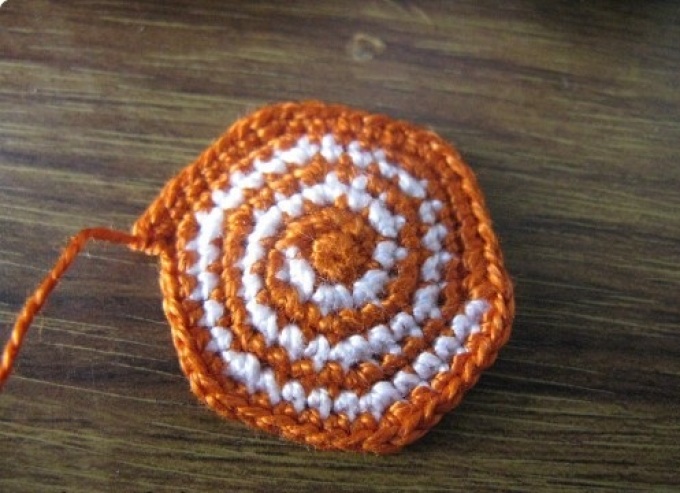
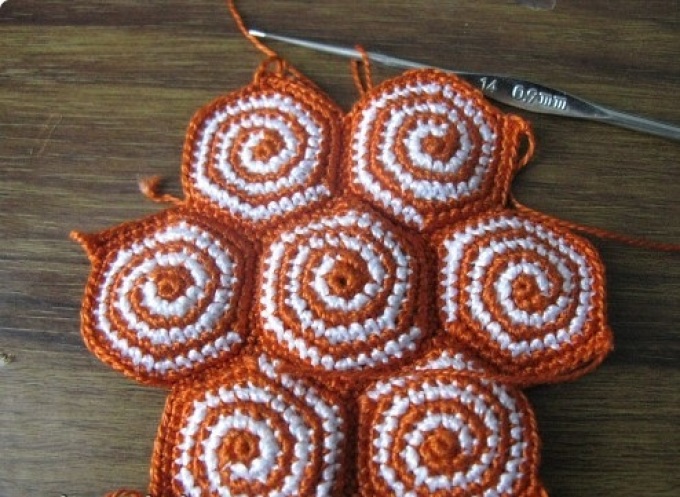
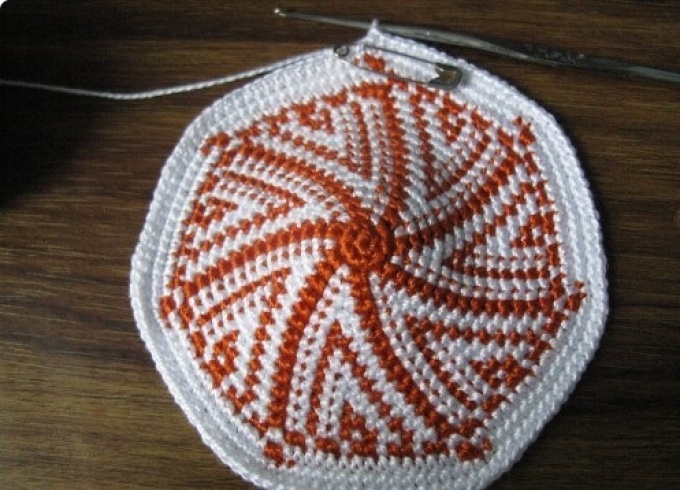
- Repeat such 7 motifs and sew in a single shell as in the photo. You can sew both crochet and thick needle (gypsy) in the photo.
- We proceed to tie the necessary element.
- We knit 1 SBN in a circle along the edge, it should be 126 loops;
- Now we knit according to the scheme: 1 loop Air Rise, 19 SBN, Reduce: 2 loops in 1 SBN, and so 6 repetitions.
Important: If you initially did not succeed 126 loops, then in the next row are simply oriented, 19 SBN is the coverage of one element, and the decrease occurs in the junction between the elements;
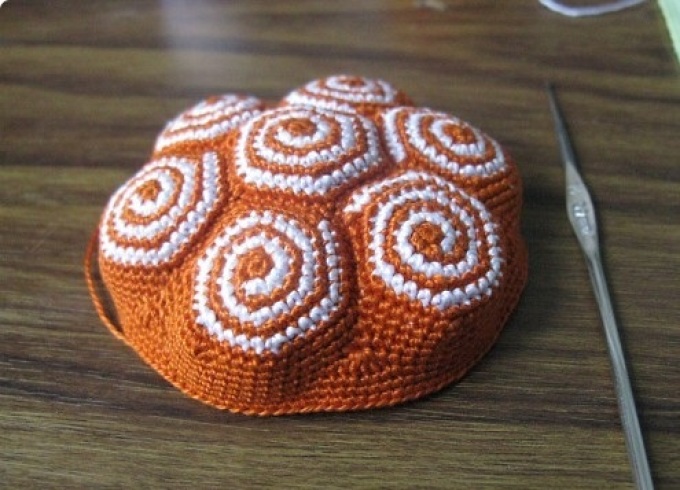
- In the previous row, you reached 120 loops. Now we go further 1 decrease, 15 SBN, decrease, 1 SBN, 6 repetitions;
- 1 half -column with crochet, 15 SBN, 1 half -column with crochet, 3 crochet in 1 loop and so 6 repetitions. It is also important to understand that crochet columns should be between elements;
- Next, 3 rows are columns without crochet and close.
- It remains to knit the tummy crocheted.
- We collect the magic ring with Amigurumi;
- Raise the air loop, knit 7 SBN;
- We connect the circle and make an increase in each loop. At the end of the row 14 loops;
- 2 SBN, 1 increase and so on to the end of the row;
- 3 SBN, 1 increase and so on to the end of the row;
- So we knit until there are 15 loops between the increase;
- We knit 2 rows without additives and leave the thread without breaking off. We will continue to knit further.

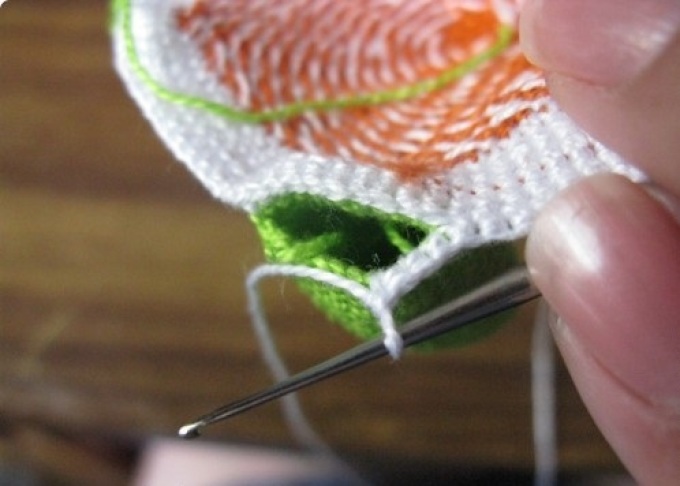
- We sew on the priority of the limb. We do this in this way: we knit a new row without increases and decreases, and at the places of connection of parts we knit with columns without crochet through two canvases. See what sewn details look like. On the one hand, it is sewn, on the other, it remains free.

- Now we knit the next row of columns without crochet, while capturing the free ends of the parts. More detailed in the photo.
- After that, we knit two more rows of crochet columns and close this knitting.
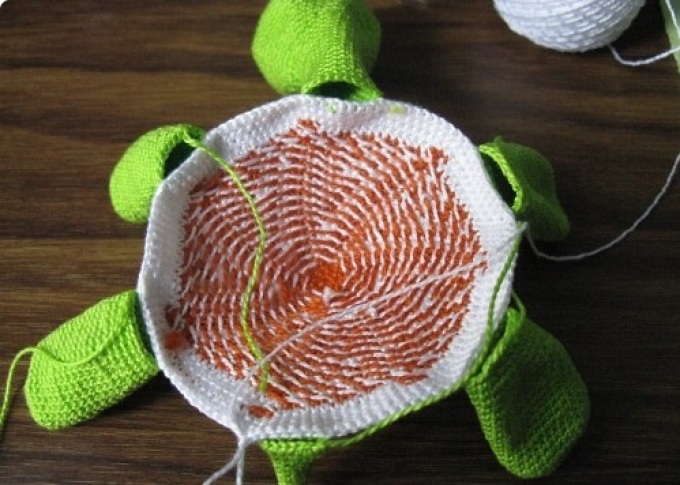
- This is what a tummy with completely tied legs, head and tail looks like.


- We cook the wire as in the photo.
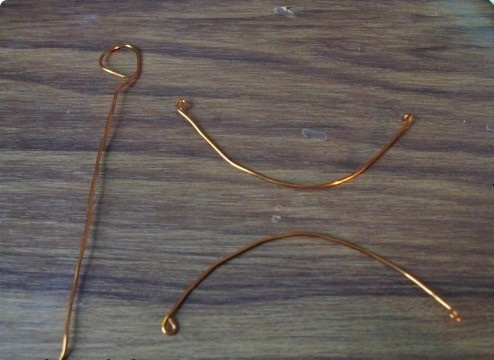
- See how to insert the frame correctly so that all the details are evenly stretched.
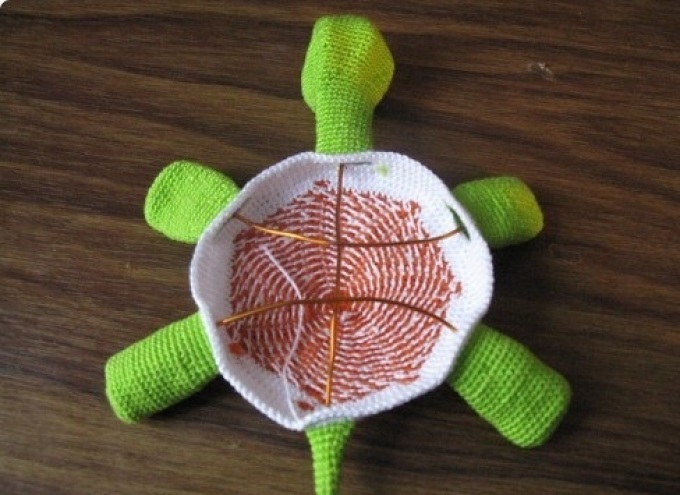
- We fill the legs, head and tail with a filler (synthetic winterizer, holofiber, etc.) and sew the upper shell. We tie with crochet columns, red thread as in the photo. We leave 3-5 cm of non-seated space, fill it with the filler and sew it completely.

- On the edge we make a decorative seam as in the photo.

- We take a white thread and knit according to this principle: 3 SBN, 2 SSN, but insert a hook into the previous row. It will turn out a simple but original pattern.

- Look at the workpiece. It already has a shape, but the last stroke remained - the face. We go to him.
- We embroider a mouth with a red thread so that the seam lay between the rows, so it will be stretched as much as possible and neat.
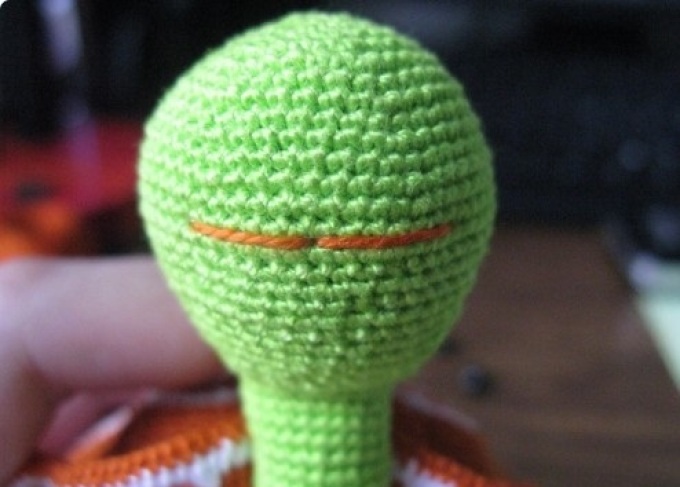
- We outline the eye line and remove the thread from the lip into the eye zone.
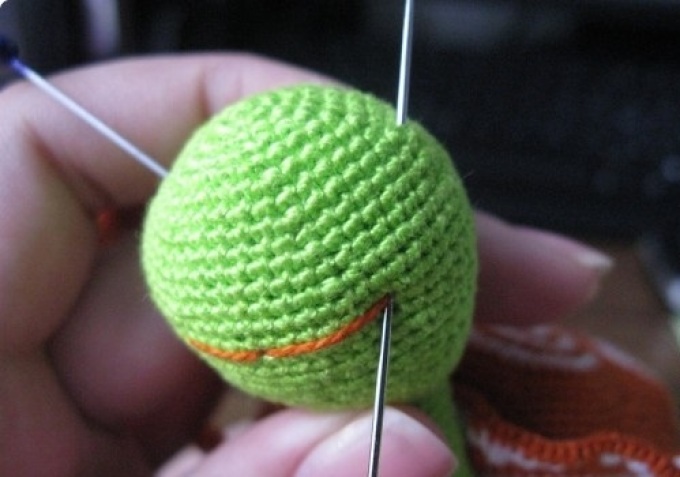
- We string the eye and tighten the thread again to the lip, from where the thread came out. We tighten it again to get a hollow.

- We remove from the second side and again penetrate the bead-eyed and tighten the thread.

- We thoroughly tie the ends, cut, and tighten the ends inward.

- As you can see, the turtle's eye “Podging”, which does not look very good. The eyebrows will not interfere with her.
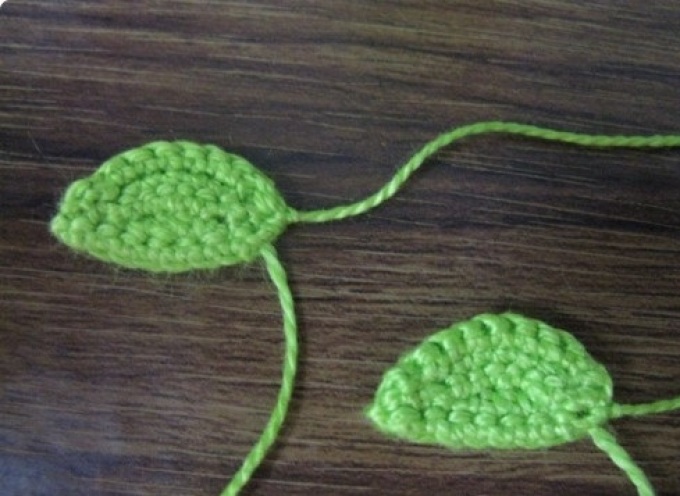
- We make 10 air loops, we knit 9 SBN on them with 2 loops, then unfold knitting. We knit 1 SSN, then 1 SBN, an increase of 1 V 2 SBN, 2 connecting loops and air loop, unfold knitting and again from the second loop: 1 SSN, 5 SBN, 3 connecting and the tip for sewing.

- Now we pin the edge with needles to the product and sew it with a needle.

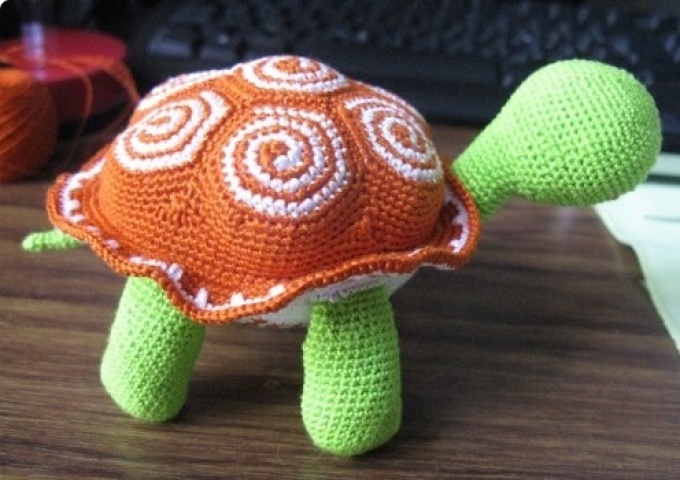
The turtle is ready!
And in conclusion, we suggest watching a video master class on how to crochet a turtle.