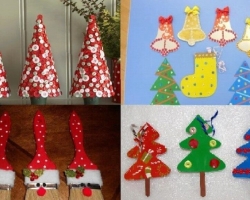
Let's talk about how to make a cone for a Christmas tree from paper.
Content
- How to make a cone made of paper for crafts and New Year's Christmas tree: method No. 1 - we will turn the paper sheet into a cone -shaped heap
- How to make a cone for crafts and Christmas trees from A4 and Watman paper: method No. 2 - use a template
- How to make a voluminous cone for crafts and Christmas trees with the base: Method No. 3
- How to make a cone for crafts and Christmas trees: method 4-Papier-Masha and threads method
- Additional actions to create a paper cone
- Video: How to make a cone from a sheet of paper, a Whatmana or cardboard with your own hands?
Consider 4 ways to make a cone:
- A sheet of paper will wrap in a cone -shaped cook
- Using the cone template, we will make it for a Christmas tree from paper
- We apply a template with the base
- We apply the volumetric workpiece-the papier-mache method.
How to make a cone made of paper for crafts and New Year's Christmas tree: method No. 1 - we will turn the paper sheet into a cone -shaped heap
A simple and probably known way to the majority.
Many of us in childhood did in this way the boats for seeds. Take a large (depending on the request) square sheet of paper and roll it into a bag, as shown in the figure:

- You can roll it stronger if you need a narrow cone from a narrow base at the base.
- Stick on the seam with glue or bilateral tape. The main thing is that the seam is glued tightly.
- Next, cut the resulting protruding edge at the base. Cut it so that the base turns out to be ring -shaped and the cone is even, stably stand on a horizontal plane.
- Now the base for a future Christmas tree can be considered ready.
But, if you can’t even cut the edge of the paper sticking out at the bottom of the cone, then make a cardboard template, with which you get a neat even base of the cone.
The template is a square cardboard paper with a hole, the circumference of which should correspond to the circumference of the base of your cone. See the picture below.

You can make such a template as follows:
- Prepare cardboard paper of the desired size.
- Now outline the circle on the cardboard with a glass, plate or other device, with a diameter equal to the diameter of the base of your cone.
- Cut the hole along the line of the outlined circle.
You need to use the resulting template as follows:
- We insert the cone into the opening of the template until it stops.
- We outline the border on the cardboard with a pencil.
- We cut out the base of the paper cone along the line drawn with a pencil.
How to make a cone for crafts and Christmas trees from A4 and Watman paper: method No. 2 - use a template
You can make a cone from A4 paper or a batman for a Christmas tree by another method - using a template. We no longer have to cut the base, we can immediately make a ready -made cone in one fell swoop. To do this, follow the following actions:
- Put on the table a sheet from which you are going to make a cone, and draw a circle whose radius is equal to the height of your future Christmas tree.
- For sheet A4, you can circle a plate with a pencil, for a watman, a round pelvis. You can also use a thread, at one end of which you need to tie a pencil, on the other - carnations. Having stuck the cloves in the paper (or hold the end of the thread with your finger), draw the circle with a pencil pulling the thread (see the picture below).

- Next, draw the two lines perpendicular to each other inside the circle, along the diameter of the circumference of the cross.
- Then cut the circle along the line of the outlined circle
Now we need to determine what size the base of the cone will be, and cut the circle
- or in diameter ( cut the semicircle)
- if we want to create a very thin cone, then we cut out quadrant
- if you want to make a fairly wide cone, then you will need three quarters of the circle.
We recommend using a semicircle (the last option will be like a Chinese hat, not a Christmas tree).
As a result, we twist the resulting template in the cone and glue at the seams.


How to make a voluminous cone for crafts and Christmas trees with the base: Method No. 3
All of the above methods for creating a paper cone promise us as a result of a half -shaped figure, the thickness of the walls of which is equal to the thickness of the Watman, cardboard or other paper that you used.
But, as a rule, such cones are made with a closed basis, which cannot be said about our case. A cone with a closed bottom, that is, with a stand, is much more reliable, it is difficult to mix, for example, when gluing the decor on our artificial Christmas tree and with other actions.
For a cone with the base, we will use the next template. The parts that are indicated in green in the figure should be glued to the cone.

In order to calculate the correct radius or diameter of the base, break the circumference of the base into parts 1, 2, 3, 4 ... and put these parts on the circumference of the cone (as shown in the figure below).


How to make a cone for crafts and Christmas trees: method 4-Papier-Masha and threads method
There is another way to make a paper cone with your own hand, which will be a frame for the New Year tree. You can create a cone of any size from small to large. You will have a solid product that will not require any additional details for hardening. In this way, those who do not have a large and hard sheet can be used.

- You just need to prepare several sheets of any paper, even newspapers or sheets from magazines will suit.
- It will also be necessary to use the template in the form of a plastic cone made of foam, plastic bottle, cardboard or plasticine. Any appropriate conical body is suitable.
To make a cone from a plastic bottle, cut the bottom and neck in it. Roll the remaining canvas as shown in the figure below and wrap the product with tape.

If you find everything you need, then we will start work:
- Cut the prepared paper into small pieces (you can just tear).
- Next, we wrap the tent of the tank with polyethylene and coat it with a thin layer of glue.
- Then immediately apply one layer of chopped paper on top of the glue.
- Wait until the glue dries, then apply a thin layer of glue to your product again and again glue it with a layer of chopped paper.
- Repeat the previous action several times until you achieve the desired thickness of the cone.
- Next, carefully remove the template from the resulting paper cone.
The same option is suitable to get a frame created from threads. Just instead of chopped paper, wrap the template with threads, gluing each layer. Then remove the dried out product from the template.


Additional actions to create a paper cone
We make an additional frame for the cone
Sometimes an artificial Christmas tree needs to be installed not on the table, but on the floor, and we will need to give the cone even greater strength-suddenly someone will accidentally touch the Christmas tree with his foot. Therefore, for this case, we may need an additional frame for the cone.
Such a frame is a core made of wire or some kind of wooden stick. It needs to be installed inside the cone so that it goes from the top to the center of the base. Better yet, string at least one cardboard circle on the rod (if it is made of wire), which will be located somewhere in its central part. Accordingly, such a circle needs to cut the desired diameter.

Video: How to make a cone from a sheet of paper, a Whatmana or cardboard with your own hands?


