Scrapbooking in detail, detailed master classes of the book using scrapbooking technique.
Content
- How to make a book using scrapbooking technique?
- Fabric cover for a book using the Schopbuking technique, master class
- How to arrange the pages of a book using scrapbooking technique?
- Scrapbooking binding, master class
- How to make a bookmark bookmark?
- Creepbooking set
- Topics for scrapbooking
- Scrapbooking technique templates
- Books for book in scrapbooking technique
- How to make a book using scrapbooking technique: tips and reviews
Scrapbooking appeared in the distant Middle Ages. Our great -great -grandmothers were not yet familiar with the photograph, portraits were rarely written and occupied honorary places on the walls.
In those days, albums from their favorite quotes, phrases, poems, and sometimes sketches were made up. Note that then most decorations for scrapbooking were not bought, but were mined from the remnants of home needlework.
And if the fate that most ladies knew how to weave, sew, embroider, knead ruffles and openers can understand that each album was unique and without the opportunity to create something like that.

A little later, traces of friends began to appear in Scrapbooking albums: poems written by a girlfriend, strands of hair decorated with ribbons, and even pieces of fabric from the clothes of a lover with ardent vows of love. It is believed that at this turning point from the decoration of the collection, Scrapbooking has gained the form that is now-an individually decorated album, dedicated to some specific event.

A century later, fans of Scrapbuking saw new horizons of their work - a photograph. Since the photo was rare and expensive, a separate album was dedicated to one or two photos.

Today, in the age of Nano technology, we, like our distant ancestors, love and appreciate manual work. Small girls are very interested in mother’s albums, and having reached 8-10 years old, they themselves are mistaken for decorating cards, books, albums. Currently, in the store you can purchase many attractive tapes, fabrics and paper for scrapbooking. But you can, like many years ago, try to tie ruffles, weave small pieces of fabric, weave a lace yourself and much more. There is no such material that would not be used in this type of needlework.
How to make a book using scrapbooking technique?
To create a book, you can use the special sets in which there are blanks, and the master remains to do decoupage and decoration of pages and covers. And you can create a book from scratch, but this will take more times and effort.

Below we give a master class to create a book. It discusses the main nuances of manufacturing, variations of playing out a particular style. But this is only the basics, as soon as you master them, you can endlessly examine.
Fabric cover for a book using the Schopbuking technique, master class
To create a fabric cover, we will not need so much:
- Glue, scissors
- Cardboard is ordinary and with millimeter markings (sold in specialized stores)
- Pill and synthetic winterizer
- Rings and eyelets
We have prepared a master class of an album size of 30*30 cm, since this size is the most popular. You can create at your discretion, substituting the necessary sizes.
Cut the square 30*30 cm from cardboard.

We apply to the synthetic winterizer and cut out the same square, glue the details with each other.
Now we cut out the square from the fabric, but on each side we add a gap of 1-1.5 cm. Glue the fabric to the synthetic winterizer, bend the corners and also glue it.
Glue the outwear from the cardboard. The back (simpler) is ready. We go to that more complicated.

We cut out a square of the same size from cardboard. Draw a cardboard, finding the middle. We cut out a square for a photo or picture inside, we have 10*10 cm.
Circle along the synthetic winterizer, cut out and glue.
We go to the fabric. We cut out again with a gap of 1-1.5 cm. We apply a cardboard blank with a synthetic winterizer, circle the inner hole, and draw another rectangle of 1.5 cm less on each side. Cut out as in the photo (step 3 of the upper right angle).

Gently glue the fabric to the synthetic winterizer, first of all with glue near the window, then smooth to the edges. The same gaps of 1.5 cm should remain inside.
We turn the workpiece, lubricate the edges of the fabric with glue and glue it from the reverse side as in the photo.

We glue the photo or picture on the back, check that there are no gaps, the picture was located evenly.
Clean the back of the cardboard-form.

Only a few strokes are left. At a distance of 2 cm from the edge, make holes and insert the eyelets. It remains only to put on the rings and the cover is ready. If desired, it can be continued to decorate, but for the first time the work is completed.
How to arrange the pages of a book using scrapbooking technique?
The shell is ready, but this is only part of the book. The main thing is the pages. They have the soul and the meaning of the album. So, let's start!
We will need blanks. On a book of ten sheets we will need twenty sheets of cardboard 30*30 cm. We glue two sheets with each other with PVA glue. For uniform drying with a bed under the press.

Then the case remains for decoupage, depending on the style of the book.


Scrapbooking binding, master class
The book can be collected both on rings and a classic binding. In this chapter, in the master class we will tell you how to collect a book in binding.

The cover and pages are ready. We will immediately start the binding. We cut the strips of 30*2.5 cm. They will need to glue the pages among themselves. Cut the corners as in the photo.
We glue the pages, with the bed under the press until it dries completely. So that there is a distance between the pages in the photo, leave a uniform distance of 4 mm on the stripes between the pages, and before put under the press, put 6-7 cardboard on the pages (to fix the position).

In the edge, as in the photo, we lay gauze over the entire length and process with glue. On the apparent edges, you can lay tape, braid, ruffles, for aesthetics.

From thick paper (not cardboard) we cut out the spine. It can be either tone for the cover and strikingly different. Glue it exclusively at the edges to the sheets, leaving a small gap along the end. Otherwise, the view will be inaccurate, and the pages open only half.

We glue the sticking layer of the bandage to the cover (between the cover and the overhaul), if there was a braid, then season and glue it. Dry thoroughly, and only then fill it.


How to make a bookmark bookmark?
Depending on the style of the book, it is possible to supplement it with a bookmark. Bookmarks are especially relevant in books made in retro-style or in the style of national motives. Below is a master class of embroidered bookmarks.

On the blanks we embroider the front and back of the bookmark, cut out with a gap of 1 cm.

We bend and sew, capturing on the stitch on each side as in the photo. It turns out a strong and beautiful seam.

We steam, sew the brush and put in our book.

Creepbooking set

There are a lot of sets for scrapbooking, and we note that they greatly facilitate the work. After all, they have everything you need, and all that remains is to do beautiful decoupage. It seems too banal and such sets deprive individuality? But no one forbids to combine sets among themselves, supplement them with their details. After all, you are a free artist, and sets are only additional raw materials.

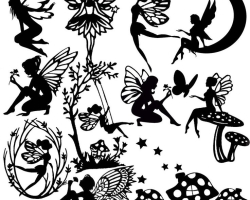
Topics for scrapbooking
A small selection of books made in different styles. Perhaps something will inspire you to new creativity.


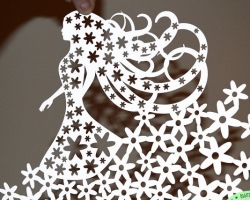
Scrapbooking technique templates
Any needlework is the costs, and usually very impressive, given that businesses on needlework today are very profitable enterprises. But it all depends on you and me. We can go and buy a ready -made set, or we can prepare everything on our own. For example, download templates and print it yourself.


Books for book in scrapbooking technique
As well as templates for the book, on the Internet there are many backgrounds for books using scrapbooking technique. We have collected only a small part of the possible collection of the master of scrapbooking.


How to make a book using scrapbooking technique: tips and reviews
- Lilia (engaged in scrapbooking year): For the first time I saw the miraculous needlework at the exhibition, caught fire. I went to the store for a set, the prices were struck, and I decided - that I could not do everything myself? I could not. But in moments of unsuccessful creation, my parents saw my desire and gave a set. With him everything is different, greatly simplifies and gives more time
- Anna (engaged in scrapbooking most of her life): once in his student years she was carried away by scrapbooking, for a long time perceived this exclusively as a costly hobby
- Then the classical situation is a decree, the child is often sick, there is no conversation about going to work, and there is not enough money at home. Kuma works in a wedding salon, offered the organizer invitations, albums and postcards. My husband and I were only grinning that it could come out of this
- And do not believe it - in a month I had complete workload with orders. When my husband was on a day off, I worked 12-15 hours a day. Now scrapbooking is my life and my business. What I can recommend to beginners: start with sets, but do not get carried away, gradually go completely to your own manufacture. This is less costly for the family budget
- If you want to save: get ready for groups and order in bulk, finding like -minded people is not difficult - exhibitions, forums, social networks