In this article, we will talk about how to make with your own hands convenient and beautiful frames for photos.
Content
- Crafts - Beautiful frames for photos with your own hands from improvised materials: ideas, photos
- DIY Framon for photos from cardboard: Master class
- How to make a children's frame of paper: templates, schemes with a description
- How to make an autumn frame in the autumn style - golden autumn: templates, schemes with a description
- How to make a beautiful felt frame: templates, schemes with a description
- How to make a carved frame for a photo of wood: templates, schemes with a description
- How to make a frame for a photo from plywood: templates, schemes with a description
- How to make a frame for a photo from a skirting board: templates, schemes with a description
- How to make a frame for photos from disks: templates, schemes with a description
- How to make a frame for a photo scrapbooking: templates, schemes with a description
- The necessary things to create a frame:
- Decoration, decorating and designing frames for photos with your own hands: ideas, decor, photo
- Collage from frames for photos with your own hands: Ideas, photo
- Master class on creating an unusual photo frame-carousel
Each photograph is a unique phenomenon, preserving a piece of some emotion. So why not design such images in a unique framework?
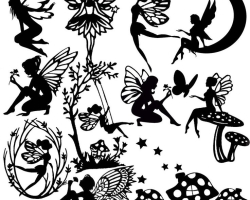
Crafts - Beautiful frames for photos with your own hands from improvised materials: ideas, photos
To begin with, we suggest that you familiarize yourself with the ideas of which photo frames can be made:


DIY Framon for photos from cardboard: Master class
For the manufacture of cardboard photo frames you need stock up on the following things:
- Corrugated cardboard
- With a knife
- Pencil
- Glue
- Decor paper - absolutely any paper is suitable
- Buttons, shells, beads
You can start manufacturing:
- From a piece of cardboard need cut the front and back of the frame. It should turn out like that HarpsesAs in this photo:

- Now is the time to decide how much Keep paper for decor.
Important: it is necessary to take into account the fact that it will have to bend inside. That is, you can not do without stock.

- Now front of the cardboard workpiece need process with glue, and then glue the paper for decor. Until the glue does not dry completely, it is impossible to proceed to further points.

- But after drying you can glue the front and back of the photo frames. Only the upper parts do not need to be glued, since a photograph will be placed through the top in the future.
- But this is not all, because it is necessary Build a support for the framework. For this purpose, you need to cut out such a detail from cardboard, which is indicated in the photo below. You can make it out of paper, then sticking on a cardboard base.

- It only remains decorate Photo frame to taste.

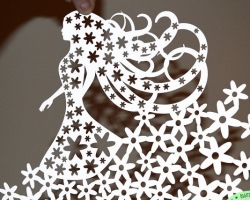
How to make a children's frame of paper: templates, schemes with a description
Such a bright photo frame will probably like children, especially girls. She will definitely decorate the interior of the children's room:

If such an idea appealed to your liking, you should stock up on the following components For its implementation:
- Paper - ordinary color, gift or even unnecessary magazines is suitable
- A wood frame that can easily be found in a needlework store. Or maybe somewhere in the house a old frame is dusting?
- Glue
Important: a hot adhesive gun is also useful, especially it is convenient for newcomers needlework.
- Scissors or stationery knife
- Toothpick
You can proceed:
- If you want to update the coverage of the frame, you can do it now, Painting her.
- From paper is needed cut the strips.

- Then all the stripes are necessary fold in half.
- Now every strip is needed twist into a roll. This is where the toothpick is useful, although you can do without its use completely. The ends each roll is needed carefully glue.

Important: do not be upset if the blanks are different in size. It is preferable that each roll is unlike the previous one.

- As soon as a sufficient amount has gained bright rolls, you can proceed to them fixations On the frame. Here the adhesive gun is useful. You can fix the details chaotically, but the strength of their pressing to the frame is required!

We attach one more with hem manufacturing photo frames:

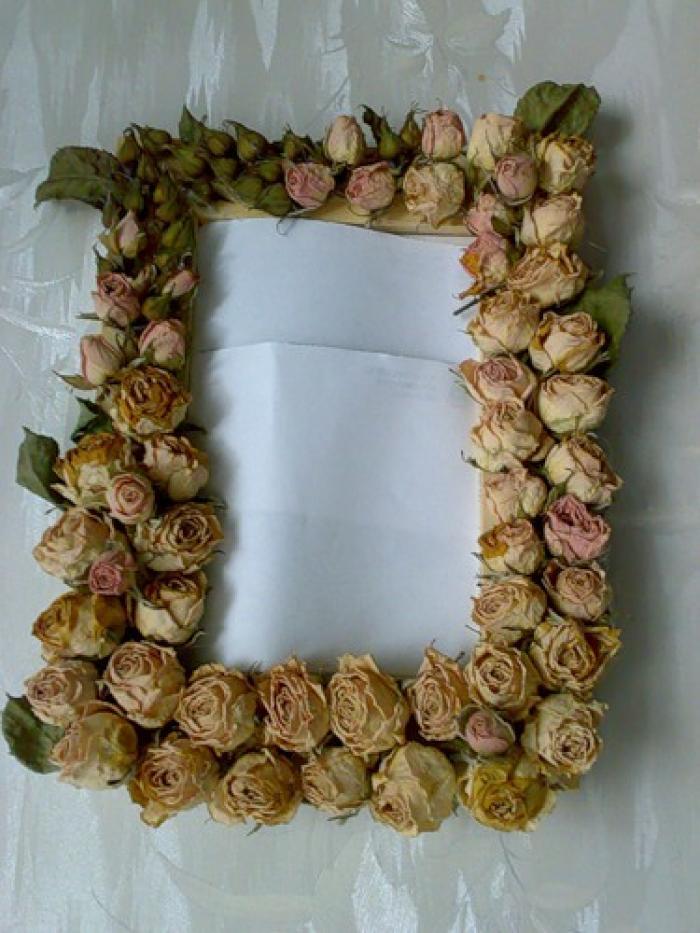
How to make an autumn frame in the autumn style - golden autumn: templates, schemes with a description
The easiest way to create a frame in honor of golden autumn is get the finished frame with leaves. The leaflets are pre -necessary smooth the iron. Then they are recommended dip one minute into hot water. However, not boiling! So the leaves can better lie on cardboard.
After fixing the leaflets on the frame, it is worth sending a craft under the presswith. You can then cover the surface with matte varnish.


If you want something not as familiar as leaves, you can decorate the frame acorns.
IMPORTANT: Burdies are recommended not to fix with the help of an adhesive gun, but with plasticine. In this case, you can always replace the part of the decor with a new one.

Yet several ideas To create an autumn frame:


How to make a beautiful felt frame: templates, schemes with a description
A felt photo frame-Magnet is quite unusual and easy to manufacture.

If the idea came to our liking I need to buy:
- Strong felt
Important: it is desirable that it corresponds to a thickness of 2 mm and size 13x26 cm.
- Tapes about 5 mm wide and about 3 m long
- Needles - one ordinary, and the other with a wide ear
- Muline threads - it is preferable that they make up one gamut with felt
- Finished magnet or magnetic tape
- Paper
- Scissors
- Glue
- Ruler
- Toothpick or awl
- Pencils are colored
- A coin

You can start work:
- On the back of the felt It is required to draw two squares. Each of them must have sides equal 13 cm.

Important: now it's time to take a coin. It is not worth ignoring this stage if you want to get a rounded frame.

- Harvesties can cut out.

- Now is the time to do template for making holes for the photo. In this example, it is presented in the form of a cloud, but in fact it can be any form.

- Hole need cut out.

- But, of course, without lining the place of the cut not enough! It will come in handy for this Two threads in two threads. Fixing occurs on the inside.

- Now the workpiece-flood must be circled on paper. On it, it is worthwhile to outline the outlines of embroidery.

It's time to do embroidery with ribbons! From green should be cut off about 50 cmBy inserting it in a needle with a wide ear.
Important: the tip of the tape must be cut at an angle of 45 degrees.

- End ribbons follows fix on the wrong side A felt workpiece with a needle with a thread.

- Next follows in advance pierce the felt in those places where it is planned to thread a needle with a ribbon. The fact is that a hard felt for the needle is too durable, so it is recommended to use an awl or, in extreme cases, toothpick.


- Now it is worth flashing the frame in the same way and blue ribbons.


- Next is needed fold both blanks for felt. They follow sake a shallow seam with the help of threads, muline.

- Left glue the magnetic tape On the back of the frame.


How to make a carved frame for a photo of wood: templates, schemes with a description
The right choice of wood for making a frame is already half the success. Highly they will look attractive Products from cherries, nuts, ash, linden. If in the future painting is planned, then the best options will be spruce and pine.
Important: it must be remembered that the softer the wood, the easier the master will make the patterns on it. This is especially important to consider beginners.
It is necessary to make a frame as follows:
- From the dick is necessary drink blanks, the thickness of which will reach approximately 26 mm. The allowances are needed minimal.

- Now you need set the edges, then gluing the workpiece.
- Drawing pattern for pattern It is worth attaching him to the tree. The pattern is transferred to the future frame.
- The contours outline a hole for posting a photo, Need to cut.
- It is also necessary to cut and patterns.
- Now you need to designate The dimensions of the foldintended for glass with a photo.
IMPORTANT: It is worth following the symmetry of the marks.
- The turn has come milling.
- Now happens alignment with direct chisels.
- You can do it The back of the frame.

We offer The following patterns. They are mainly used by masters for the manufacture of platbands, but for photo frames they are perfect:


How to make a frame for a photo from plywood: templates, schemes with a description
For such a photo frame we need:
- Multilayer plywood width at least 10 mm
- Wooden plywood saw
- Electric jigsaw
- Drill - can be either manual or electric
Important: the most important thing is to have a tree on wood.
- Scissors, measuring instruments
- Stapler for working with furniture and brackets for it
- Metal bracket or reinforced thread in order to fix the frame
- Grinding devices - fine -grained sandpaper or special grinding machines
- Wooden varnish

You can start work:
- The first step is to transfer Material templates.


- Using a drill need to do several holes, and through.
- Now In the holes you need to place a jigsaw. It is produced cutting the pattern.
Important: it is necessary to calculate the sizes of the images in such a way that when cutting them, the canvas of the saw of the electric jigsaw is placed freely. However, you can apply a hand tool, but the work will be longer.
- Now the time has come grinding.
- Next, you can proceed to painting object.
- Now you can insert a photo. If desired, you can Place it under the glass. In this case, you will have to attach the back wall, fixing it with a construction stapler or self -tapping screw.


How to make a frame for a photo from a skirting board: templates, schemes with a description
To create such a photo frame we need:
- Pieces of wooden skirting board
- Glue type "moment" or "gluing nails"
- Chancellery knife or knife for construction work
- Transporter or knock
- Marker
- Ruler
- Acrylic paints, as well as an acrylic putty for work with wood
- Cardboard - necessarily dense

Operating procedure:
- First, it is advisable to cut out cardboard basiswhich will be a little more than the desired photo.
- Next, you need to cut another part of cardboard - the front of the frame.
Important: each side of the second part should be less than the first by about 5 mm.
- Now Both parts need to be glued with each other.
- Then it is necessary to measure 4 pieces of plinth. With a stall, they need them cut at an angle of 45 degrees. If there is no stir, you can draw a corner on paper, then noting it on the baseboard by a marker.
- Now you need glue the panels to the cardboard base. If you don't want to do this basis, you can just glue the details to each other.

- If there are at the junction slots, They can easily be easily Mas it with putty.

- After the putty dries, you can proceed to painting.
Important: if there is no water-based or acrylic paint, before applying some other, cover the workpiece with PVA glue. Moreover, it is necessary to apply several layers.


- It's time to apply water -based varnish.

How to make a frame for photos from disks: templates, schemes with a description
For such crafts We need:
- DVD discs, CD
- PVA
- Black
- Cardboard of dense texture
- Pencil, ruler, scissors, tweezers
You can start work:
- From cardboard cut out frame-starting

- Now is the time to do cutting pieces of disks.
Important: these pieces should have the wrong shape.

- Next is needed pour the frame with glue, having glued colored pieces on it. It is most convenient to use tweezers. It is advisable to lay out the details not tightly to each other, because you need to fill the gaps with paint.


- Now the paint is filled with the distance between the pieces. The edges of the frame can also be covered in black.


How to make a frame for a photo scrapbooking: templates, schemes with a description
The necessary things to create a frame:
- Special paper for scrapbooking
- Cardboard
- Construction or stationery knife
- Scotch tape, glue, scissors, ruler
- Decor elements, stencils for drawings
Operating procedure:
- On cardboard celebrated The boundaries of the product
- All unnecessary is cut off -Only a fireflow frame should remain.
- Obtained the workpiece should be glued to the back of the scrapbooking paper.
Important: the excess edges of the paper must be slightly cut, and then wrapped behind the frame.
- All the edges The future frame is needed fixed with tape. The upper part cannot be glued, since a photograph will be inserted through it.
- Further from cardboard need cut a piece for the back panel of the frame.
- Now it is desirable to create the leg is anocorio For the framework.
- The most interesting stage in work remains - Decor! It can be very diverse.
We attach several options for ideas:


Decoration, decorating and designing frames for photos with your own hands: ideas, decor, photo
You can also decorate the already finished standard frames. Moreover, after decoration, unique and pretty things will be obtained:


Collage from frames for photos with your own hands: Ideas, photo
If there are many photos that you want to combine into one idea, you should look at the ideas of a collage from photo frames:


As you can see, even beginner needlemen to create an original photo frame. Such a product will give the interior a unique charm and will certainly hold the eyes of the guests. And as a gift, such a photo frame will bring a sea of \u200b\u200bjoy.