DIY toothpick crafts. Simple instructions for beginners.
Content
- What can be done from toothpicks: photo
- Light, simple crafts from toothpicks with your own hands: a master class for beginners and children, step-by-step instructions
- How to make a house out of toothpicks?
- How to make a toy out of toothpicks?
- How to make a casket out of toothpicks?
- Crafts of toothpicks and skewers
- Crafts of toothpicks and plasticine
- Crafts of toothpicks and paper
- Crafts of toothpicks and matches
- Crafts of toothpicks and foam
- Crafts of toothpicks and threads
- How to make a craft for children from toothpicks on March 8?
- How to make a craft for children from toothpicks on February 23?
- How to make a craft for children from toothpicks on May 9?
- How to make a craft for children from toothpicks for the New Year?
- Video: dome of toothpicks
For many of us, a toothpick is just an object of hygiene with which you can put the oral cavity in order after a dense and tasty dinner. In fact, from these thin wooden sticks you can make a lot of interesting crafts for the home.
But immediately I want to say that the crafts of toothpicks require a sufficiently strong concentration and perseverance, so it will be better if you start acquaintance with this type of creativity from the simplest and lightest objects.
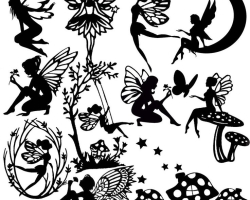
What can be done from toothpicks: photo


Toothpicks are an excellent material for home creativity. Creative people create with their help a huge number of original items that become a decoration of the house. In addition, the process of creating such crafts is an excellent alternative to passive rest at the TV. In this case, you will also be able to return your moral state to normal. But besides that you will relax, in the end you will make a thing with your own hands that can become a great gift for one of your relatives.
Moreover, such a pastime can be an excellent general -embedded leisure that will help you get closer to your child. As for what can be made of toothpicks, it all depends solely on how patient and reinforcing you are. If you wish, you can make even a large puppet house and all the furniture into it from this material.
In addition, you can make from toothpicks:
- Decorative flowers
- Balls
- Animals
- Helicopter
- Birds
- Christmas decorations
- Boxes
- Gift boxes
- Educational material for children
Light, simple crafts from toothpicks with your own hands: a master class for beginners and children, step-by-step instructions

Now we will present to your attention a master class with which you can make an easy and miniature umbrella. It can be used for children's games or decorated with sweet cocktails and fruit salads.
If you want your child to get an umbrella for a doll, then at the final stage, wrap the frame with colored shiny threads and decorate it with beads and rhinestones.
If in the future you plan to use such a craft for decorating dishes and drinks, then cover the frame with colored paper, can be corrugated.
So:

- First of all, we take thick paper and cut out two circles of the same diameter from it. We put one of them on a flat surface, grease it with glue and put eight toothpicks on it.

- We are waiting for them to fix a little, and then lubricate the second circle with glue and carefully apply it to the workpiece that we did before that. Try to lay it out so that the edges of both circles coincide with each other as accurately as possible.

- At the next stage, we begin to make the pen of our umbrella. To do this, we take and with the help of tape we fasten two toothpicks together. In order to ease your work in the future, you can already wrap the workpiece with paper or satin ribbon at this stage.

- Next, we take an ordinary awl and make a hole with its help in a blank of toothpicks and paper. Lubricate the upper part of the handle with glue and carefully insert it into the hole. After that, you will only have to wait for it to be fixed and you can proceed to the installation of the upper layer. That it will be paper, fabric or lace is solved only to you.
How to make a house out of toothpicks?

If you want the house you get the house the first time, then before starting to create it first, first draw the most accurate sketch of what you want to get in the end. If you plan to make a multi -storey building with a balcony and many windows, then estimate their dimensions in advance and cut it to the desired toothpick in a sharp knife.
Also at this stage you can paint over the part of the material that will be used to create a roof, windows and doors. In addition, do not forget to take care of the foundation on which your craft will stand. It will be better if it is made of very dense cardboard or any other dense material.
So:
- When the base is ready, take an awl and make holes in it, into which we subsequently insert the transverse racks of the future structure.
- First, they need to be lubricated with glue and only then lower it into the obtained holes. As soon as the glue dries, it will be possible to begin to remove the walls of our house.
- To do this, take the “logs” and gently glue them to a well -fixed transverse. At one time, fix 5-6 toothpicks, and then let's glue time to dry.
- Continue to withdraw the walls of the house taking into account window and doorways, and when it is done to start collecting the roof.
- To do this, make two identical rectangles from the toothpicks, and then, with the help of the same glue, glue them together.
How to make a toy out of toothpicks?

If you want to please your child, then invite him to make a well of toothpicks. To make such a toy you need glue, a piece of rope and, of course, the toothpicks themselves.
Production recommendations:
- Take four toothpicks, lay out a square from them and fix everything with glue
- Further, in the same way we form a second square and fix them together
- We continue in the same spirit until we get the base of the well
- While it will dry out, we make a roof, a columnar and support from toothpicks, on which all this will be mounted
- To create the supports, we glue three toothpicks together, and for the collarity it will be necessary to glue at least two
- To create a roof, first we form two small rectangles, and then fasten them together
- Next, we fix the columnar on the supports, wrap the rope on it and with the help of the glue we fix it all on the basis
- When these parts are well fixed, we fasten the roof on them
How to make a casket out of toothpicks?

A casket made of toothpicks can become a decoration of your bedroom or hallway. To create this craft, you will need to show a little patience and turn on your whole imagination. As for the shape of such a product, it can be different. If desired, you can make it round, square or rectangular.
But no matter what kind of ready -made crafts always remember that only the correct decor will make it beautiful. In view of this, it will be better if you try to decorate the box with an interesting pattern of small rhinestones or simply multi -colored beads and satin ribbons.
Production rules:
- Cut the base of the desired shape
- We make holes along the edge of the workpiece and insert the toothpicks into them
- We fix them for reliability with glue
- At the next stage, take a thread or thin tape and begin to surround its toothpicks
- If desired, a number of threads can be replaced with beads
- Thus, we close the entire height of the toothpicks and carefully fix the end of the decorative material
- At the next stage, we start decorating the box
- We take a decorative tape and attach it to the glue along the edge of the bottom and the top of the crafts
Crafts of toothpicks and skewers

Toothpicks and skewers are the decorative material from which you can make many interesting things for the home. For example, from this simple material you can make an original frame for family photos. To create this craft, you will need dense cardboard, glue, toothpicks or skewers, acrylic varnish and tape for decoration.
First of all, you will need to figure out how many toothpicks you will need to create your masterpiece, and then paint them with acrylic varnish. If you want the product ready to look as spectacular as possible, then apply a varnish in 2-3 layers. Yes, and this must be done before you start collecting the frame. It will be more difficult to do this at the very end as the glue will interfere with the uniform painting of the material.
So:

- At the first stage, you need to cut the skewers into the desired length and fel up them as neatly as possible. Then we take a dense cardboard and form the base from it under the frame.

- When the preparatory work is completed, we take skewers and begin to fix them on the basis of transparent glue.

- After all the skewers are glued, we take a decorative tape and fixed along the inner and outer edge of our frame.
Crafts of toothpicks and plasticine


If you think that a plasticine craft cannot be beautiful, then you are deeply mistaken. With this supple material, you can create many attractive toys that your children will definitely like. The simplest craft of plasticine and toothpicks is considered to be a spider. To create this product, you will need to form a spider torso from plasticine, and then make him legs from toothpicks.
In order for them to be as realistic as possible, make them in two stages. First, stick a whole toothpick in the body, and then close its end with a plasticine ball and already fix a smaller piece of toothpick in it. If you do everything right, then in the end you will get a spider that can stand on your own legs.
On the same principle, you can make a hedgehog. You will also need to start crafting the craft with the creation of the body, and when it will be ready with the help of toothpicks, you will make this sweet animal needle.
Crafts of toothpicks and paper
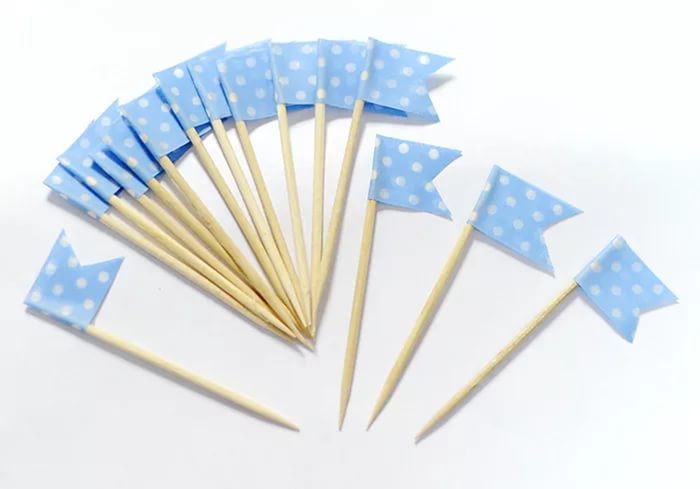
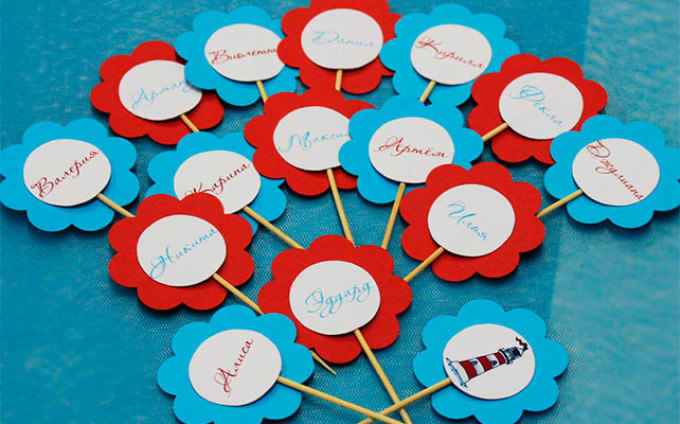
If you plan to arrange a thematic party for your guests, at which they can taste dishes of different countries of the world, then you can try to make flags for this holiday, prompting the dishes of which country they eat.
If you do not want to bother, then find the templates on the Internet, print them, cut it off and simply glue them onto a skewer. If you are ready to spend a little more time, then paint them manually and additionally decorate them. It’s just that in this case the standard flag can be replaced with a flower, a heart or some kind of little animal.
Crafts of toothpicks and matches

Now we will tell you how with the help of matches or toothpicks you can make a rather cute, puppet chair that, despite its miniature size, will not differ from the standard product.
So:
- First of all, we put two matches on an even surface (they should lie parallel to each other).
- Then we take a toothpick, cut it in half and have two parts between the two matches.
- Then we cut another piece of toothpick and place it exactly in the middle of the matches.
- Next, we form the basis for sitting and the front legs of our chair from matches.
- When all parts are ready, we begin to collect our craft.
- At the last stage, we make a seat, fix it on the base and the chair is ready.
Crafts of toothpicks and foam

From toothpicks and foam, you can make rather cute dandelions that will become an original decoration of the kitchen or living room. You can adjust the size of such a decorative dandelion using a toothpick. The more miniature you want to get craft in the end, the smaller pieces you will need to cut a wooden skewer.
Production recommendations:
- We cut into pieces of toothpick and paint them in the desired color (if desired, you can make them multi -colored)
- If you want a dandelion to be brighter, then be sure to paint in a yellow, beige or lemon color a foam ball
- Next, we take toothpicks and begin to stick them into the foam
- We try to arrange them in such a way that there is a minimum distance between them
- We continue these actions until the toothpicks close the entire surface of the foam ball
- Next, take a wooden twig or thin bamboo stick and also stick it into the ball
- For greater realism, you can attach paper or fabric leaves on the twig
Crafts of toothpicks and threads

From threads and toothpicks, you can independently make a mandala that will help you fulfill your cherished desire. All that will be required of you in this case, correctly choose the color scheme of crafts and in time for its creation to think only about what you want to get with its help. If your goal is love and passion, then use all the shades of red to create it.
If you strive to attract happiness and joy to your house, then dilute the main color with a yellow and green tint. To make such a craft you will need standard toothpicks and thick threads. At the initial stage, you will need to cross two toothpicks, fix them with a thread and twist the protruding parts of the product at least 10 times.
If you did everything right, then in the end in the center of crossed toothpicks you should get the perfect rhombus. Thus, we make another similar workpiece, and then we put them on each other and already together surround them with threads.
How to make a craft for children from toothpicks on March 8?

Using toothpicks, you can create not only a toy or decorative decoration, but also a completely edible craft, which will become a real decoration of the festive table for the smallest representatives of the fair sex. Now we will tell you how to make an edible hedgehog, which at the end of the holiday can be eaten for dessert.
For its manufacture, you will need:
- Banana or pear
- Toothpicks
- Grape
- Mint leaves
So:
- Take a pear and cut it slightly on one side (this must be done for stability)
- Find the smallest grape, put it on a toothpick and fix this workpiece on the narrowest part of the fruit
- Next, prepare needles with a beginnings. To do this, take toothpicks and string vipers on them
- We take the needles and stuck them into a pear one at a time
- We lay out the finished hedgehog on a plate and decorate everything with mint leaves
How to make a craft for children from toothpicks on February 23?

If you are a little constrained in the funds, and you still want to make a gift to your son, you can try to make a very interesting designer of toothpicks and plasticine for him. To create this original presentation, you will need plasticine, toothpicks, and a bright box where all this can be folded.
Next, you will need to take plasticine and make perfectly round balls and triangles from it. All these blanks will have to be folded into a gift box, to caress the toothpicks here and the present will be ready. You just have to show the child what figures can be made from the elements he has.
How to make a craft for children from toothpicks on May 9?


In our country, the holiday of May 9 is considered special, therefore, presentations on this day should be as memorable as possible. Of course, in this case, it is better not to give flowers, caskets or toy furniture as a presentation. If you want your baby to treat this holiday with the same warmth and respect as you, then try to make a helicopter for him, for example.
Such a craft will look especially original if you paint it in the colors of the flag of your country. If you already have such a product, then you can make a boat and decorate it with decorative flags. How to do them correctly we told at the beginning of our article.
How to make a craft for children from toothpicks for the New Year?

As you already understood, from toothpicks, you can make many beautiful things that children will definitely like. As for the New Year, for this holiday you can also make the original craft. The most pleasant thing is that such a product can be not only a decoration, but also an original gift for your baby.
So:

- Buy a ready -made foam ball or make it yourself

- Take toothpicks and stick them into the ball

- Paint crafts from a spray can

- Without waiting for it until it dries, sprinkle the product with sparkles