This material will be useful to all girls who want to be beautiful. In it you will learn about the correct technique of applying makeup.
Content
- From the basics - to the ideal: the main principles of creating beautiful makeup
- The necessary tools for beautiful makeup: what should be purchased?
- Step -by -step makeup at home: where to start?
- Tonal cream, base: how to apply correctly?
- Use of crumbly or compact powder
- Eyebrows - "frame" of the whole face: create beautiful eyebrows
- Proper use of shadows: decorate the eyes
- Application of a liquid liner or eye pencil
- Follow cilia: how to fix it correctly?
- Mascara: how to apply correctly?
- How to apply blush?
- Lipstick, shine, contour pencil - how to make the right lip makeup?
- Video: Create the perfect makeup
Makeup, made by a professional hand, is strikingly different from a make-up, made by an amateur makeup artist. In the second version, errors, the lack of accuracy, which, however, are corrected, are clearly visible. Knowing some features of the right make -up, will help even at home to beautifully decorate the face for any occasion.
From the basics - to the ideal: the main principles of creating beautiful makeup
The main principles of creating beautiful makeup:
- Skin condition control, Including a visit to a cosmetologist, the selection of care products.
- A prerequisite - skin cleansing Before applying a make -up. On a moisturized face, the result will be very tender and soft.
- Rejection of cheap cosmetics of dubious quality - The best way to take care of the face, for many years, retaining its freshness and purity, without manifesting the disadvantages on the epidermis.
- Supporting the perfect eyebrow shape - The most natural as possible, without making eyebrows too wide or thin. To remove exactly “your” form, it is better to contact a professional in order to subsequently support it.
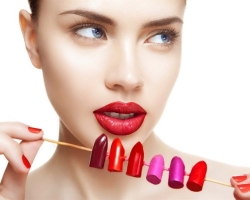
- Lips care - includes the use of balms and hygienic lipsticks. By the way, red lipstick is one of the most advantageous options for conducting experiments with images. Many believe that red is not for everyone. This is not entirely true. It is precisely your own shade that combines with your color type. So, girls with a cold type of appearance opt for lipstick on raspberry, bluish, cherry, purple shade. A warm type of appearance will look advantageous with shades: terracotta, coral, mountain ash.
- One technical beauty of makeup is not enough, its goal is to give the appearance of a girl/woman expressiveness.

For example, for the visual effect of “wide open” eyes, you can:
- Perform an eyeliner of the lower eyelid using a white pencil.
- Painting the cilia mascara, you should expand the brush to the outer corner, making a scrolling movement.
And, conversely, to make round eyes a little already, you should use a black pencil, staining the upper and lower line of the eyelids from the inside.
- Using a primer to create beautiful makeup It is quite acceptable and even welcome. However, you should not use this tool daily, as the pores are too clogged: 2-3 times a week is enough. With its help, you can: level the surface of the skin, smash small hairs, hide the flaws in the form of pimples, wrinkles, spots, scars.
- Facial correction with some accents Allows the makeup to look more natural, and to play the face with all the colors. For example, with the help of highlighter or white shadows, you can light up the hole above the upper lip, the inner corners of the eyes, the area above the cheekbones, eyebrows, the middle of the forehead, the back of the nose. Using the powder-Rumyan darker shade, you can darken the cheekbones, nose on the sides, change the front oval, “remove” the second chin.
- One of the most important rules for “home” makeup is face demarriage Before going to bed using special products and water - so the purification of the pores will be maximum.

The necessary tools for beautiful makeup: what should be purchased?
Every woman wants to be sure that the makeup, which she performed on her own at home, will come out perfectly neat and will be combined with the color of the skin, eyes and hair. To do this, you need not only a huge desire to look attractive to the skills of proper application of cosmetics, but also a minimum of tools for high -quality make -up.
Get ready for the purchase:
- Various sponges - For example, in the form of a wedge - with the help of its narrow edge, you can level the base around the nose and shave it along the edge of the lower jaw; The wide side will help to distribute the base on the cheeks, forehead and chin. If you do not like synthetic materials from synthetic materials, use natural ones, not forgetting to moisturize them before use.
- Set of brushes and applicators:
- For applying powder (or powder powders)-will help to level the makeup of the face as much as possible after the foundation. You will need a wide soft brush, with which the powder will lie with a uniform layer; An excess of the product is removed by the same tool.
- For blush, use a shorter and narrow brush so that the product can be applied to a smaller part of the face.
- The purpose of the brush for shadows is a flat application of shadows forever.
- An applicator-gobka will easily apply light shadows on the eyelids (they do not need to be thoroughly aligned), as well as to the area under the eyebrows.
- Bilateral brush-shred for mascara. Using a comb, you can remove the lumps of mascara on the eyelashes before applying the second layer. A brush on the other hand is used to give the shape of the eyebrows or shading a pencil on them.
- A brush is also used for the lips, with which you can smoothly apply a layer of lipstick.

- Brovils for eyebrows - so that excess hairs do not spoil the shape and image.
Step -by -step makeup at home: where to start?
Many girls need at least a couple of dozen minutes to apply makeup, but this is not an indicator of its correct application. In order not to have to spend finances on professional makeup artists, it is necessary to spend some time to master the art of makeup at home.
Step No. 1. Preparatory actions.
The start of the lesson of a step-by-step master class-definition:
- Face shapes (oval, round, square, triangular, elongated).
- Eye (almond -shaped, with an overhanging upper age, with lowered corners of the eyes, etc.).
- Type of skin (dry, normal, oily, combined).
- Its colors (yellowish, pinkish, grayish).
Step No. 2. We select cosmetics, not forgetting to take into account the features of the skin.
You will need:
- tonal base
- moisturizing cream-spray
- primer
- correctors in a palette
- highlighter
- bronzer
- basis under the shadow
- lipstick or lip gloss
- shadows, eyeliner, eye pencil
- brush, pencil/eyebrow shadows (+ gel d/eyebrows)
- blush
- mascara
The palette is selected taking into account the time of day and the reason for which the image is created. Day makeup involves the use of pastel shades, for the evening you can opt for a more saturated, juicy gamut. Do not forget that all tones should be in harmony with the color of the skin and eyes. The same applies to the consistency of cosmetics for various types of skin: oily lungs or crumbly, and dry - based on oils.

Step No. 3. Performance of makeup in compliance with certain stages.
We:
- Clean the face
- Moisturize it
- We apply a primer
- We apply a tonal base
- Correct the shape of the face
- We mask flaws
- We make eyebrows
- We draw your eyes
- The last stroke - apply blush and lipstick (shine)
Since compliance with each stage is mandatory in the technique of makeup, they should be considered separately and in more detail.
Tonal cream, base: how to apply correctly?
This tool should be applied only by previously cleansed and additionally moisturizing the skin of the face. After that, a primer is applied, aligning the skin texture and hiding its flaws. The tone is usually applied with a brush, sponge or with the help of fingers.

Technically, “Tonalnik” is applied approximately the same, including 3 processes:
- Small application in small quantities to the area of \u200b\u200bthe nose, forehead, chin and cheekbones.
- Slightly patting the skin, the product is distributed from the central areas to the hair growth line.
- In the presence of clearly visible boundaries between the color of the skin and the foundation, it should be shaved.
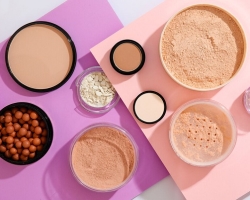
Use of crumbly or compact powder
The first option is for the house, the second is for a handbag; And then the skin tone will always be impeccably even and matte. Why? The main vocation of the powder is to absorb excess sebum, thereby eliminating the bold shine in some areas (for example, T-zone) and hiding expanded pores.

Features of applying powder:
- Bruttered - it is better to use a large soft brush. Covering the face with powder, it is worth removing its excess, slightly running a brush on the face.
- Compact - is considered a “figurative” option to always be at hand. You can apply both with a special sponge and a brush (use a brush with a removable top, which also easily fit in a bag). If the sponge is more convenient for application, apply powder, slightly touching the skin. A prerequisite for storing the sponge is its frequent washing, otherwise the skin fat from the skin will be accumulated on the powder and serve as a source of reproduction of bacteria.
Important: when applying powder, do not ignore the side areas of the face and the jaw line, since it is more difficult to see them.
Choosing the tone of powder that suits your skin color, it is recommended to apply a little powder to the lower jaw.
Eyebrows - "frame" of the whole face: create beautiful eyebrows
Beautiful eyebrows - half the success in the correct design of the face. This should be taken into account for beginners during trial attempts to perform makeup on their own.

To correct the shape of the eyebrows using a pencil, you need:
- Comb the eyebrows with hairs down.
- With light strokes, paint spaces on the growth of hairs.
- Pay special attention to the onset of eyebrow tails.
- Distribute the pencil over the entire length of the hairs with a brush.
- Apply a coherent gel.
The smoothness of all movements is important, the gaps are filled with short stitches imitating hairs.
Proper use of shadows: decorate the eyes
Shadows are used as follows:
- A damp brush is applied along the lower part of the eyebrow and shaded to the bridge of the nose.
- The next layer of shadows is applied to the upper part of the armor, stretching the narrowed tips to the temples.
- The edge is diligently combed with a special brush.
- The result is fixed with gel.
It is better to start fulfilling, using shadows, since the process will proceed faster, and the result will look much more natural.

We draw up eyes - psupporting application:
- Apply a base for eye makeup, leveling the surface of the skin on them and receiving a layer that “holds” the makeup from spreading.
- The next step is a layer of crumbly powder for the face - on the upper eyelid and under the eyes (protection against particles of shadows from getting into them). For this, a very soft brush is used.
- Apply a gobby to apply the “ivory” color to the upper eyelid, performing movements from the bottom up to the eyebrows.
- In the same applicator, put the shadows of brown in the fold of the eyes, distribute them evenly with a brush, smoothing the sharpness of the transition.
- Add using the applicator even a little light shadows along the edge of the brown.
- Smell a layer of powder under the eyes.
- With a clean cotton swab with the same brown shadows, draw a line under the lower cilia to obtain a weightless effect.
Application of a liquid liner or eye pencil
You can make your eyes more or change their shape.
Those who have never used eyeliner can try the following:
- Sit in front of the mirror (lighting should be sufficient).
- Take the eyeliner in the hand.
- To rest your elbow on the table/dressing, providing your hand with a stable position.
- Gently draw a thin line in the upper eyelid, slightly thickening to the outer corner of the eye (it is recommended to look at the lower fragment of the mirror).
- Do not look up for a few seconds, waiting for the drying of the paint.
Important: eye eyeliner is applied on top of shadows, in mascara to paint in mascara.

To use a pencil for the eyes, alternately on the upper and lower eyelids with a pencil, a soft line is drawn, as close as possible to the cilia line. In order for the effect to be always 100%, pull the pencil every time before using it.
Follow cilia: how to fix it correctly?
They will perfectly complement evening makeup, if you learn how to fix them.
- It is necessary to apply a drop of glue to the base, and then place the cilia on the right section of the century using forceps or tweezers.
- On the outer corners of the eyes, individual hairs of eyelashes, not bundles, look better.

Mascara: how to apply correctly?
Correctly applied to the eyelashes, can make them beautiful, and the look - attractive.
Methodology for creating perfect eyelashes:
- Apply a layer of mascara to the upper cilia.
- Care out a brush along the top of the eyelashes, performing movements up and down.
- Do the same with the bottom of the eyelashes, trying to raise them.
- The lower cilia is painted with light, but confident movements from side to side. Try not to blink so that the mascara can dry without smearing.
- Comb the cilia with a special comb, removing the excess carcass, in order to avoid sticking hairs.
- Repeat the two previous manipulations to achieve the maximum effect.

How to apply blush?
The presence of a natural blush on the cheeks, transforms his face, giving him freshness, making young and emphasizing on reliefs. The following rules will help this:
- When choosing a shade and saturation of blush, take into account the natural complexion. For the skin of a cold shade, the entire pink gamut is suitable, for warm-peach and beige-brown.
Remember! If you:
- Blonde, with a cold skin tint-use pale pink blush.
- A blonde with a warm skin tone is suitable for dark pink gamut.
- Brownfish with dark hair and a cold skin tone use a cold rose shade; Dark hair combined with a warm skin tone is a pinkish-brown gamut.
- Red hair + cold skin tone - a soft shade of peach.
- Red -haired beauties with warm skin are used warm tones of peach.
- With dark hair with dark skin, brown blush of warm shades look perfect.
- Girls with black hair and dark skin are recommended a terracotta gamut.
- Apply blush to certain areas, depending on the shape of the face:
- with an oblong type of face - on the top of the forehead, chin and cheekbones.
- triangular - on the "apples" of the cheeks and the upper area of \u200b\u200bthe forehead on the sides.
- pie -shaped - on the lower area of \u200b\u200bthe cheeks.
- oval - only for cheekbones.
- round - on whiskey and cheeks.
- square - long strokes are applied to the sidewalls of the lower jaw, cheekbones and on the sides of the upper forehead.

Dry compact blush should be applied with a brush on top of the powder, making short, light movements; Liquid - on a foundation, removing excess using a napkin.
Cream blush appliance technique
They are good because they never completely go out of fashion. They are appreciated for the ability to instantly refresh the external condition of the skin of any type.
To achieve a similar effect, you should apply with your fingers a couple of drops of blush on the cheeks (on top of the cream for makeup) and blend to the cheekbones. If the effect is insufficient, you can add means by completing the process with a layer of powder.
Remember! Half of the originally taken number of blush will give a much better Makeap result.
Lipstick, shine, contour pencil - how to make the right lip makeup?
Pomade It is able to instantly make the face more bright, attracting attention to it. Choose a shade of lipstick in accordance with the planned image and type of appearance.
- Lip gloss - It is used separately to give the lips a slight shade or applied after lipstick, giving lips juicers.
- Pencil for lip contour -It helps to emphasize the outer border of the lips before the application of lipstick, is used on the entire surface of the lips, giving them a rich color (in this case, it is recommended to apply a little balm/lip oil on top, in order to avoid their drying out).

The master class is completed. It remains to apply lip gloss for a daytime image or a bright lipstick - for going out in the evening.
- Cover the lips with a tonal base, filling the hollows and wrinkles. Thus, the lipstick lies more evenly and holds for a long time.
- Circle the contours of the lips with a brush or pencil (the tone should coincide with the color of the lipstick).
- Distribute lipstick on the lips with light movements, then apply a repeated layer.
- Apply a drop of highlighter or shine to the middle of the lips so that they look more chubby.
Perfect makeup in a home environment is not as complicated as it might seem. It is only necessary to pay attention to the little things and not to miss important details in order to look irresistibly every day.