An article on how to quickly and unusual make a Christmas tree with your own hands. Such a craft will be an excellent decoration at home or a gift to a loved one.
Content
- New Year's tree of sweets and improvised materials with your own hands: photo
- Option of a Christmas tree with a cone made of ordinary paper and sweets: scheme, description
- Christmas tree with your own hands from colored paper: photo, description
- How to make a cute Christmas tree made of paper snowflakes and skewers for mini-shashlyk: instructions, photo
- New Year tree from paper palms: instruction, photo
- Craft - Christmas tree from the pages of the magazine
- Christmas tree from old unnecessary children's coloring: description of manufacture, photo
- New Year's Elka Topiary with your own hands from napkins: instruction, photo
- Christmas tree from a bottle of champagne with your own hands: photo
- Making a Christmas tree from plastic bottles: photo, scheme and description of manufacturing
- Ideas of creative New Year Christmas trees with your own hands from improvised materials: photo
- Video: DIY Christmas tree
An increasingly relevant gift is considered by yourself. With great interest, parents make crafts in kindergarten, school with their children, give unique things to relatives, colleagues and friends. Naturally, a Christmas tree of paper, sweets, tinsel glasses or napkins is considered the most optimal New Year's decoration at home.

Today we will get acquainted with some ways in which you can make not an ordinary, but very beautiful Christmas tree with your own hands. We will use the simplest and most inexpensive materials.
New Year's tree of sweets and improvised materials with your own hands: photo

List of materials:
- Base (cone),
- Candies,
- Tinsel,
- Glue,
- Scissors,
- Jewelry (bows, balls, stars).

For the base, you can take everything that will hold the cone:
- special figures from foam
- cardboard
- colored paper
- an empty box from the same sweets that are planned to be used as a decoration
- Everything that comes to mind and falls under the hands
Option of a Christmas tree with a cone made of ordinary paper and sweets: scheme, description

- We take any colored sheet, turn it off to get a cone, fix the edge with glue and remove the excess with scissors. The base is ready.
- We go to Mishura. Starting from the base, we pass with glue with dotted movements and from above, wrap the tinsel spirally to the very top of the head. If there is a suitable asterisk for dimensions, then you can fix it.
- Sweets are attached to the Christmas tree around, using glue or thread. It is advisable to use 1-3 colors of sweets so that it is harmonious and not pile.
- If there are some balls, bows or other jewelry, then we attach them at the very end. Specially fixing in those places where the space was visually formed.
This is the fastest way to make a Christmas tree with your own hands. The approximate manufacturing time is up to 10 minutes.
- The base at the Christmas tree can be decorated with cotton wool, thus created the “snow effect”.
- For lovers of American style, red bows around the perimeter are ideal.
- We do not limit our imagination and do as our inner voice tells us.

This is a gorgeous gift for the New Year to grandmother, teacher, aunt, sister. The most demand is such sweets as raffaello, fereerosha, although from ordinary caramelks It also turns out a sweet, sweet Christmas tree.
Christmas tree with your own hands from colored paper: photo, description

For the manufacture of a paper tree, we will need:
- Paper (the more paper will be, the better),
- Glue,
- Scissors,
- Pencil or pen,
- Decorative materials for decoration.
- We cut out a circle from the paper with the help of which we make a cone for our Christmas tree.
- The easiest option would be to paint the Christmas tree with any paints and
Add several beads for volume by fixing them with glue.
The Christmas tree is ready.
Also, after we made a cone, you can cut a huge number of small circles, each of which we attach to the Christmas tree with glue, spreading only half of it, and bend the second a little. As a result, we get a voluminous Christmas tree.


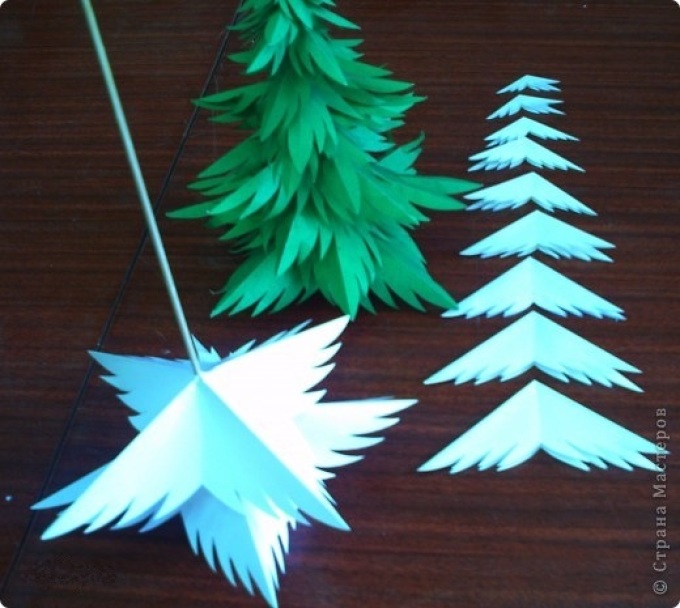
How to make a cute Christmas tree made of paper snowflakes and skewers for mini-shashlyk: instructions, photo
A version of a Christmas tree made of paper snowflakes and wooden skewers for mini-shashlyk.
- We cut out snowflakes, as shown in the figure below, different diameters. The upper smallest, and then increase the radius of the circle by 1.5 - 2 times. How much you like the splendor of the Christmas tree. The more we increase the diameter, the more magnificent the Christmas tree.
- Cut the snowflake to the center of the circle. We cut the segment at the upper snowflake 1/3 of the circle. From the second snowflake (medium) we cut out 1/4 of the circle and cut out 1/5 of the circle from the third (lower).
- We glue the edges of the snowflakes so that the cones turn out, as in the figure below.
- We string snowflakes on a skewer and get beautiful Christmas trees that are suitable for decorating the festive table and interior.
- The skewer can be stuck in fruits, dishes, into a piece of foam, as in the figure below. It all depends on your imagination.

New Year tree from paper palms: instruction, photo
An interesting and unusual can be called "Christmas tree from the palms." It can be the hands of family members or students of a school, some separate class or group.
There are many options. The ideological goal of such a Christmas tree is to unite some number of people.

In order to make a Christmas tree from the palms we need:
- glue,
- flomaster,
- scissors and
- a few sheets of paper (the amount depends on which Christmas tree in the end we want to see). Small-up to 7 palms, average-12-15, large-more than 20.
We take a person’s hand, circle the contour, cut it out and glue it on the wall, watman, cone or something else. This is how we do until the size of our Christmas tree is as arranged as much as possible.
For the top, you can cut the star, and along the entire perimeter, decorate with tinsel or small balls made of contrasting paper. Thus, we will create the effect of an elegant Christmas tree.
From such palms you can make various figures for decorating houses, kindergartens and schools.
Craft - Christmas tree from the pages of the magazine

Another of the unusual crafts is the "Christmas tree from the magazine."
A magazine with a number of pages of at least 200 and glossy pages is ideal. A thick cover can be removed. And now patience and time.
- We bend each upper right corner of all pages to us under 45 degrees.
- All the lower corners that go beyond the boundaries are wrapped up.
- We fold further pages of the magazine the same way.
- It turns out an accordion. When it comes to an end - we see an interesting Christmas tree that can decorate any office all year round.

Christmas tree from old unnecessary children's coloring: description of manufacture, photo

Do not rush to throw off the already painted magazines of your child, because the New Year is ahead and everything will come in handy. So,
- we take the usual paper cone that we already loved,
- glue,
- scissors and
- coloring, which is cut with the most long stripes, 3 cm wide.
From it we will now make a garland. We fold our strips and glue together horizontally, after that, along the length of the entire garland, we make vertical cuts half a width and with a frequency of not more than 5 mm.
We create the effect of “comb”, after which we simply glue it around the cone of the whole Christmas tree. Thus, the “cloaks of comb” turn into the “sharp needles” of our Christmas tree.
There are a lot of ways to make a Christmas tree from paper with your hands, we examined the simplest and most unusual in the same line.

New Year's Elka Topiary with your own hands from napkins: instruction, photo


I immediately want to say that the tree of napkins always differs from other crafts of its visual airiness and tenderness. Some do not immediately manage to understand what material it is made of.
Topiary lovers this option of creating a Christmas tree with their own hands will very much like. In order to make a Christmas tree of the topiary we will need the following materials:
- Napkins,
- Foam cone,
- Glue gun,
- A decorated rod that will hold our Christmas tree (often take a regular tree branch and mask it under jewelry),
- Little pot,
- Gypsum (gypsum plaster is also suitable),
- Beads on a thread or other jewelry.
- We interfere with gypsum with water, pour the mixture in a pot, strengthen the holder for the Christmas tree and put the cone of our Christmas tree on it.
- Using templates, draw circles on napkins and bending the edges, make “mini-pits” from each napkin.
- Next, each jewelry, using an adhesive pistol, apply on a cone, fill the entire space.
- You can put a few of these “mini-pins” on the top of our pot to combine our entire craft in style.
- Along the entire perimeter of our Christmas tree, we wound the tinsel (beads on the thread), everything that looks beautiful is suitable.
Our tree from napkins with your own hands is ready.

Napkins for such eliki can be of the same color or you can take 2 colors and compose them beautifully. The inclusion of your imagination in this project will give excellent results.
If you are not a lover of topiary, then a Christmas tree of napkins can be made on a regular cone from cardboard, completely repeating the above process. Another version of the Christmas tree from napkins look here.
Christmas tree from a bottle of champagne with your own hands: photo

For manufacture, we need the following materials:
- A bottle of champagne,
- Tinsel,
- Glue gun and glue itself.
A simple gift can be in an original way, if you take a bottle of champagne, glue the tinsel point point and decorate with additional accessories.
We will succeed beautiful treeinside which there will be a surprise - a bottle of champagne.

Making a Christmas tree from plastic bottles: photo, scheme and description of manufacturing
At home, the most common is the method of making a Christmas tree made of plastic bottles. The list of necessary:

- Plastic bottles of green color,
- Paper,
- Glue gun and glue rod.

- We turn the sheet with a tube to get a diameter of 1-2 centimeters.
- We cut the bottle into strips with a width of 2-5 centimeters and a length of no more than the one that wraps our paper tube.
- We cut the plastic strips perpendicular to get the "comb".
- We dive the even edge with glue and attach around a paper tube.
- The longer the needles of our Christmas tree, the more beautiful.
- It is advisable to calculate the length so that the bottom is wider than the top, maintaining the proportions of a real Christmas tree.

The craft can be left like this, or can be decorated with additional accessories of paper, cardboard or other materials.

You can hang real Christmas balls on such a Christmas tree, only small in size, so our crafts will look more real.
In conclusion, I would like to say that there are many ways to make a Christmas tree with your own hands.
The main thing is to show imagination and try.
Always gifts made by yourself delight much more ordinary figurines purchased in the store.
The production of crafts together with children brings not only joy, but also real benefits, because during such classes the mutual understanding of the parent and the child is formed, tactile sensations develop.
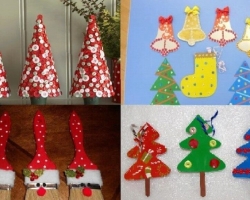
Ideas of creative New Year Christmas trees with your own hands from improvised materials: photo