

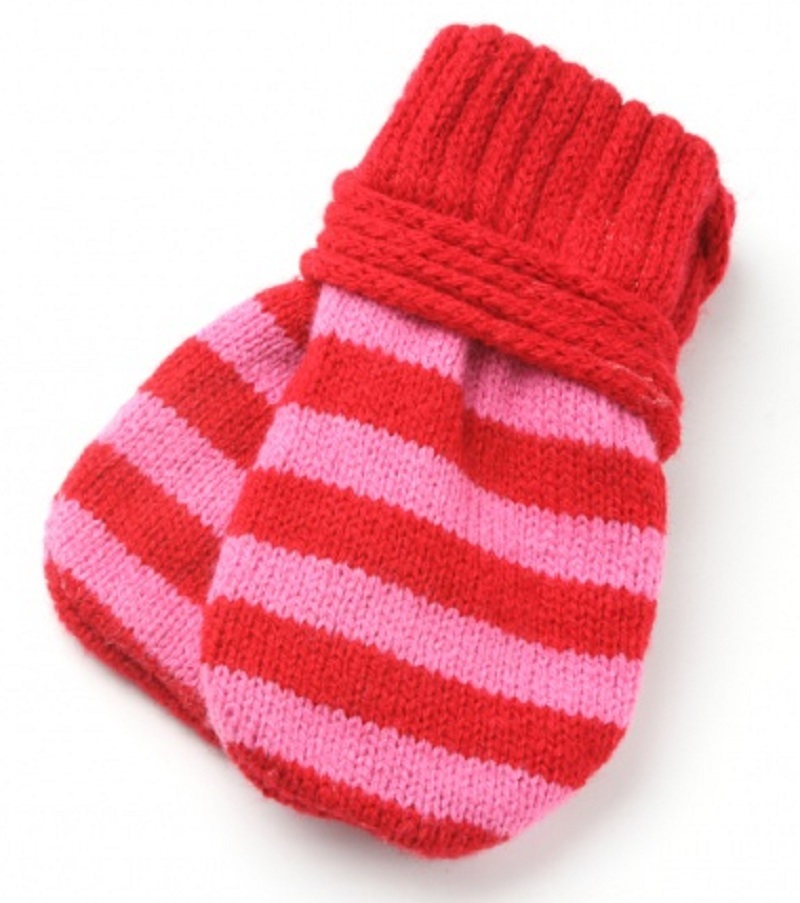
How to knit mittens with knitting needles in different techniques and with different patterns for every taste and color.
Content
- How to learn to knit mittens with knitting needles?
- Calculation of mittens loops with knitting needles
- Mittens on 5 knitting needles for beginners, a detailed description
- Mittens on 4 knitting needles for beginners, a detailed description
- Mittens on 3 knitting needles for beginners, a detailed description
- Mittens for beginners on two knitting needles, a detailed description
- How to knit an elastic band on mittens
- How to tie the mittens with knitting needles for beginners?
- How to reduce and end the mittens with knitting needles?
- How to close the loops on mittens with knitting needles?
- Mittens of a gastard knitting needle for beginners
- Mittens without fingers with knitting needles for kids: diagram and description
- How to tie children's mittens with knitting needles for beginners: diagram and description
- A simple mittens for mittens with knitting needles for beginners: diagram and description
- Video: How to knit mittens with knitting needles? | How to Knit MitTens.
Knitted mittens from mom or grandmother had almost everyone in childhood. Many people, mainly women, after years they themselves learn to knit warm mittens to their children, loved ones, or themselves. It is much more pleasant to have a thing in your wardrobe with your own hands or caring hands of your loved ones.

How to learn to knit mittens with knitting needles?
To be able to knit something yourself is a very good and useful skill. You never know when you want a new scarf, gloves, socks or mittens. There are always people who love to create something with their own hands, buying finished products in stores for them is not interesting. It is such people who create a masterpiece amazing with their beauty.
Mittens can also be beautiful and stylish. If you knit yourself, then in the right to solve absolutely everything regarding the model, yourself. And about where to start and how to learn to knit, we will write in this article.

Step 1. You need to study on quality materials, so select the most convenient knitting needles for yourself. They can be made of metal, bamboo, bones, plastic. As a rule, they choose knitting needles of metal, because they provide the desired sliding of the thread. And metal knitting needles do not catch yarn, which is very convenient.

Step 2. Choose good yarn. It all depends on what exactly you want to connect on your initial skill. If you keep knitting needles for the first time in your life, then keep in mind that it will be difficult for you to work with threads that stretch much or not stretch at all. Usually, in such cases, half -haired threads are recommended, they are rather elastic, and finished products from them keep their shape well. Beginners are also not recommended to work with threads that go in three or more additions - a large number of puffs are provided to you.

Step 3. Decide on the knitting technique and the circuit. It is best to start with the basics: a set of loops, facial loops, wrong ones. Further more. Learn to knit with different techniques. Learn the rules for knitting braids, patterns, rubber bands and other elements.
Step 4. A set of loops is the very beginning of knitting. If you make an error at this stage, then, most likely, it will not work to embody your idea of \u200b\u200bknitting the product. To correctly dial the first row of loops, use the scheme below.

Step 5. Now you need to master the technique of the front surface. This is the basis of the foundations in the knitting business.

Step 6. After you understand the technique of knitting the facial loops, proceed to the study of the wrong technique. They do not differ much from each other, but both of them need to own virtuoso.

These were the most basic knowledge that a person who wants to knit beautiful things in the future should have. Detachment them, and only after that proceed to the manufacture of a full -fledged product.
Calculation of mittens loops with knitting needles
First of all, you need to determine the size of your hand - calculate the length of the wrist, brush, fingers. If you count all sizes incorrectly, then the product will turn out to be non -casual, crooked, so pay special attention to this step.
detailed instructionsto determine the correct size of mittens, there is already on our website.
After all the measurements are made, proceed to knitting the sample. This will be needed in order to correctly calculate the number of loops.

The control sample is ready. Now attach a ruler to it and calculate the number of loops 1 cm. Multiply this number by the length from the brush to the wrist that you counted before. Divide the last number obtained into the nearest smaller number, multiple of the number 4. For example, you received from multiplying the number of loops by 1 cm by the length of the brush to the wrist the number 54. The closest number that will be divided by 4 without a trace is 52. It and it and it We take it.
Thus, the number of mittens loops is calculated.
After that, build a scheme by already removed standards. The pattern will serve you a kind of landmark.

The base part is ready. You have decided on sizes, patterns, drawings, color and texture of yarn and spokes. Now read the rules for knitting mittens for 3, 4 and 5 knitting mittens.
Mittens on 5 knitting needles for beginners, a detailed description
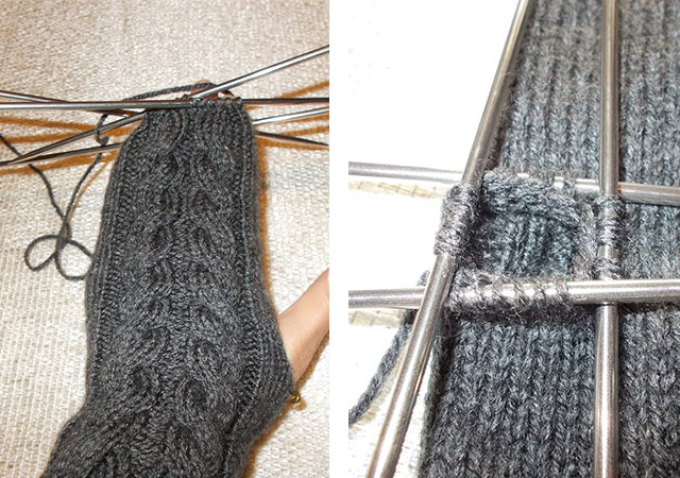
Knitting mittens on 5 knitting needles implies circular knitting. The main “frame” is held on 4 knitting needles, and with a knitting needle at number 5 everything is knitted.
The first time, cuffs are made. The cuff length is equal to the length of the circumference of your brush. The cuff is knitted according to the principle of elastic bands. One facial and one wrong loop, or 2 front and 2 wrong ones.
How to knit a mitten on 5 knitting needles:
- At first, cuffs are knitted. The number of loops is determined as indicated above.
- Two knitting needle the desired number of loops.
- Divide the number of loops into 4 equal parts and into each knitting needle (only 4) throw one part of the loops along one part of the loops.
- Close a row of loops into a circle, tied the ends of the thread among themselves.
- The height of the cuffs is from 5 to 7 cm, knit as much as you need.
- Now that the cuffs are finished, proceed to knitting the main part. Start adding one loop on each knitting needle. That is, at a certain moment you get two from one loop.
- At this pace, knit as many centimeters as you indicated earlier in measurements.
Cuffs are ready.
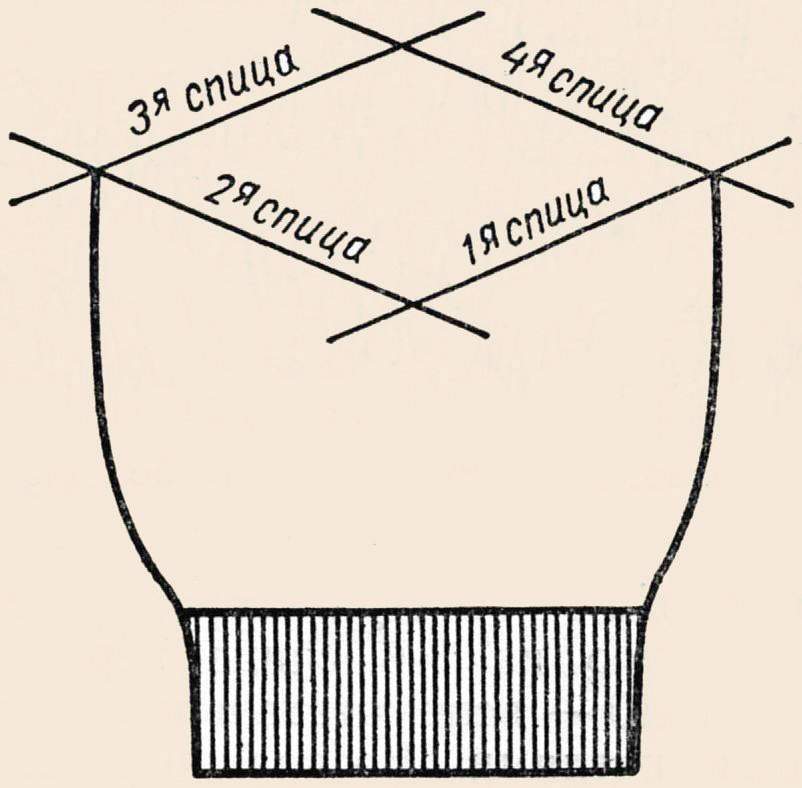
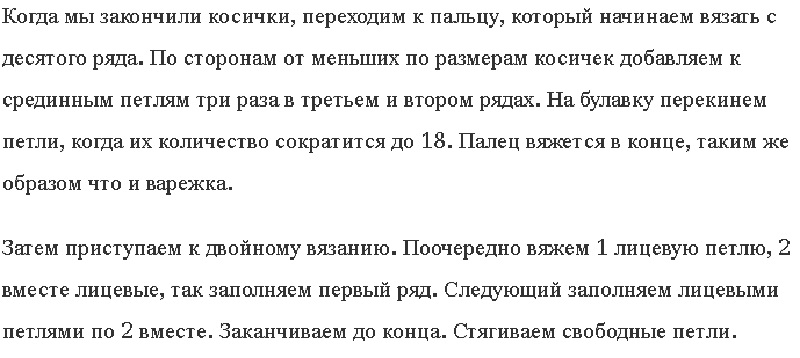
Now proceed to knitting the thumb. The opening of the thumb for the right hand is located on the third knitting needle, for the left hand - on the fourth.
- Now proceed directly to the knitting of the hole for the finger. On each spoke you have a certain equal number of loops. For example, 12. Then knit the first loop on the third knitting needle, then steal the next 10 with a pin.
- Throw 10 air loops on the right knitting needle (the number of such loops is equal to the number of loops you removed to the pin) and knit the final twelfth loop.
- Continue knitting in a circle to the height of the little finger.
- Now start reducing the number of links in this way: on the first and third knitting needle, knit two loops (at the beginning) with peroxide, and at the end on the second and fourth knitting needle, knit two joint loops over the upper shares.
- Reduce the number of links on each spoke through a row until, on each of the knitting needles, half the loops remain from the original number. From this moment, reduce the number of loops in each row.
- Slim the last 8 loops into the ring and tighten on the wrong side.
- Now start knitting your thumb. Those loops that were taken to the pin in 9, transfer to the knitting needle.
- When you knit air loops at the 10th step, the only is formed. Of these, type new loops, the number of which should be divided without a trace by 3.
- Distribute the loops on three tools (knitting needles) and knit in a circle almost until the end of the nail. Using a technique shown in step 12, start decreasing.
- Collect the last 6 loops in the circle and tie it from the wrong side.
Mittens on 4 knitting needles for beginners, a detailed description
When they talk about knitting mittens on four knitting needles, they most often mean that there are 4 knitting needles and one working. Therefore, if you want to tie mittens on 4 knitting needles, pay your attention to the previous point in an article called "Mittens on 5 knitting needles for beginners, a detailed description." Most likely, it is in him that you will find what you are looking for.

Mittens on 3 knitting needles for beginners, a detailed description
Mittens on three knitting needles are very rare, and most often these are children's mittens. Such a choice is associated with the fact that the baby’s wrist is already much already wrists of an adult, so there is no sense in an additional fourth knitting needle.
So, to tie mittens on three knitting needles?
- Dial the required number of loops (according to the table above) on two knitting needles.
- Distribute them to 3 in equal quantities. Start knit an elastic band 1 to 1 (one wrong loop, one front).
- Add other colors, if necessary, without cutting off the previous thread.
- Tie the gum thus to the end.
- Start increasing the loops according to the scheme described earlier in the article.
- If there is a drawing - at this stage you must begin to launch it. Do not forget to leave the hole under the thumb.
- After the end of the picture, knit to the tip of the little finger, if necessary. If not, begin to reduce the number of loops according to the scheme described above. Also finish knitting.
- Tie the thumb in the usual way, fix the end from the inside.
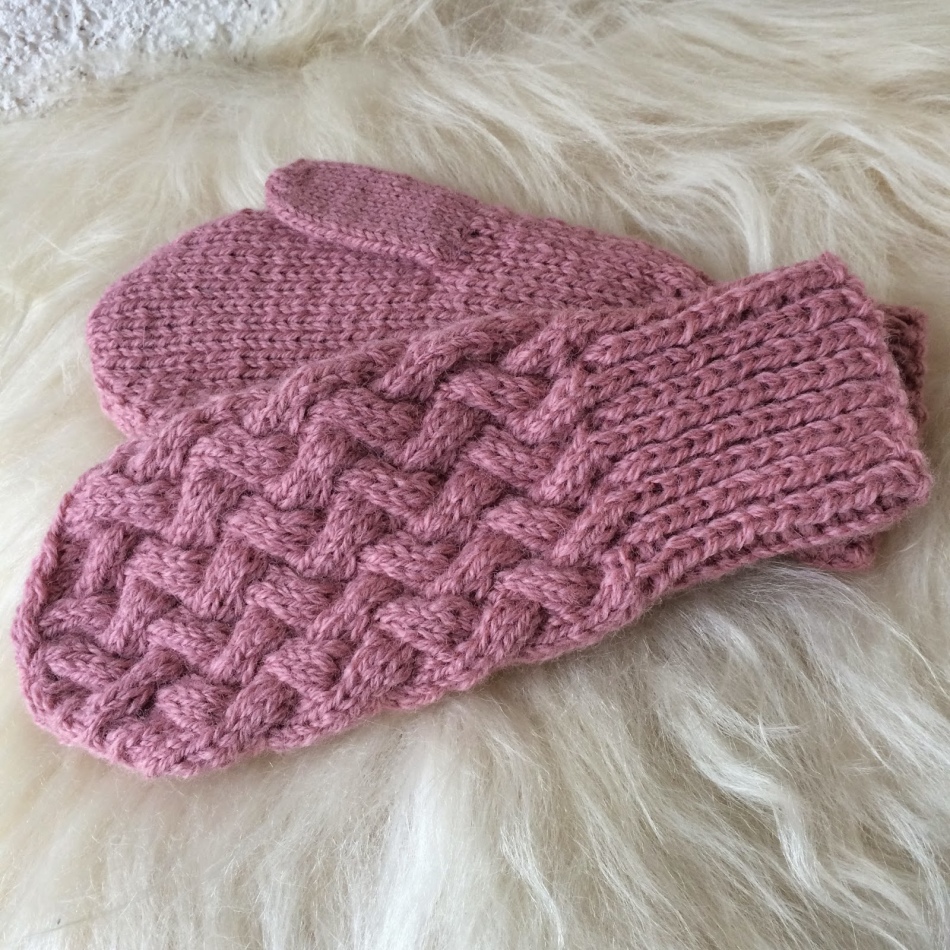
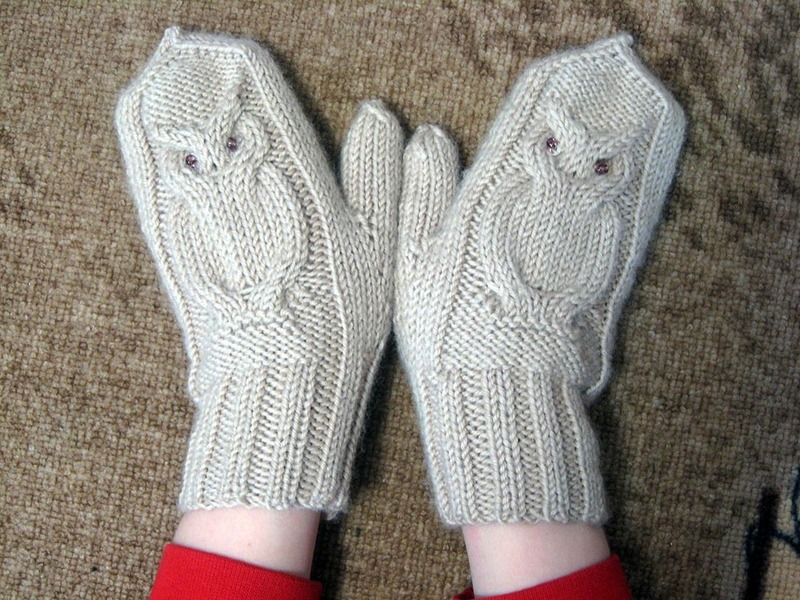
You can use any pattern. For example, such as in the picture below.

On this pattern, such interesting mittens are obtained.


Mittens for beginners on two knitting needles, a detailed description
Mittens on two knitting needles are knitted very simply. This technique is suitable even for beginners. Its essence is that the internal and back sides of the mittens are separately knitted, which are subsequently fastened with a needle or hook.
Important! Do not forget to measure the volume of your brush before knitting, as shown in article from our site.
For the back:
- Get on two knitting needles the number of loops required for the mittens (half less). How to find out the exact amount that will be used earlier in the article.
- Be sure to dial one loop on each side additionally. They will come in handy for stitching at the very end.
- Knit an elastic band 7-8 cm long.
- According to the technique selected in advance (drawing), continue knitting to the tip of the little finger.
- After that, start reducing the number of loops as shown earlier in the article (tie two loops into one).
For the inside:
- Do the same work that you did with the first half, but only until the end of the elastic band. Further the scheme will change.
- Now 3 quarters of all loops are dial to the pin.
- On the loops remaining on the knitting needles, get the same number of loops that were removed. The element is knitted from them - the future thumb.
- Those loops that remained on the pin are knitted with an even sheet to the little finger.
- Next is the decrease according to the standard scheme.
- Two sides are ready. Now you need to sew them from the inside with ordinary needles and threads.
- Mittens are ready.
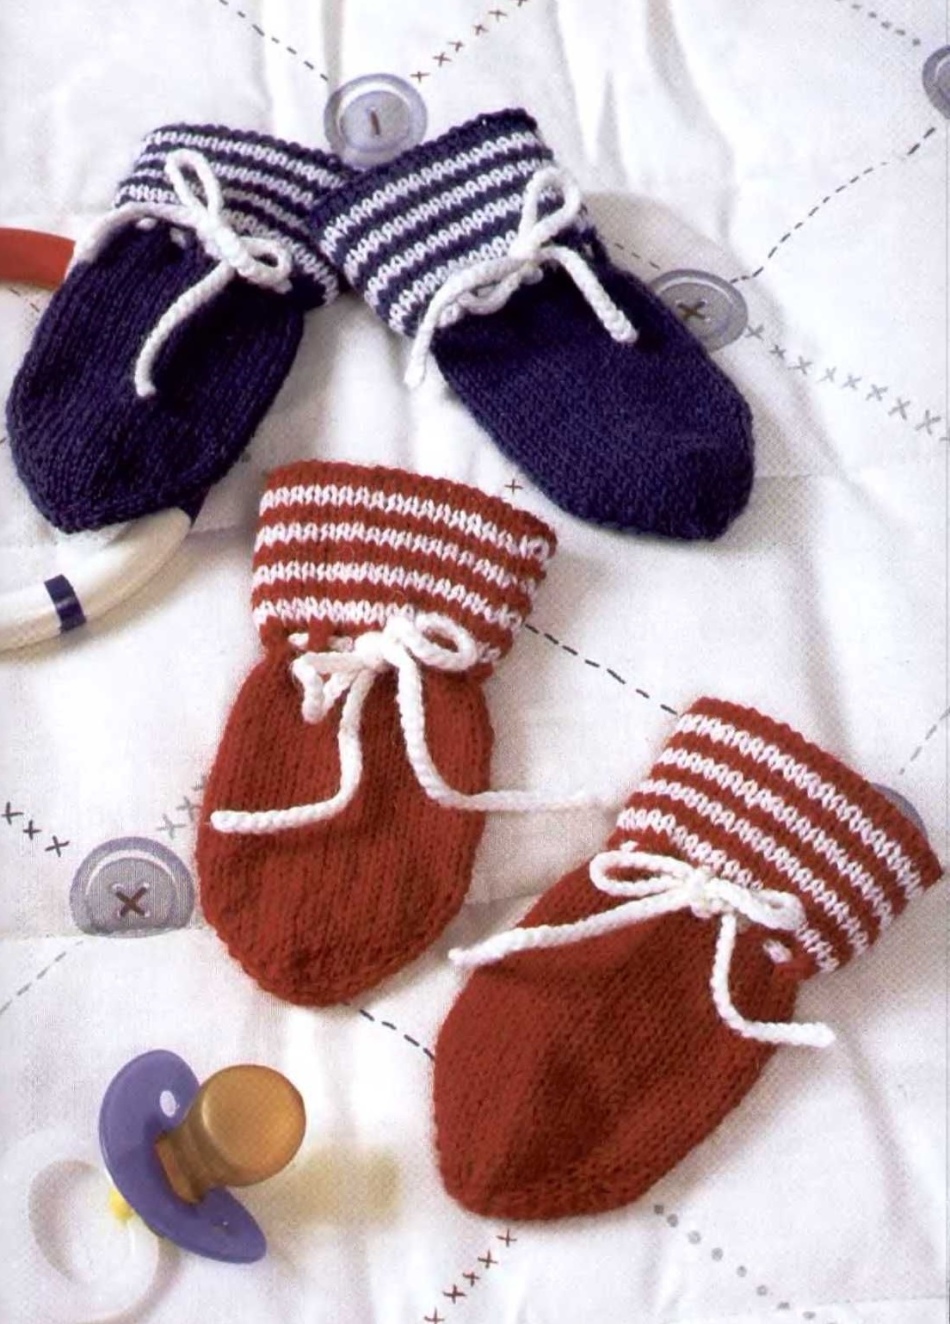
How to knit an elastic band on mittens
Gum, or cuff (cuffs) - is the name of the part of the mittens, which tightly adjacent to the wrist and reaches the brush. Glastic is needed, first of all, for better fixation of the mittens on the arm. It is thanks to the cuff that mittens do not fall at the first wave of the hand.
It is not necessary to make mittens with an elastic band. But otherwise, be prepared for the fact that the product will quickly stretch and lose the “product” look.

We have already given several options for knitting elastic bands for mittens in this article, however, we still give it.


In the event that you want to make a beautiful elastic band, but you don’t have time or skills to weave patterns, you can apply a tricky trick - you can sew the fur on the gum. Then the mittens will look completely different.

How to tie the mittens with knitting needles for beginners?
The finger on the mittens is always knitted separately from the main product, or it is returned to it when all the main work is already completed.
In this part of the mitten, take into account especially carefully if you bind the brush perfectly, but make mistakes in knitting your finger - the product will have to be tied up again.

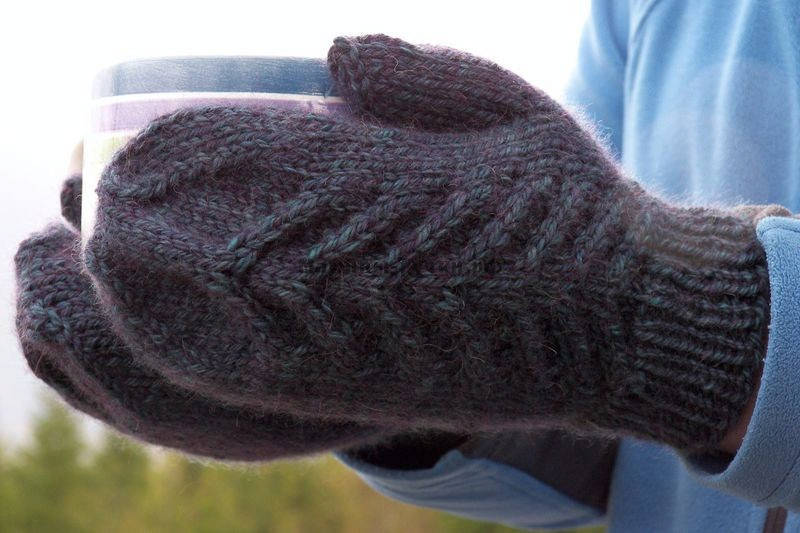
The thumb can be knitted both with a wedge and without a wedge. The mittens, in which the thumb is made with a wedge, look more accurate than those mittens, the thumb in which is made without a wedge.
The knitting pattern of the thumb for a mittens with a wedge.

The knitting pattern of the thumb without a wedge.

This is how mittens look in which the thumbs are made with wedges.

How to reduce and end the mittens with knitting needles?
There are several ways to finish knitting mittens. In this article we revealed only one. Therefore, we will further talk about some methods that you may like more.
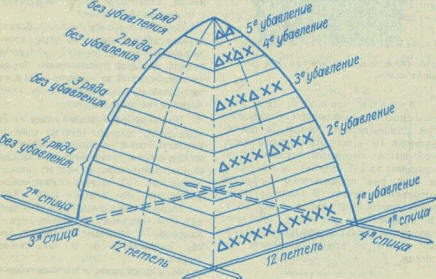
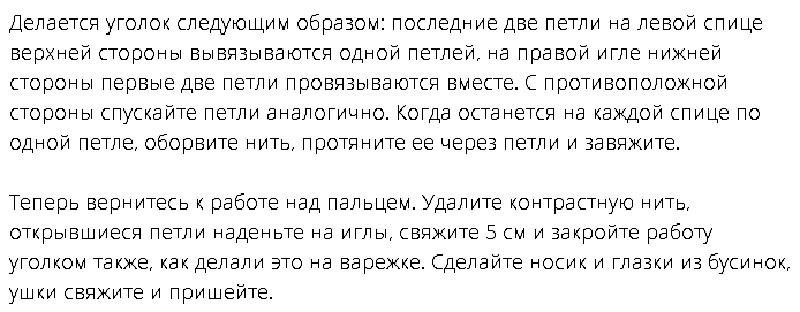
Method number 1. So that the miter’s moska comes out rounded, decreases are made only at the end and in the middle of each of the knitting needles. The last loops are collected in a ring and tightened from the inside.
Method number 2. On the first and third knitting needle, knit every 2 first loops with peroxide, stretching one loop through the second. And on even (2, 4) knitting needles, only 2 the last loops are knitted together in the usual way.
How to close the loops on mittens with knitting needles?
Mittens of a gastard knitting needle for beginners
The mitten, made in the technique of patch knitting, always consists of two halves - the external and inside. Therefore, any mittens on two knitting needles can be performed in this technique.
Now we will tell you how to knit such mittens.


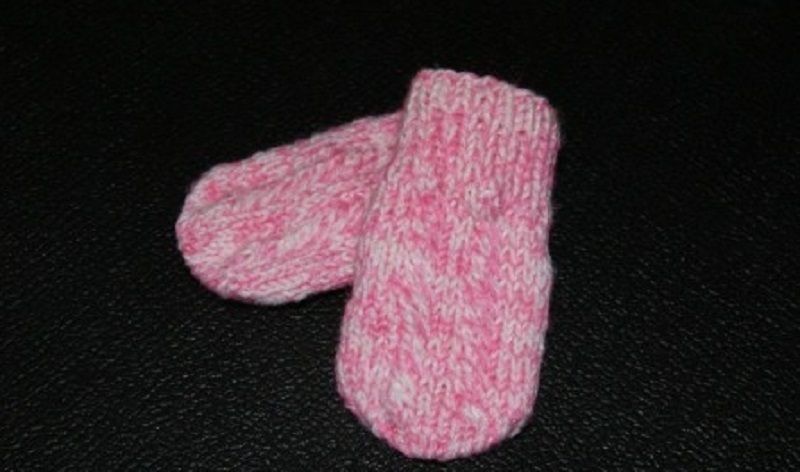
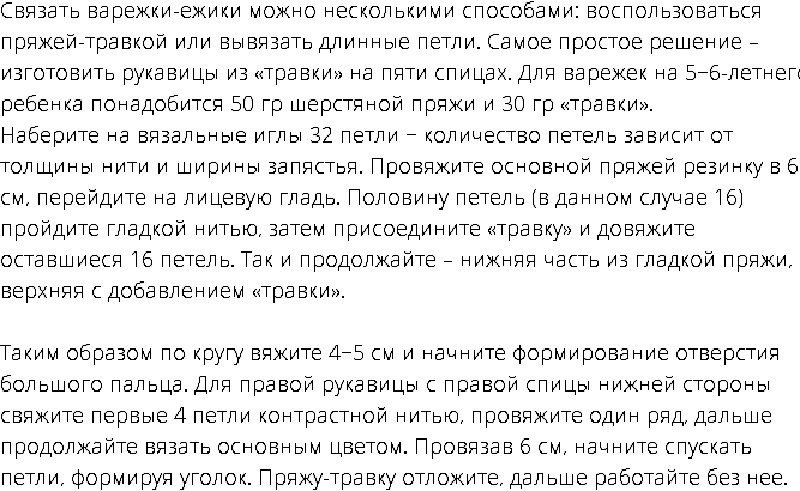
Mittens without fingers with knitting needles for kids: diagram and description
So that your baby is always warm - tie him with your own hands mittens. Varanges without fingers are knitted very small children so that children's pens do not freeze. In another way, such mittens are called scratches.
Mittens without fingers are knitted very simply. Even a beginner will bind such a product without problems in just a few hours.
Mittens without fingers are knitted on 5 knitting needles already familiar to you.
How to knit mittens without fingers for kids without fingers:
- Get 32 \u200b\u200bloops on 2 knitting needles, distribute them on 4 knitting needles.
- Tie a small elastic band about 4-5 cm long. Knit, alternating one front and one wrong loop.
- Now only about 6-8 cm with the front loops, the hole under the finger does not need to be made.
- When the main part is completed - start decreasing 1 loop on each side of the knitting needle. So knit 6 rows.
- Finish, pulling the loops into the ring and tied them on the wrong side.
We offer you several ideas on how to tie interesting mittens without a finger for the baby.
How to tie children's mittens with knitting needles for beginners: diagram and description
Children are the best. Therefore, the creation of children's mittens should be approached with a creative.
How to tie mittens with bullfinches for children?


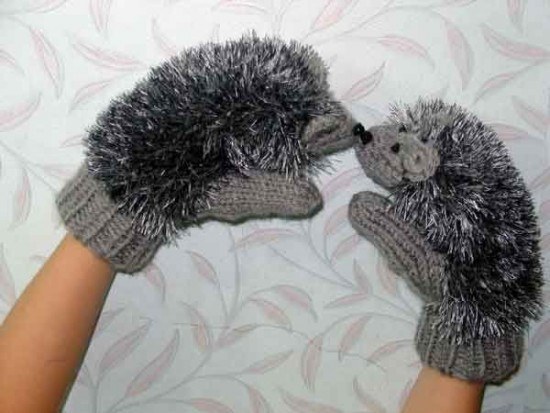
Now you will talk about how to knit mittens-hedgehogs that your child will definitely like.
Do-it-yourself mittens.
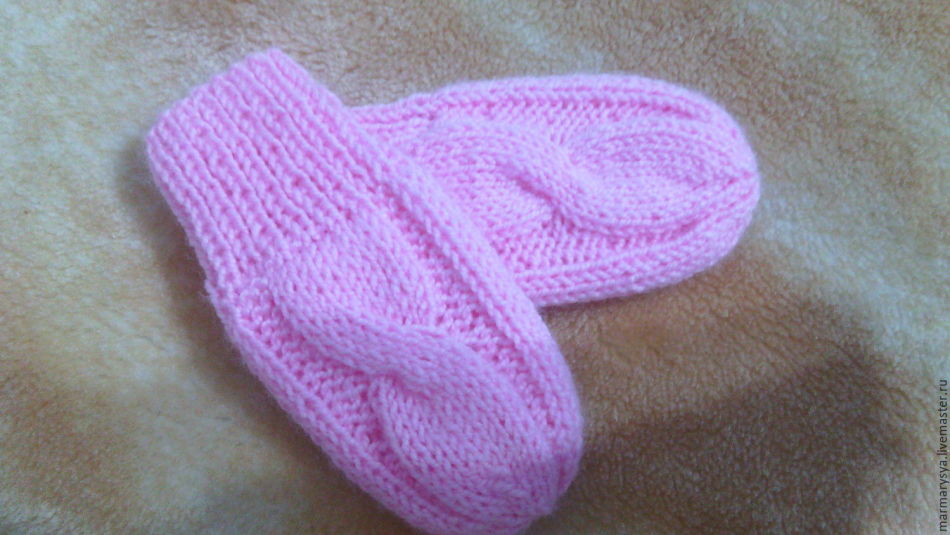
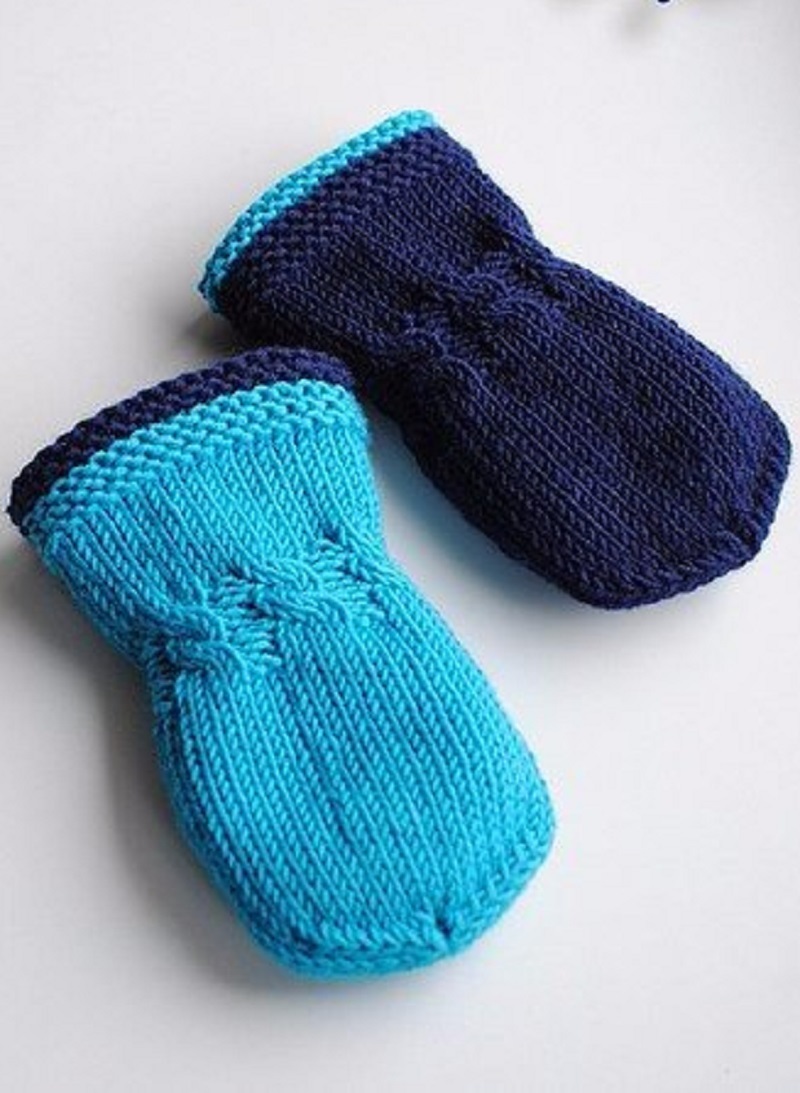
A simple mittens for mittens with knitting needles for beginners: diagram and description
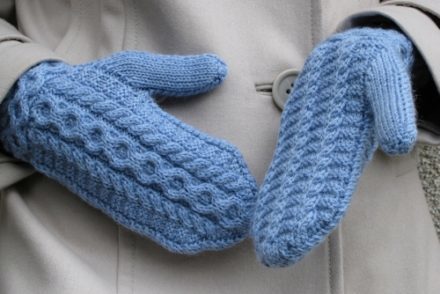
Simple patterns usually include braids, harnesses and all kinds of lines. To tie such patterns to a beginner, it is enough to adhere to any of the schemes below.
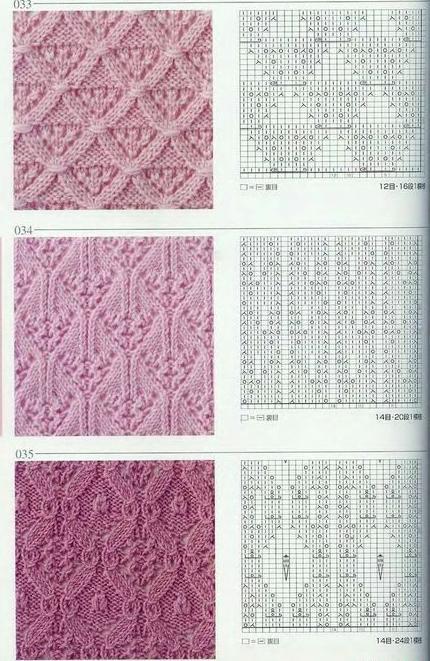
And here is a detailed description of knitting cos for mittens using knitting needles.


