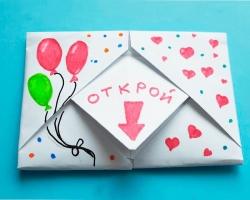
In this article you will find many ideas for creating and decorating a box for decorations with your own hands, simple and affordable options for designing a handmade box.
Content
- What can you make a simple box for jewelry with your own hands?
- How to make and arrange a box for jewelry from paper, cardboard, a bag of milk or juice: ideas, step -by -step description, photo
- Video: DIY box
- How to make and arrange a box for jewelry with your own hands from a shoe box: ideas, description, photo
- Video: How to make simple roses from ribbons without glue?
- How to make and arrange a box from a book with your own hands: ideas, description, photo
- How to make and arrange a box for decorations with your own hands from a container for eggs: step -by -step description, photo
- How to make and arrange a box for jewelry with your own hands from adhesive tape: description, step -by -step manufacture, photo
- Video: DIY decorative box
- How to make and arrange a box for jewelry with your own hands from wooden spatulas: step -by -step description, photo
- How and how to decorate the box with your own hands: ideas, description, photo
- How to arrange a casket using decoupage technique: ideas, design style, photo
- Video: Master class on decoupage caskets
What can you make a simple box for jewelry with your own hands?
The box performs two functions:
- In it you can store various jewelry, jewelry and hair accessories.
- It is a stylish element in the interior.
A beautiful jewelry box always attracts the attention of girls, women and even little girls. It is difficult to argue with the fact that women are very fond of this kind of cute little things. Although you can’t say that the box is a necessary thing in the female room, rather an unusual and beautiful box, in addition to practicality, plays an aesthetic role.
A lot of hairpins, rings, bracelets and other jewelry, without which many girls, women do not imagine their lives, can be carefully stored in the box. You can buy a ready -made box for jewelry, but we offer to make it with our own hands. Handmade box has many advantages:
- Low cost of materials.
- Unique design.
- Handmade, which is always valued.
- You can determine the optimal size and shape of the box yourself.
To make a box with your own hands, you do not need to buy some materials. You can make a beautiful thing from the materials that are found at your home. For example:
- Paper
- Cardboard
- Old shoe box
- Tetrapak from milk or juice
- Plastic bucket of mayonnaise or other products
- Container from eggs
If you have beads, buttons, colored paper, fabric remains, ribbons and other decorative elements, then you can beautifully decorate the box. It is not necessary to do everything as in the photo, you can add something of your own when decorating the box. This will make your box unique.
Handmade caskets can be done not only for yourself, but also for a gift. This cute little thing will not leave indifferent half of women and girls of different ages. You can create handmade caskets for additional earnings. If you like to fantasize, needle up, create something beautiful and aesthetic, then you will like this activity. We have collected many ideas on how to make and arrange a handmade box.

How to make and arrange a box for jewelry from paper, cardboard, a bag of milk or juice: ideas, step -by -step description, photo
Important: paper is the simplest and most affordable material for making a casket. If you use ordinary thin paper, then the box will turn out very fragile. The cardboard box will be much stronger.
No need to buy a cardboard for these purposes. The used bags from juice or milk, old covers from notebooks are suitable. Below you will find a step -by -step manufacture of a box for jewelry with sections.
For work you will need:
- PVA glue
- A sheet of dense cardboard
- 2 square bags of milk, juice
- Scissors
- Jewelry (buttons, ribbons, beads, etc.)
Step -by -step manufacture:
- Cut the square packages into six parts of the same height - these will be the sections of your box.
- Put them next to each other, as in the photo, measure the length and width.
- According to these sizes from a sheet of dense cardboard, draw the base and cover. Add 2 mm on each side.
- Also make sides for a cardboard box. They should not exceed the height of the sections.
- First glue the base of the casket: the lower base and the sides.
- Then glue the base of the section inside. Fasten them with clothespins for drying.
- On the inside of the lid, stick 2 fabric strips. They will hold the lid.
- Stick the other end of the fabric strips to one of the sides of the box.
- Leave the box until completely dry, then you can decorate it.
To begin with, all the outer sides of the casket should be tightened with fabric, colored paper, beautiful wallpaper or other material. On the inside, the lid should also be decorated with beautiful paper or fabric. Then you can decorate the casket at your discretion: stick a bow, beads, buttons, a lace ribbon.


You can do it paper's -shaped casket:
- To get started on a sheet of paper, draw your heart. The workpiece should be with even contours and the same sides.
- It is better to print a finished workpiece or circle the existing heart -shaped figure.
- Cut out two hearts from cardboard. At one of the blanks, draw another pencil for another heart 5 mm less than the workpiece with a simple pencil.
- The next step: cut a long strip with teeth.
- Glue the strip along the contour of a simple pencil so that there is a waste from the edges of the workpiece.
- On the second side, stick the same strip, fasten them with paper clips for drying.
- Stick two small braid ribbons. It will be a curtain for the cover.
- Glue the lid to the curtains.
- Decorate the box with patterned paper, satin ribbons, flowers, lace patterns.


Video: DIY box
How to make and arrange a box for jewelry with your own hands from a shoe box: ideas, description, photo
Old shoes from shoes are often stored in the house. It seems that you are not needed, but it’s a pity to throw it out - suddenly they will come in handy. You can make a box from such a box very simple. In fact, the box is ready, it only needs to be beautifully decorated. But the design of the handmade box depends entirely on your imagination and the presence of improvised materials.
The shoe box can be pasted with the following materials:
- Velvet
- Atlas
- Knitted fabric with a pattern
- Wallpaper with a pattern
- Patterned paper
You can decorate the outer part of the casket with paper, and the internal part of the casket with a cloth. It is important to choose the right colors so that the box ultimately looks harmonious.
Important: if you want to make a soft casket, put a layer of vatin, synthetic winterizer or other similar soft material under the fabric. Previously, it is necessary to make measurements of the box from all sides, and cut the layers of the desired size.
Inside the box you can make partitions or sections. They also need to be designed with the appropriate fabric or paper so that the box looks complete, and not as if it was forgotten to be designed to the end. On the inside of the lid you can stick or sew a pocket for storing trifles.
If you want the cover not to be completely removed, but to be attached to the box, make a curtain from the fabric. You need to stick the veils at the very beginning of the work, before you pulled the box with the material. Otherwise, the veils will look ridiculous. To make a curtain, one side of the lid should be cut off so that it does not interfere with the box to open in the future.


You can hide traces of glue or uneven tissue using lace braid at the edges. Openwork braid can be crocheted or bought ready. Below is the crochet openwork scheme.

Important: a box of shoes boxes is decent. In it, you can store not only jewelry and hair accessories, such a box for storing sewing accessories is also suitable for storing other needlework. Some store photographs in such caskets and trifles pleasant to the heart.
A box with volumetric colors from ribbons looks beautiful. If you do not know how to do them, watch a video that describes the process of manufacturing simple and very pretty colors in detail.
Video: How to make simple roses from ribbons without glue?
How to make and arrange a box from a book with your own hands: ideas, description, photo
The box from the book is an original idea. The box from the book can be a good cache if you want to hide some little things that are not intended for public viewing. In this case, decorating the cover of the book is not worth it.
If the cover of the book is decorated, you get a very unusual box. Making it is simple, the process will take a little time. For the manufacture of such a casket, an old book is suitable, which is not a pity to cut.
What needs to be done:
- Open the book on the first page, draw a square or circle, depends on your desire. Make indentations a few centimeters from the edges of the page.
- Cut the shape that has been drawn with a clerical knife. The part that was cut out can be thrown away, it will no longer come in handy.
- Then glue all the pages among themselves. No need to glue each page, so they will simply get wet.
- It is enough to glue the pages in places. The main thing is that in the end they could not be flipped through.
- Decorate the cover of the book with cloth, paper, beads, newspaper clippings, other elements.
- The inside of the casket can be left in the form that is available. And you can also paste it with plain paper to hide the yellowness of the book, give a more elegant look of the box.
- Inside and outside, the box can be varnished.
- If desired, you can attach a miniature lock on the box, which is sold in accessories, in needlework products.

Important: When designing a casket from the book, as well as caskets from other materials, adhere to the same style. If this is a retro-style, you can decorate the casket with clippings from the pages of the book, black and white pictures. If the Provence style, add pastel colors, openwork ribbons.
Below options for designing a casket from the old book.


How to make and arrange a box for decorations with your own hands from a container for eggs: step -by -step description, photo
The fantasy of needlewomen knows no boundaries. The casket for trifles from a container for eggs confirms this. To create beautiful and practical things, it is not at all necessary to spend a lot of money.
In the compartments for eggs, it is convenient to store beads, beads of different sizes and colors. Such a box is suitable for needlewomen who have nowhere to store their small materials for creativity.
You will need:
- Container for eggs
- Paint, preferably in the form of a sprayer
- Macarons of different forms
- PVA glue
Step -by -step manufacture:
- To begin with, the internal and outer part of the container should be painted. It is convenient to do this with a spray can. But if it is not, an ordinary brush and gouache paint are suitable. You may need a varnish for fixing paint and color brightness.
- Wait when the paint dries and start decorating the lid.
For decoration, you can use pasta. They should be laid out with a beautiful pattern. Macarones of different shapes and sizes will look good. - When you posted the pattern and confirmed that you like it, you can glue pasta. It is convenient to do this with an ordinary brush and PVA glue.
- After the glue dries, paint the pasta in the same color as the container.
We can say that nothing turns out to be a pretty box. Even a child can cope with the manufacture of such a casket.


How to make and arrange a box for jewelry with your own hands from adhesive tape: description, step -by -step manufacture, photo
Bobbins from adhesive tape are also suitable as the basis for handmade casket.
You will need:
- 2 bobbins from adhesive tape of the same size
- Glue
- Cardboard
- Simple pencil
- Scissors
Preparation method:
- Put the bobbin (cardboard base of tape) on a sheet of cardboard, circle with a simple pencil.
- Cut 2 circles of the same size. One of them will be the lower base, the second - a lid.
- Cut one bobbin in half - it will be a lid. The lid should be slightly smaller than the casket.
- Stick cardboard circles to bobin.
- You can decorate the box with polymer clay. Initially, clay should be softened, rolled to the required size.
- Then cover with clay the inner part of the casket, fill all the joints, seams and irregularities.
- In the process of working with clay, it is important not to leave places with air so that there are no bubbles left.
- Then the outer part of the box should be arranged with clay. Multi -colored squares with patterns look beautiful.
- Before laying the last row of squares, stick a tape that will be a veil for attaching the cover.
- All elements with polymer clay are baked in the oven. After completely cooling, the box is ready.


You can make a round box from any can, boxes. For example, packaging from tea, a box of sweets.
Important: the most important thing in a decorative box is a decor. Here you need to observe the taste, style, combine all the elements of the decor among themselves.
Video: DIY decorative box
How to make and arrange a box for jewelry with your own hands from wooden spatulas: step -by -step description, photo
Wooden spatulas or ice cream sticks are also good material for handmade casket. To create such a casket, you will need free time, since it is supposed to glue the sticks together, and this takes a lot of time. However, the result is worth it.
For work, you will need the following materials:
- Wooden sticks in the amount of 60-100 pcs.
- Glue gun
- A small piece of fabric for the veils
- Decor elements
The method of manufacturing the casket:
- Glue together 10 sticks. It is convenient to do this with a glue gun, significantly reduces the working hours.
- Stick two more sticks at the edges to fix the row. This will be the basis of the box.
- Immediately you can make the same size the lid. Only in the lid stick two more sticks, in the future it will fit tightly to the walls of the box.
- Now you can start the side walls of the box. Close sticks, as in the photo. Adjust the height of the box at your discretion.
- Make a curtain from a piece of tape or fabric.
The box is ready, it remains only to decorate it. A great option for decorating such a wooden box is decoupage. You can also decorate in other ways:
- Make stickers from newspapers, magazines, photos
- Decorate
- Make a pattern of buttons or beads
- Glue beads or stones
On average, about 60 wooden sticks will be needed for the manufacture of the casket. If you want to make the box deeper, you should stock up on 100 sticks.
Ice cream sticks are not a deficit, they can easily be bought in city stores or ordered via the Internet. Such sticks should be sought in the section of packages and containers for food.


How and how to decorate the box with your own hands: ideas, description, photo
Decoration of the casket is one of the most important and interesting stages in creating the product. The casket frame can not be done with scratch with your own hands. You could already understand this by the example of many described boxes. But you can’t do without decor. In the decoration of the casket, all its charm.
To decorate the casket, you do not have to be a needlework guru. You also do not need to have expensive materials for decor. You can decorate the box with improvised means. For example, a shell from eggs and paper napkins. In the end, it is even difficult to guess what materials were used.
Decorate the box eggshell and paper napkins it is possible in this way:
- Previously, you need to cook eggs, clean them, chop the shell.
- Apply paint to the box when it dries, apply a layer of glue.
- Then, until the glue is dried, evenly distribute the shell.
- When the glue dries, apply one or more layers of paint.
- For decor, napkins are suitable with a pattern or pattern. Divide the napkins into two layers.
- Lubricate the inside of the napkin with glue.
- Gently put the napkin on the box and spread the edges.
- Apply another layer of glue on top.
Here is such an interesting and unusual casket.


Another way of the budget decor of the box - journal clippings. A glossy magazine is suitable. From the pages of the magazine you need to make many tubes. Glue will also need. The photo shows that first you need to glue the tube in a vertical position at a distance of 5 cm to the bottom of the box. Then you should weave the tubes horizontally. The tubes should fit tightly one to one. To keep the tubes better, fix them with glue.


How to arrange a casket using decoupage technique: ideas, design style, photo
In decorative and artistic design, the direction of decoupage is popular. You can master this technique from scratch yourself.
We will tell you what the decoupage technique includes.
The decoupage is called the decoration technique, which consists in gluing the picture and further fixing with varnish. The varnish helps to fix the picture so that it does not deteriorate over time.
In decoupage, as in other design techniques, there are styles. Consider what styles are in the decoupage technique:
- Shebby chic. In the color scheme, delicate shades, small or medium -sized flowers, romantic elements prevail.
- Simplicity. In this style, newspaper clippings, magazines, elements with printed text are used for design.
- Provence. Picture in the spirit of France, flowers, plants. The style uses pink, beige, pastel shades.
- Victorian style. Products are decorated with gilding, also used paintings and postcards.
- Eththel. Pictures with African, Asian ornaments, exotic animals and birds are used.
- Vintage. Products with the effect of "aging", with scuffs.
Decoupage technique can be used on any materials - on the skin, metal, cardboard, plastic. But the decoupage with wood is better than all other materials.
You can purchase a set for decoupage, in which there will be special napkins with drawings. It is not always possible to buy decoupage napkins. You can print the finished pictures and successfully apply them in this technique.
For this, ordinary paper, tracing paper or office paper is suitable. Print on a color printer any pattern you like. Now the paper needs to be thinned. This can be done in the same way:
- With tape. On the outside of the picture, apply varnish. You can ordinary hair varnish. When the varnish dries, glue the tape on the inside of the picture. There should be no folds, cracks. Now tear off the tape strip carefully. Thus, you need to make the picture very thin so that later it can be used in the technique of decoupage.
- With the help of water. Apply several layers of varnish to the picture. Each next layer must be applied when the previous one dries. Then place the picture in a container of water. After a while, take out and start rolling the inner layer of paper with your fingers. If the paper is still not wet enough, leave the picture in the water for a short while.
At the next stage, you need to work with the box. It should be painted, you may have to apply several layers of paint. If you want to get the effect of an old box, you need to apply two layers of paint:
- The first layer is dark.
- The second layer is light.
Then the top layer is wiped with sandpaper to dark spots. So it turns out the effect of scuffs on the box.

At the next stage, the picture is glued and the product is opened with varnish. As you can see, at first glance there is nothing complicated in the technique of decoupage. The product will need time to decorate, as the varnish dries for a long time. You may leave for 1-2 evening for making a beautiful box. Decoupage is a great idea for those who do not know how to draw, but want to make a box with a beautiful pattern. This technique is simple and at the same time it looks luxurious if you do work carefully.

Below are options for beautiful caskets in the technique of decoupage.


Making a beautiful box with your own hands is not such a difficult task as you can imagine. Now you know that you can make an original decorative box literally from nothing. If you have a well -developed fantasy, if you like to create and needle up, you will like this activity. Try to do work carefully, then your box will look very presentable. We offer to see a detailed master class in which you will learn how to decorate the box with the effect of aging using decoupage technique.


