Recommendations for pasting the ceiling with tiles of foam.
Content
- How to properly and beautifully glue the ceiling tiles of foam: different methods
- How to mark the ceiling for ceiling tiles?
- Where to start gluing ceiling tiles from?
- How to apply glue to the ceiling tile?
- Which glue is better for ceiling tiles?
- How beautifully and correctly glue the ceiling tile diagonally, rhombus: description, video
- How to stick ceiling tiles without seams?
- How to properly glue the ceiling tiles on an uneven ceiling?
- How to close the seams between the ceiling tiles?
- Is it possible to paint ceiling tiles?
- How can you paint the ceiling tiles of foam?
- Video: how to quickly glue the ceiling tiles?
Foam light tile is the most popular ceiling coating. With its help, the space is transformed in kitchens, hallways, bedrooms and even in the halls for receiving guests. First of all, people choose this finishing material due to the fact that in comparison with stretch ceilings it costs mere pennies.
And, of course, everyone, without exception, likes that even the person who for the first time in his life makes repairs with his own hands can cope with this gluing. For such newcomers, we will tell you how to properly glue the tiles on the ceiling and what methods can be done.
How to properly and beautifully glue the ceiling tiles of foam: different methods


For those who do not know ceiling tiles, these are squares with perfectly even sides, which have the front and wrong side. In view of this, during the finishing work, you must carefully watch whether you fix them correctly on the ceiling.
After all, if you glue the tiles without paying attention to this nuance, then in the end you will not be able to add the perfect drawing. Also, when planning such work, it is extremely important to determine in advance which method you will glue the tile. This must be done in order to understand how exactly the amount of material may be needed.
Methods of pushing foam to the ceiling:
- Parallel to the wall. This method of decoration suggests that finishing work will begin to be carried out at the wall, which is located opposite window or doorways. The first tile will need to be smeared with glue and lay it exactly parallel to the wall, retreating a little from it.
- Diagonally. If you choose this particular method, then you will need to start finishing the ceiling exactly from the center of the room. In order to determine this place, you will need to stretch the thread through the corners located opposite each other. The place where they cross and will be the center of the room.
- Rombs. I immediately want to say that this method is considered the most difficult, so it is better not to begin to begin with beginners for it. In this case, you will also need to find the center of the room, postpone several squares from it, and then glue the tiles from them diagonally. If you do everything right, then the angle of the tile will look exactly to the center, and one side coincides with the diagonal on the ceiling.
How to mark the ceiling for ceiling tiles?
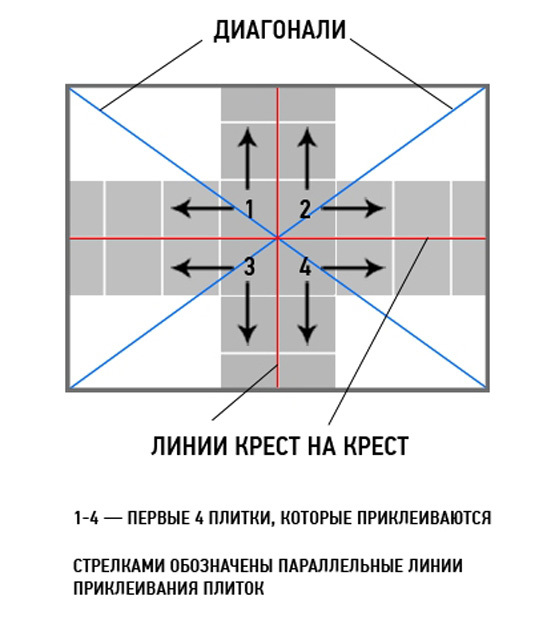
As already mentioned a little higher, so that the ceiling tiles look perfect, preliminary marking must be carried out before its fastening. Remember, if you do not want to remake all your work from the very beginning, you must do it.
After all, only properly applied to the ceiling, marking will help you place the first tile as it is necessary, and subsequently create the perfect pattern. If you fasten the tile to the ceiling with rhombuses or diagonally, then the marking will help you to mask the seams as well as possible, thereby making the canvas visually even.
Marking recommendations:
- To begin with, with the help of a measured tape, measure the approximate distance (diagonally) from one corner of the room to another
- Next, cut two pieces of the rope (their length should correspond to the data obtained)
- At the next stage, you will need to stretch these two blanks from the corner to the corner so that they cross in the center of the ceiling
- Next, take, for example, the level and a simple pencil and draw the formed diagonals in the ceiling space, and be sure to indicate the central point of the room
- Remove the ropes and draw a square near the central point, into which ceiling tiles will easily enter. From this place you will continue to finish the entire ceiling coating.
Where to start gluing ceiling tiles from?

If you carefully read our article, you probably realized that you can start gluing the stove to the ceiling from two places. If you do this for the first time, it will be better if you give preference to the method in which the tiles are glued in parallel to the wall. In this case, you will not need to carry out any preliminary measurements, and you can literally immediately move on to the main stage of work. All you need to do is find the perfect place on the ceiling coating and fix the first plate on it.
After its fixation, you will need to check if you placed it correctly, and you can proceed to fix the rest of the decorative material. If you want to create a more complex drawing on the ceiling, then you will need to mark it (how to do this correctly we told you above) and after that it will be possible to proceed to the transformation of living space. In this case, the first tile will need to be placed in the center of the repair room.
How to apply glue to the ceiling tile?

Most people who, for the first time in their lives, think that applying glue to finishing material does not require any special knowledge. But as practice shows, even such a simple, at first glance process, it is necessary to carry out correctly. If you apply glue randomly, then in the end the tile is not fixed as it is necessary and what is the most unpleasant, they will not perfectly fit the stitches formed to the ceiling.
So, first, apply a small amount of glue to the very center of the tile, then put the droplets diagonally from this point, and at the very end, apply the line around the entire perimeter of the finishing material. Applying glue to tiles, monitor the droplets are not very large. If there is a lot of glue, then when the tiles are pressed to the ceiling, it will begin to go out and, as a result, you will have to remove surplus, and this can damage the structure of the finishing material.
Yes, and remember if you want the adhesive to fix the tile on the ceiling as well as possible, before fixing it will need to be held in the air for 1-3 minutes. During this time, glue will react with air and this will contribute to the fact that substances that are responsible for adhesion will become more active.
Which glue is better for ceiling tiles?
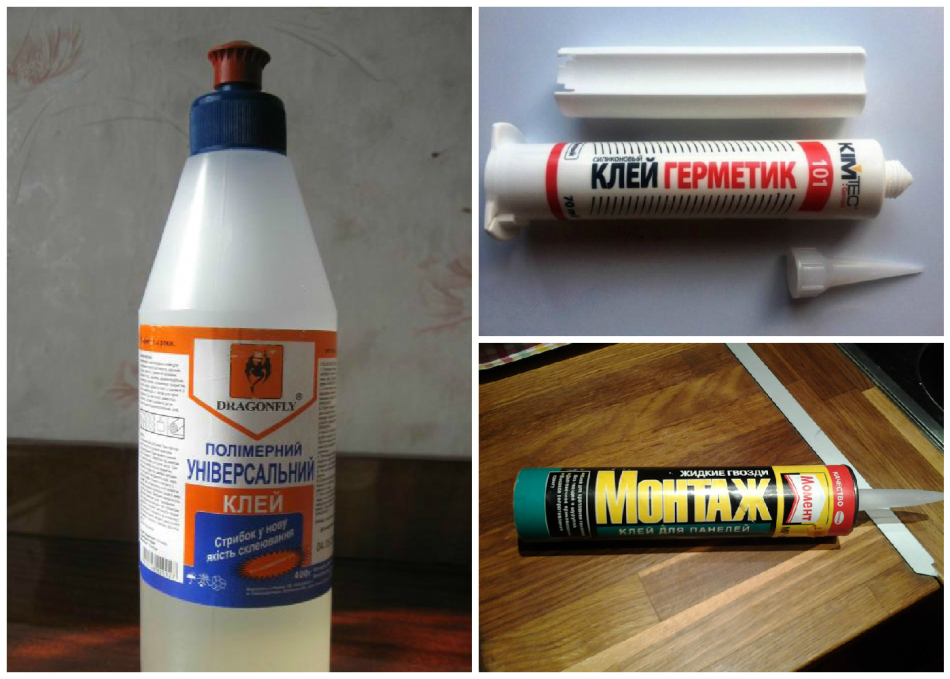
As a rule, people think that the more expensive glue, the better it is. Of course, in most cases, an expensive tool is much better than cheap. But still, in the case of ceiling tiles, you need to pay attention to other factors. The most important indicator of the quality of glue is the clutch force. The more this indicator will be, the more reliable the decorative material on the ceiling coating will be recorded.
In addition, you should pay attention to how quickly the glue dries. The faster it will happen, the better it will be for you. After all, if he grabs not 30 seconds, but 2-3 minutes, then you will simply get tired of keeping such a time and, most importantly, you definitely can’t fix it correctly. Also, when buying, you must pay attention to the viscosity of the adhesive.
If the glue you have chosen will be very liquid, then try to choose another option for finishing work. As practice shows, too liquid base of glue will not allow you to reliably fix the tile on the ceiling and it is likely that after a while you will have to redo everything from the very beginning.
Types of glue for fixing ceiling tiles:
- Universal
- Titanium
- Adhesive compound (on silicone basis)
- Acrylic putty
- Liquid Nails
- Polyvinyl acetate glue
How beautifully and correctly glue the ceiling tile diagonally, rhombus: description, video
Before starting to fix the tiles, it is necessary to prepare the ceiling space. If you do not do this, then in the end, with all the desire, you will not be able to correctly fix the finishing material. For this reason, it will be better if you first carefully inspect the ceiling and fill all the defects.
But keep in mind that in order for the tile to go perfectly, it is not enough to close all the cracks and fossa. If you want the clutch between the ceiling and the decorative coating maximum, then you will definitely need to grind the surface, and then thoroughly primed it.
Tile sticking recommendations:
- To get started, measure the ceiling area and estimate how much you may need tiles. Keep in mind that if you fix it with a rhombus, then it may need more than if you glued diagonally.
- At the next stage, you will need to mark and indicate the central point of the ceiling, as well as the diagonal lines, equal to which you will lay out the diagonals and rhombuses.
- After the marking is made, you will need to apply glue to the entire tile and fix it at the center point. If you want it to be fixed instantly, do not forget that it must be withstanded at least 1 minute.
- In order for the tile to fix, it must be pressed to the ceiling coating and held in this position for 30 seconds. After you make sure that it is not moving, you can start applying glue to the remaining decorative material.
- Initially, you will need to lay out the tiles along the diagonals that were drawn during marking, and when this is done, you can proceed to filling out an empty space.
- It is necessary to fix the tiles on the ceiling, moving from the central point to the corners, while trying to monitor that they are visually folded into a perfectly even line.
How to stick ceiling tiles without seams?
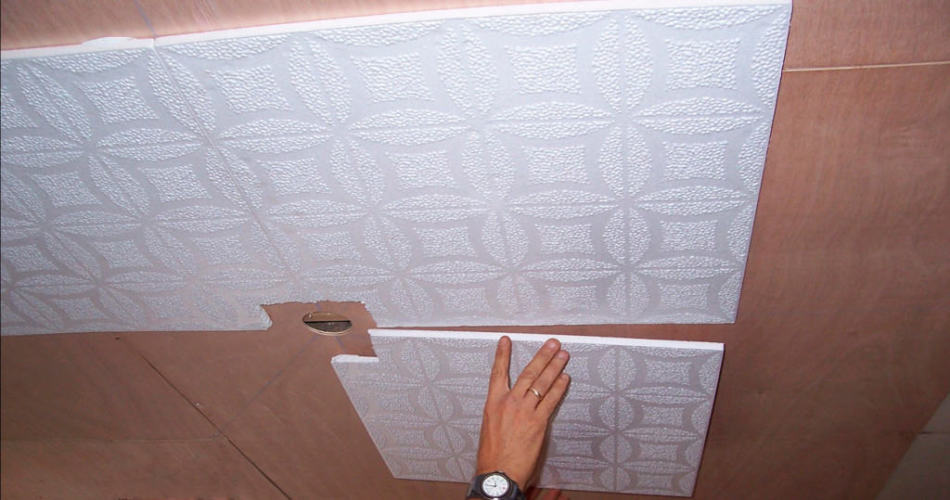
In principle, seamless tiles are glued in the same way that we introduced to you a little higher. Therefore, in this case, you will need to initially measure the area of \u200b\u200bthe ceiling in the room being repaired, mark it, determine the central point, and only then move on to gluing decorative material. But still, if you want to ultimately get the perfect ceiling coating, then the tiles are either diagonally or parallel to the wall.
Yes, if you prefer the last method of finishing the ceiling, then begin to fix the tile on the wall opposite from the window. Such a little trick will help you make those gaps that form when decorating such material. And finally, I would like to say that, although some sources argue that in the case of seamless ceiling tiles, it is not necessary to apply all over the entire perimeter, it is still necessary to do this.
As practice shows, if this is not done, then after drying the gap formed during the installation, the gap is quite striking. And, of course, do not forget that ceiling tiles are made of very soft material, so you need to hold and smooth it not with your hands, but a foam sponge or a soft rag.
How to properly glue the ceiling tiles on an uneven ceiling?
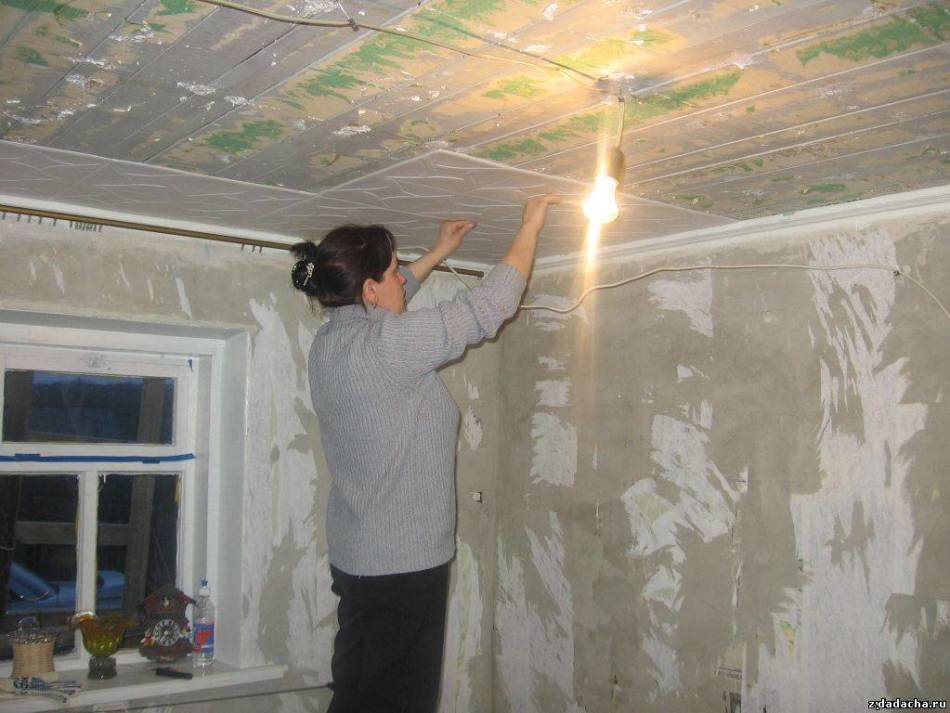
As a rule, in old houses and apartments, ceilings are far from ideality. Most often, they are covered with cracks and small recesses, which are very striking. If you live in a house with the same ceiling coating, then if you wish, you can correct the appearance of the dwelling using ceiling tiles.
If you do not want to mess with the alignment of the ceiling, then just buy tiles of foam and glue it in the way parallel to the wall. True, you must remember that it is possible to do this if the defects on the ceiling are the most minimal. If they are too large, then you will need to either be decided to completely tear out the surface or on the installation of a special frame.
Usually it is installed slightly below the ceiling itself and this makes it possible to hide even very great defects. True, in this case, it will have to fix a more expensive tile, for example, wooden, metal or ceramic.
How to close the seams between the ceiling tiles?
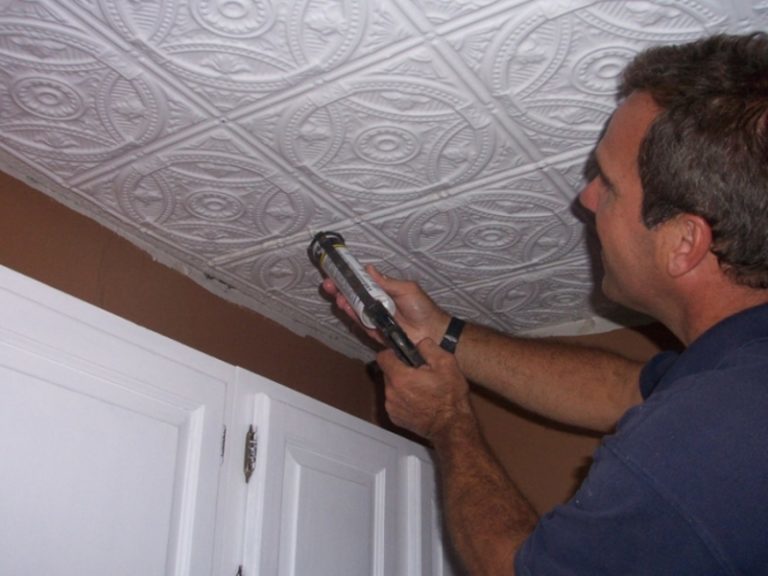
As already mentioned a little higher, even the so -called seamless tiles requires additional processing of the gaps, which are formed after the ceiling canvas completely dries. In view of this, when planning such finishing work, immediately lay out special means in their cost that will help you make the surface being repaired as flat as possible.
As for what to do this, in this case it is best to give preference to acrylic sealant. If you want to close the seams without any problems, then spend on a sealant in a tube and a gun that will help you distribute it evenly.
Recommendations for the location of the joints of the ceiling tiles:
- Fix a pistol on a tube with a sealant
- Using scissors, cut the tip at an angle of 45 degrees
- Press the formed hole to the beginning of the seam
- Press the pistol's handle smoothly and drive them exactly at the seam
- After filling the seam, carefully take the gun from the ceiling and let the sealant time
Is it possible to paint ceiling tiles?
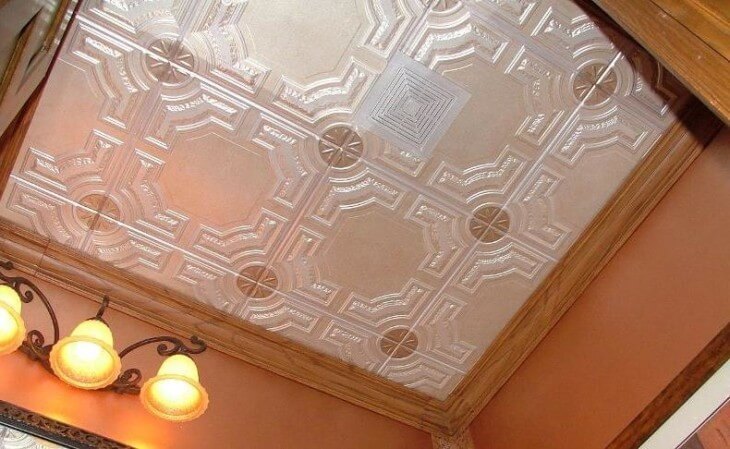
Sooner or later, the desire to paint the ceiling decorated with tiles appears in all people. But as practice shows, only a small part of novice repairmen is decided by this step. Most of these people believe that the paint will simply ruin the ceiling tiles and they will have to spend money again on expensive repairs. In fact, you can just not all be painted tiles.
For example, seamless tiles in no case can be treated with coloring substances as it will necessarily make the seams darker and as a result, they will stand out quite much against the general background of indoor space. The rest of the tile can be painted calmly, however, consider that in order for the color of the updated ceiling to be as saturated as saturated, it will be necessary to apply the paint at least two layers.
How can you paint the ceiling tiles of foam?

As for the choice of paint to update the ceiling, when buying it, you need to pay attention not only to the color. If you want the ceiling to remain in perfect condition for a long time, you must choose the right coloring substance.
And this means that it should impede the reproduction of mold, be moisture resistant and have dusting properties. In addition, it must have a moderate level of glossy effect. In view of all this, it can definitely be said that it is best to paint ceiling tiles with water -based or acrylic paint.


