How to draw pencil values \u200b\u200band watercolors.
Content
You can draw the lilies of the valley with a simple pencil, watercolor paints, or use gouache. Training in drawing, and especially delicate flowers, will relieve stress and inspire the creation of a whole series of floral drawings.
And if your child suits you and asks you to draw flowers with him, then you will have something to interest him. After all, the process of drawing flowers is fascinating for both adults and children.
The main thing is not to start with too complicated drawings. First, try to make a drawing in the graphics technique. Work on clarity and accuracy of lines. See how plausible the drawn buds look like

Vintage cards


Lily of the valley: Pencil drawing in stages
Performing a monochrome drawing is the best way to learn how to draw the valley. It will not take much time to draw all the details on the leaves and buds. The figure uses the only color - green
Look at the bouquet of lily of the valley and study the shape of the leaves.
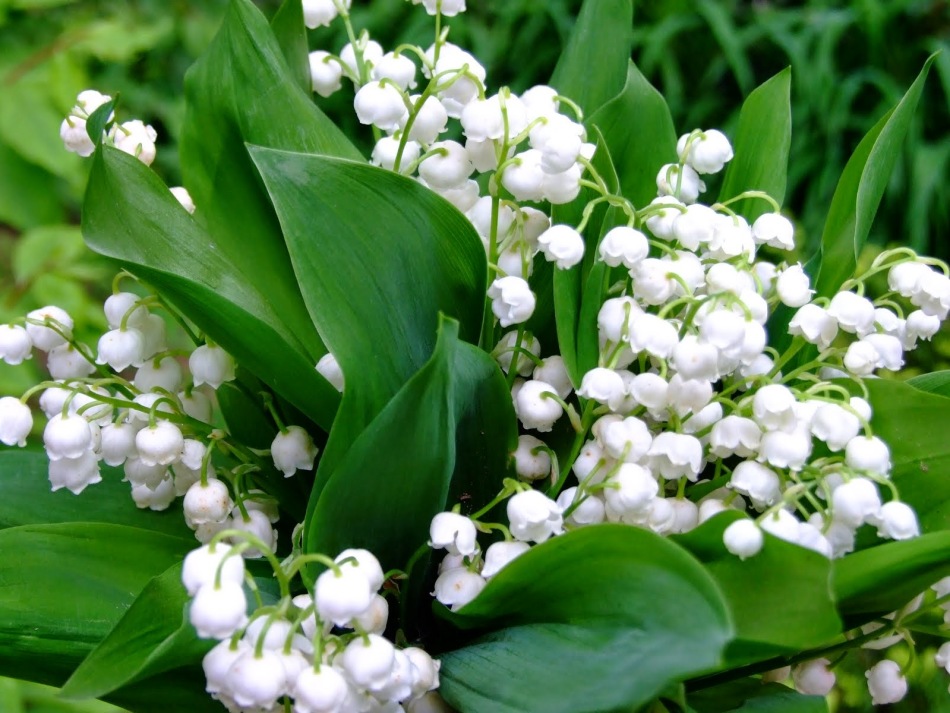
Try to transfer the image of a single bush of the valley to the paper. If everything has succeeded, proceed to draw a bouquet
For drawing the valley with a pencil, you should buy special paper for graphics. Watercolor paper is not intended for such a picture
Stages of drawing the valley
First stage
- Start the drawing with the outline of the future boundaries of the image: draw horizontal and vertical lines that form a cross. Inside it, then you will draw lily of the valley.
- Next, you need to work on the drawing of the sprigs of the valley. Without pressing much on a pencil (only easily touching paper), mix 3 arched lines with a small inclination in one of the sides. These are future stems on which buds will be depicted.
- We gradually thicken one of the lines, narrowing up.

Stage second:
- We begin to draw leaves. There should be two of them. The leaves should fill the drawn early rectangle-crossbow. We have them in different places, changing the size, bending and avoiding symmetry.
- We draw two more lines, remembering that the shape of the leaves of the valley has an elliptical shape: they are narrowed from above. The bush of lily of the valley is leaves and buds on arched pedunks. We divide each leaf into two halves of the arched line. Add veins. There should be many of them.
- We go to the stems again. We had two lines left, which should be drawn more carefully. We thicken the lines up, making them similar to the stems.
Stage third:
- We proceed to drawing buds. We plan in circles the place where the flowers on the stem will be located.
- How to draw buds? On the underside of the future flower, we draw a wave -like line - a skirt of the bell.
- Camps on the buds can be 3 or four. On each side, the edge of the wave -like line is raised up. Inflorescences should resemble the sleeves-backgrounds. It is better to direct them in different directions.
- We draw in several strokes the area inside the buds. Each bell is attached to the stem with small lines-spaces. At the top of each stem, you can draw tiny unwritten buds.
We coped with the preparation of the sketch of the valley. It remains only to erase all auxiliary and unsuccessful lines with an eraser.
Stage Fifth:
- Then we need soft pencils. We will give them the bush of the valley volume and make them more realistic. We outline the shadows on the bottom of the leaves.
- Add the shadows with a soft pencil and inside each buton-cloen. You can perform hatching crosswise or simply stroke with short lines obliquely.
- The turn came to make a partial shade. To do this, use a solid pencil. We leave the lightest sections of the valley of the valley not painted.
- If you draw a bush of the valley lilies with black mascara, then the volume and partial shade are given, observing the same principle. The most shaded areas are painted in black, and illuminated areas - in lighter tones, gradually moving to areas that may remain not covered with mascara.


You can make a picture with colored pencils. To do this, draw a sketch of the bush of the valley of the valley, observing the same sequence as when drawing with a simple pencil

And then everything is simple: we paint the foliage with bright green color, adding yellow and blue, designate the edges of the bells with a light blue pencil


Shadows should be drawn in blue. We shake the shaded areas with a napkin or a cotton swab. You can strengthen the effect by drawing in the dark areas with a brush. Three -dimensionality to the drawing will give the drawing of the external boundaries of the picture in some places stronger and brighter
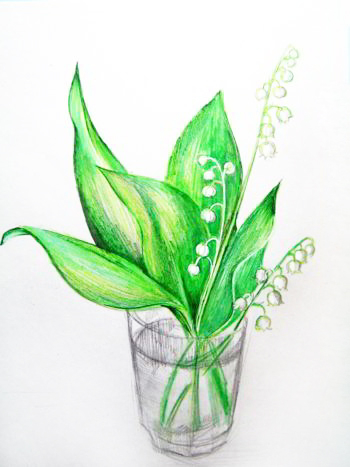
More dark areas are worked out darker with pencils. If the inflorescence ends with berries, then we paint them with orange or red. Add shadows and partial shade again.
Lily of the valley drawing for children
With children, the drawing of the bush of the valley can be performed differently. Having shown zeal and attentiveness, children will be able to get a beautiful and correct drawing that can be presented to mom or grandmother.
Children's drawings with lily of the valley can decorate the wall at school. Then she will delight her eyes in winter and remind of warm summer days
Children can be offered to outline the bouquet of the valley. You should not draw a lot of leaves: in nature, 3-4 sheets are held on one stalk. It is worth explaining to the guys that the lily of the valley flower is a cup. It has a curved wavy edge
On one branch of the valley there are about 10 bells-flower bells. They can be open, or they may look like incapacitated tiny buds. Closer to the top of the top of the valley of the valley, the bells have smaller sizes


It will be much easier for children to perform a stylized drawing of one sprig of lily of the valley
- we draw a leaf with a bend
- add the inflorescence to the sheet: we draw another arched line
- we begin the drawing of the bells of the valley with the upper arcs. We draw the lower edge of each bell with a wavy
- add arched short lines again, connecting the bells to the stem
- on the leaf, draw the veins with lines at an angle. Such a drawing can be left not painted, or use the same green and blue colored pencils
Lundy drawings with watercolors
The drawing of the bush of the valley made by watercolors will allow conveying all the tenderness, lightness and weightlessness of the plant
It is better to draw on a sheet of watercolor paper: it has a dense structure and therefore will not deteriorate when interacting with water. Ordinary paper can be deoxidized, and the pattern will look untidy
Before the start of drawing, the sheet must be fixed with tape around the edges. It is desirable that the adhesive tape be glued with even lines. At the end of the work, the area sealed with adhesive tape will act as a frame

First we draw a sketch of the bouquet of lilies of the valley with a simple pencil. Remember that long and wide leaves narrow upward
- We draw the lines easily touching the paper: it will be difficult to erase thick lines, and when covering paper with paint, they will still be visible
- When drawing with watercolors, the main thing is not to overdo it when applying a colorful layer. Diluting watercolor with water, and using a dry technique, you can achieve transparent air shades
- The leaves should be drawn in technique on the wet: on the water-flooded area we apply colorful layers of light yellow and green watercolor. In some shaded places, add blue. We use a mixture of blue and purple paints for this
- The technique for dry consists in layout of paints on a certain section of the drawing. Only watercolor paper will allow you to do this for sure. Draw the background around the lilies of the valley in blue
- Water should not fall beyond the boundaries of a sketch painted with a pencil. Otherwise, the drawing will flow and lose clear outlines
- Only the area moistened with water is stained

To obtain a beautiful picture, you should use as many colors and their shades as possible, mixing paints on the palette. Remember what the flowers of the valley look like in bright light: a mixture of many shades occurs
- Substituted areas on the leaves can be bluish-green. The illuminated area can have areas of bright yellow. Bells of the plant are also not painted with homogeneous white color. In the shade, flowers acquire a cold blue or purple hue
- When the process of applying primary colors is suitable for completion, the picture must be left for a while for complete drying. This process can be accelerated using a hair dryer
- At this stage, if errors were made or the paint hit the sketch, you can correct everything. To do this, wash off the paint with a stream of water
- After the drawing completely dries, the line of applying final strokes comes: the color of the darkest areas deepens and small details are drawn
- Easily sprinkle white paint on the pattern