In this article we will tell you how to create a practical and beautiful diary in which it will be incredibly convenient to fix plans.
Content
How many times do we want to start doing anything-to learn a foreign language, play sports and so on-and each time we transfer the goal! Not enough time or simply forget. Well, then it's time to take advantage of the diary, literally starting life from scratch.
DIY DIY DIDED DOCTION: Description, photo
The first thing that comes to mind is the processing of an existing notebook. How can this be done? Creatively, creating from the most ordinary old notebook Diary with a clock!
In addition to the fact that it will be enough unusual So also very useful for constantly late people. Now, planning any event or checking with the nearest, the owner of a useful notebook can always be aware of the one that is an hour.
The manufacturing procedure is as follows:
- Have to take old wristwatch, which, however, will in working order. The clock is preferably relieve the strap.
- This watch fixed to the inside of the lower part of the cover. It is most convenient to use glue.
- Left to do slot on all pages, which will correspond to the circle of the dial. Thus, regardless of which page is turning over, the watch will always be visible.
Important: this part of manufacture is the most difficult. To go perfectly, it is better to use a stationery knife.

Active personalities can be done A thick diary of several notebooks. For this you will need:
- Actually, several notebooks
- Satin tape, preferably thinner
- White cardboard good density
- The hole punch, scissors
- Pencil simple and markers
- Ruler
- Various decorative elements - for example, stickers, multi -colored tape
The diary is made as follows:
- Notebooks getting rid of covers. The easiest way to do this with not too thick notebooks in soft covers
- Next with a hole punch holes on the roots are made notebooks
Important: the holes should be made in such a way that the notebooks are then convenient to fasten. That is, parallel to each other.
- Then notebooks are folding The spine to the spine
- Into the holes made ribbons are tied, tied
- From dense cardboard you need to make two parts, which will be a cover
- These parts Apply on different sides of notebooks and are interconnected in the same way using tapes
- It remains only decorate the cover In accordance with personal wishes

DIY DIY DOCTION: Description, photo
Many people like this type of diaries. They are beautiful, practical. To create such a thing you will need:
- Binding cardboard
- Thick paper - specially designed for scrapbooking is perfect
- The rings are detachable - they are also completely easy to purchase separately
- Awl
- PVA-blanket
- Sewing machine, scissors
- The printer is desirable
Important: and even better - a special device for installing eyelets.
The manufacturing process is simple:
- Using a printer proceedings are printed For a diary. Or you can Mark yourself On attractive scrapbooking lists.
- Sheets equal.
- For the cover sheets are cut out of cardboard, suitable for the format for the future diary.
- The cover is gluedcolored paper. A scrap-paper is also appropriate here.
- After combining cardboard and main sheets They are done symmetric holes.
Important: it is preferable to insert the eyelets - this step will help maintain the cover unharmed for a long time.
- It remains only insert the rings.

You can also create an unusual diary with a cover that imitates a tree. You will need:
- Metal rings with connectors
- Metal corners in the amount of 4 pcs.
- Cardboard is thicker
- Acrylic paints - 2 shades are needed
- Krakelyur varnish
- Chancellery knife, awl, round -liners, scissors
- Ruler, pencil
- Synthetic
- Paper


You can start manufacturing:
- To start the sheets are ordinary and cardboard are equal. Cardboard can be somewhat larger, since they make a cover.
- Further in cardboard They are done Symmetrically holes.
- Cardboard is covered acrylic paint. It becomes dense enough after that, and therefore it is recommended to equalize it to the coating.
Important: several layers are needed for artificial lifting the cover. If it is simply planned to be decorated with drawings, one can do one.
- Collapse like the outer sides future cover, and internal.
- If there is still a need yet Contact the cardboard, It is worth laying something under the table.
- After application the first layer of paint He needs to give properly dry.
- Next is the turn krakelyur varnish. To make it dry faster, you can use a hair dryer.
- And again layer of paint. The master must remember that the direction of the movement of the brush is actually the direction of future cracks.

- But now you can and attach the corners. If it is difficult to do with your fingers, pliers will come to the rescue.
- If necessary, you can again put in order sheets future diary.
- Left collect together, follow the rings - And now the vintage diary is ready!

DIY DIDENDEL DRIVE: Description, photo
If you want to create a diary on your own book, you will have to stock up on the following components:
- Cardboard
- Sheets corresponding to A4 format
- Fabric and tissue ribbon
- A piece of gauze
- PVA glue
- Marker
- Needle and dense threads
Important: dense sheets are needed, thin ones are not suitable.
The diary is made as follows:
- First of all, sheets of A-4 format Fold in half.
- Of them are needed form peculiar notebooks, By investing in each other. In each notebook you can place from 2 to 5 sheets.
- These notebooks fold in one pile and for a while left under the press. Special stationery clamps and sheets of cardboard protecting from marks will help in this.

Important: leave the sheets in this position for 3 hours, no less.
- After the specified time The brackets can be removed.
- Further from the fabric tape you need cut off a few stripes. Them and roots are wrapped.

- But it is not necessary to fix the strips at this stage - after peaks with a pen or pencil the locations of the bands, they can be removed.


- Now the fabric stripes are being taken again, but this time already sewn to the workpiece firmly. It should be focused on the photographs below. It is worth noting that you do not need to sew the entire stack immediately to the ribbons - each notebook is processed separately.


- The spine needs to strengthen. To do this, put on it under the press gauze. Or use sealant.

- Further the spine is gluedfabric tape.

- Now 3 parts are cut out of dense cardboard - the spine and parts of the future cover.
Important: it should be remembered that the cover should be slightly larger than sheets.
- From fabric Rectangular is cut a piece, on which you can place the blanks described above.
- They need them Glue On the fabric.

- The remaining unoccupied parts of the cover are glued pieces of fabric from the inside.

- Now glues vogs.

- Left connect The main part of the leaflets and the cover.

DIY scrapbooking technique: photos, description
You can make a wonderful diary with a bright unusual cover with your own hands. For this you will need:
- Scrap-paper
- Any other sheets
Important: in this case, there is a rule that the more unusual the paper, the better. That is, old notes, unnecessary packaging from under something, etc. can be used.
- Cardboard with high density or special blanks for covers
Album rings - Glue gun, double -sided tape, pillow for stamp
- Scissors, hole punch, sewing machine
- Ribbons
You can start manufacturing:
- First of all, it is worth calculating in advance what design It is better to do it for a diary. Then, based on this, You need to cut off in advancepreferred the number of ribbons, prepare the required amount of other decor.
- The machine will help Sew The necessary details on the paper.


- It is attached to the cardboard Double-sided tape - It will be possible to glue processed paper with decor on it.

- But, despite the presence of adhesive tape, additional cover processing clearly does not hurt. That is, desirable flash it around the perimeter.
Important: a wide line is best suited for this.

- Now you can glue any others decorative elements.

- In order for the sheets of the future diary to be attractive, you can Mark them with a pillow for a stamp.

- Further, using a hole punch, punches in the sheets - And you can unite All leaflets, parts of the cover.


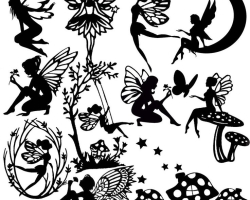
How to draw a diary inside: ideas, photo
How can you conveniently design a diary from the inside? We offer several ideas as options:


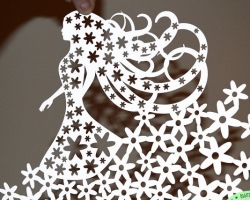
DIY DIY DOCTION: Ideas, photos
Now let's offer options for the appearance of the diary:


Now on sale you can find a diary for every taste. But why not create it personally for yourself? Unique, upsetting, motivating. One in which you definitely want to make notes. I would like to hope that tips from this article will help in this.