

In this article I would like to cover the technique of decoupage in detail. Convenient master classes will help to master this needlework even beginners.
Content
- Decoupage technique for beginners
- What you need for decoupage: tools, materials
- Decoupage for beginners from napkins: master class
- Decoupage of bottles for beginners
- Furniture decoupage for beginners
- Decoupage of glass beginners step by step
- Decoupage for beginners step by step in wood
- Decoupage casket for beginners
- Decoupage for beginners hours
- Decoupage of tea houses for beginners
A pleasant word “decoupage” immediately inspires associations about something exquisite, beautiful. So it is: things that this art affected are amazing with their special charm. And, most interestingly, absolutely any person can master the decoupage technique. Let's talk in this article on how this miracle happens.
Decoupage technique for beginners
Decoupage technique has its basicswhich begins to know:
- You can glue the drawing in different ways, but best smooth it in the direction from the center to the edges. Bubbles and folds should not be initially
- It is recommended to glue in an old proven way, that is, pVA glue. He will keep the drawing very tight
Important: do not strive to do everything as soon as possible - it is very important to allow furniture to dry well. And not with a hairdryer, but in a natural way.
- Do not neglect acrylic paint - So the image does not look alien, and the thing itself becomes more elegant. Apply paint with a roller

- How many lacquers should be? As a rule, the best results are when there are two layers. Moreover, before applying the second, be sure to wait for the first
Important: building varnish will fit, but acrylic is preferable, since it does not smell and does not cause allergies.
- It is useful for beginners to know that acrylic paints and varnishes are washed off with ordinary water during the first day after work. Thus, not entirely successful work can be easily fixed
- Whatever the idea, the thing should go through the preparation stage. It includes cleansing both of all kinds of pollution and dust.
Important: it is advisable to use the solution containing alcohol, however, just a wet rag is suitable.
As for the varieties of techniques, then a little of them:
- Classic - This is when the picture is attached dry, wet or hot, and then covered with varnish with subsequent polishing. You can tone it

- Artistic or smoky - looks like a real painting thanks to a successful connection of the picture with the background

- Reverse - Recommended for processing a transparent surface
- Gluing occurs on the back of the decorated thing
- Decopate or liver - Simply put, similar to a patchwork blanket
IMPORTANT: Decopaging is achieved on any materials, but it is recommended for beginners to use special paper.

- Volumetric - Very similar to a relief painting. The so -called structural pasta will also help in this. A material that is very similar to the egg shell is also used

What you need for decoupage: tools, materials
- First of all, this is decoupage object. And they can become anything from furniture to small plates. The surface is allowed to be any - made of wood, glass, fabric, plastic, ceramics, porcelain, metal
Important: the first steps in decoupage are best taken on wooden surfaces.
- Special napkins for decoupage with images to taste

- Maps for decoupage - It is a little more difficult to work with them than with napkins, but the paint on such maps is of good quality. Beginner masters are recommended to purchase cards on rice paper - they are both thin and durable, do not stretch during work

- Scissors It is recommended to use those that are small in size and have rounded ends - this will be a guarantee that small details will cut out of thin paper freely
- Brush We need flat, width is desirable within a centimeter-two-varnish and paints of such tools are applied simply excellently. And keep in mind that the larger the processed thing, the more there should be a brush

- Glue - As previously said, PVA is still desirable, although it is possible to purchase a special glue for decoupage for the sake of interest
Important: usually after gluing, the master’s pictures process it with paints and varnish. Sometimes the adhesive properties of varnish are enough, but PVA is better to keep with you.
- Varnish - And again, the flight of fantasy is provided. Matte, glossy, acrylic, with the effect of diamond shine and craquelure - a choice for every taste. The advantages of decoupage varnishes are that they are not smell, do not turn yellow over time and, importantly in the process, do not allow traces of the brush of non -surface
- Sandpaper - indispensable assistant in preparing the surface for work
- Primer It is also desirable to purchase, since it perfectly levels the surface and helps to reduce paint costs. The optimal choice is an acrylic non -toxic water -based primer

Decoupage for beginners from napkins: master class
A flat ceramic surface of the plate is what you need for beginner decoupage masters. It is still not recommended to eat food from such a plate,but as an object of decor, it is incomparable. It will be necessary to stock up:
1. Actually, a plate
2. Alcohol cloth
3. Napkin for decoupage
4. Office file
5. Water spray gunner
6. glue
7. Acrylic varnish
8. Acrylic paints
9. A brush
10. Valik

We proceed:
- First of all, we take alcohol napkins - they are excellent fool the plate. After it dries well, you need apply to the entire surface of the PVA. And leave to dry again
- Now It's time to take a decoupage napkin. Need to gently separate the first layer with a pattern from it
Important: many newcomers mistakenly believe that the drawing after the napkin applies to the surface should look up. In fact, it is attached to the front part precisely to the surface.
- Put the layer on the fileso that he does not break. Then sprinkle all this with water from a spray gun
- That's all - the file can be applied to the surface of the plate
- Further with a roller smooth is made in the direction from the center to the edges. It is necessary to do this, otherwise excess moisture and air will prevent the normal mounting of the image. However, you can do without a roller - a flat brush will serve as a good alternative
- Now the file is removed, and the remaining moisture is removed ordinary napkin. You can cover with varnish or paint, glue volumetric elements from colored napkins


Decoupage of bottles for beginners
Come in handy:
1. A bottle
2. Acrylic paints and varnishes, special varnish for decoupage
3. Sketch
4. Alcohol
5. Picture to your taste
6. Sponge or sponge. It is preferably a few pieces - depending on the number of expected colors

We start work:
- Alcohol, as in the case of a plate, we degrease the surface. The surface dries
- Acrylic paint needs to be poured In some capacity
Important: the paint is applied to the bottle not with a brush, but with a sponge or sponge through vuminating movements.
- Do not miss this point in any case! It is important to wait for the complete drying of each layer of paint. It is recommended to apply two on the bottle
- Pick up water into a deep container, dip the sketch of the picture there
- Try ithow suitable in size sketch for the bottle
- Glue should be diluted with water From ratio 2 to 3
- Apply this adhesive mass with a brush on a bottle. Choose directions from the center to the edges
- It is recommended to walk in the paint with a sponge moistened in the paint, not busy with the picture. So it will work to achieve smooth transitions
- Dry the bottle properly - Only after that can you apply a second layer of paint. And let him dry again
- Now you need to cover the product with varnish For durability. You can tie the tape on the neck

Furniture decoupage for beginners
Real vintage furniture is very expensive, but for this, decoupage is needed - to simulate antiquity and jewelry of initially faded furniture. Beginners should start with something big-for example, from a chest of drawers. You will need:
1. Actually, a chest of drawers
2. Decoupage pictures
3. Acrylic varnish and paints
Important: if you want to create really similar to vintage furniture, do not save on craquelure varnish. It will give the necessary cracks when dried, which will create the desired visual effect.
4. Bitum
5. PVA
6. Scotch
We proceed:
- Primarily, unscrew all metal pens - They will only interfere with work. Most often, chests of drawers are polished - in this case processing with sandpaper and primer is necessary
Important: if the chest of drawers is not polished, do not waste time on clicking and primer. It is easy to make an acrylic varnish coating.
- Now the time has come for golden paint. It is necessary that it dry well

- Measure a centimeter from the edges. Stick adhesive tape for an hour Thus, so that this adhesive tape acts. The same with boxes

- Apply white enamel on the top of the furniture and on the front sides of the boxes

- The time has come for Krakelura - Apply it to the side panels of the chest
- When an hour after gluing strips of adhesive tape passes, remove them. The same surface that was previously at tape is necessary paint brown
Important: Perform brown paint with a sponge - so it will lie best
- Part of the chest of drawers painted by enamel process with sandpaper. You need to try until golden paint
- Cut those drawings from napkins for decoupagethat you want to stick on furniture. Glue their PVA, smooth out. Wait for the drying of glue
- Cover the furniture again with craquelure. This time, try so that the craquelure varnish grips the entire surface of the chest of drawers along with the drawings

- Wait for the cracked varnish drying. Cover the surface again. Wait for drying out - after that cracks will begin to manifest itself
- Suffle the resulting cracks with bitumen - This is the final stage of work

Decoupage of glass beginners step by step
To start you can try to work with a glass jar chosen for storing coffee. It is well known that grain or ground coffee will be best preserved by the aroma if storage is produced in a glass vessel. So, for thematically decorated jar you will need:
1. Bank itself with a lid
2. Spirted napkin
3. Sponge and clamp for stationery. The latter is desirable if you do not want to get dirty in the paint
4. Acrylic paint white
5. Napkin for decoupage
6. Aklavak
7. PVA
8. Flat wide brushes
9. Toothpick and old toothbrush
10. Real coffee bees
11. Umbra burned is a paint that will help to make a small aging effect
12. Shpagat
13. Bitumen varnish

We start work:
- First of all, of course, you need degrease the jar with an alcohol cloth

- Now the bank is covered on all sides with white paint. Do not forget about the lid
IMPORTANT: the background is carried out by vuminizing movements by a sponge recorded in the clamp - this is convenient and effective.

- All this should well to dry
- Now on PVA the drawing is glued. Since the bank is convex, the image is best applied in parts. We also do not forget about the lid


- Both the jar and the lid need cover with an scalat

- The lid should be decorated Coffee grains. They are glued to PVA

- Now we grow old. The toothbrush is thrown into the Umbra, and with a toothpick, spray is made on a jar and cover
Important: the umbra preliminarily diluted with water.


- Now all this dried, then covered with varnish
- If you want to bring a little more aging, cover with bituminous varnish edges of the lid. You can also cover some sections of the banks

- Tie the twine - And the bank is ready!

Decoupage for beginners step by step in wood
It is best to start with something simple-for example, From the cutting board. This thing will serve to train decoupage skills, and in everyday life it will be used often. So, stell:
1. The board itself
2. Acrylic paint of white and gray colors
3. Decoupage napkin
4. Acrylic varnish
5. Water in a glass
6. PVA
7. Sponge
8. Brush
9. Dental brush that is not used
10. Candle
11. Eskaric paper

We create beauty:
- Apply white paint to the entire outer surface of the board. Start applying on top of the board
Important: for convenience, the sponge should be cut into 2 or even 3 parts.

- From the napkin, neatly breaks away or that piece of image is cutwhich is necessary

- From the desired piece The highest layer with a picture is separated. You need to do this as neatly as possible

- Add PVA to a glass of water In such a ratio, so that in the end the consistency of liquid sour cream comes out. Put the required piece on the board. Dip the brush in a glass, and drip a little solution to the middle of the picture

- Glue must be smeared with a brush according to the pattern. The drawing should be carefully smoothed in order to avoid folds and effects of bubbles

- According to a similar principle Glue other images

- About the edge of the board is needed rub the candle

- Further treat the edges with gray acrylic paint. Apply it with a sponge pressing, but at the same time with neat movements
Important: do not overdo it with the amount of paint - it should be few.

- Gray paint should be applied to the rest of the surfacebut this time with light rubbing movements

- Process the edges with sandpaper. Since they were processed with a candle, they will white

- Now the gray paint is applied in a small amount on the toothbrush. Spend the bristles in the direction of yourself - so it will turn out spray

- And now make such splashes with white paint

- The final stage - coating a plate with varnish

Decoupage casket for beginners
This master class is a peculiar basis, from which it will be possible to build up when creating other caskets. You will need:
1. Harvesting for a box
2. Flat brushes
Important: it is desirable that the brushes are made of unnatural materials
3. Brown acrylic paint
4. Bright enamel
5. Toothbrush
6. Candle
7. PVA
9. Rice paper, decoupage map, napkins
10. Patina. It is permissible to use brown oil paint as an analogue
11. Acrylic varnish
12. Sponge
13. Bilateral tape
14. Various accessories - buttons, lace and so on

Now you can start:
- All irregularities are carefully removed. The purified surface is needed cover brown acrylic paint. The box should dry well
- Now the candle needs to grind all the corners and faces
Important: Do not remove excess candles with your hands - it is better to use a toothbrush for this purpose

- The surface is covered with white enamel And dries

- Take any thing from metal. Scrape off the paint in those places that were previously rubbed with a candle. Gently remove excess paint

- Dilute the glue in water in a ratio of one to three. With a wide brush, apply the solution to that place of the casketwhere the image will be placed
- Attach the picture and from above cover PVA again. Move from the center to the edges. In this case, you need to smooth out all the irregularities
- Remove the extra glue brush. Leave the workpiece to dry

- Soak the cards in advance for decoupage in water
- Patina or oil you need to cover the corners, faces

- Now the turn of the acrylic varnish. The box needs to dry after that
- The bottom of the box follows paste with bilateral tape - Fabric will be attached to it
Important: do not forget to mrain this tissue in an adhesive solution - this will work to get rid of wet threads.

- Decor items also need a preparatory stage. Lace must be soaked in soluble coffee with sugar. Then they are slightly squeezed and put on the battery. You do not need to rinse

- It remains to glue lace, braid and buttons. Preferably on transparent glue


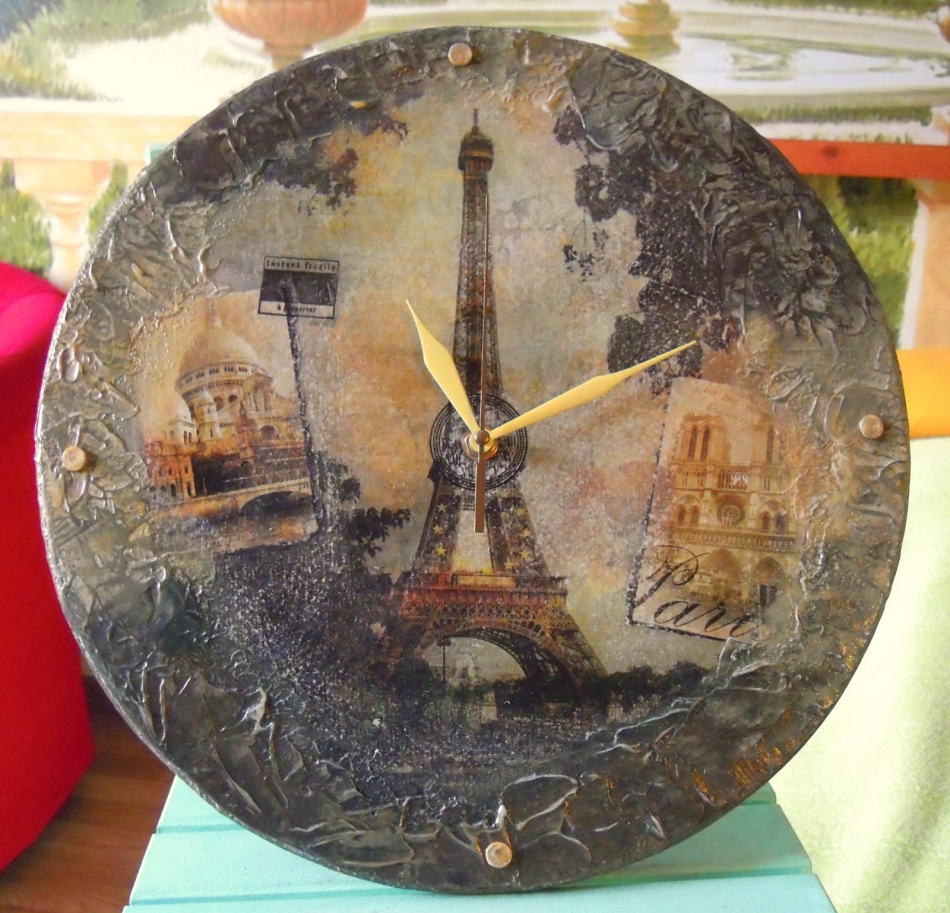
Decoupage for beginners hours
The decoupage of the watch is great for beginners. Stencils, dials, arrows and other elements of the clock for watches can easily be found in bookstores or in stores for creativity


- So, take the workpiece. You can not worry about where to fix the arrows - in the blanks of the holes, as a rule, there are. And there is a recess for batteries too
Important: however, you need to prepare the future dial. If it is wooden - stress, if plastic - degrease.

- Now you can start making a dial. There are absolutely no restrictions - when choosing, focus on interior features and imagination. Even finished decoupage sheets in the form of dials are sold

- Stick on the workpiece. Keep in mind that if the paper is rice, it is not necessary to soak it. Smooth all the folds
- Let the workpiece dry, and then cover with varnish. Dry again. And so three times


Decoupage of tea houses for beginners
What will be needed:
1. Wood blade
2. Thin acrylic embossed paste
3. Lapata-Mastikhin, thanks to which it is convenient to apply soil and remove excess
4. Acrylic paints
5. Rice map
6. Matte spray varnish
7. Matte acrylic varnish
8. Gel with 3D effect
9. Glue
10. Stencil for future tiles
We proceed:
- First of all, you need propket Harvesting under the house

- Cut The necessary pictures from the card
Important: make a reserve per centimeter.
- Stick all images to the right places. However, glue only the middle of the pictures

- But why you should not glue the whole image at once. Under the free edges, you need to apply a relief paste by mastichin - This is all done for the volume of the house

- Helpering paste can be drawn bricks. A toothpick will help in this
- Using a stencil and volumetric paste , you need to apply a tile
- Mix paint in advance - it may turn out that the desired shade is not presented in the finished form

- Now begins The process of painting a house


- For more similarity Do not be afraid to place additional details - lantern, masonry

- Color the lantern and masonry. Add the crack on the walls to persuade

- Paint the roof

Important: from the inside, you should not stain the house.
- It is recommended to use the dark umbra In order to finish the roof - it will be brighter

- Add glare. And on the lantern and windows - 3D gel


- Cover the house with matte varnish - And he is ready!

To many people who love decoupage things, it seems that this art is only possible for masters. But the masters are not born, but become! Moreover, many techniques are quite easy to perform, so you should never be afraid to start creativity.


Hello everyone, girls, found an excellent, inexpensive store for the sale of napkins for master classes, decoupage and more. Link to the Salfetki.kiev.ua store, can you make sure and say the last)) and also, when will the new master classes be?