

In this article we want to tell how to create candles with our own hands. Such candles will make your design unique, moreover, they will do perfectly as a gift.
Content
- DIY candles for beginners: master class
- How to make and decorate wax candles with your own hands?
- How to make and decorate with paraffin candles with your own hands?
- Beautiful carved candles with your own hands: Forms
- How to make colored candles with colored fire with your own hands?
- How to make aromatic candles with your own hands?
Do you know that people began to use candles back in the 3rd millennium BC? True, at that time only wealthy citizens allowed them. In our days, candles are used mainly as cozy decor items. Let's see how you can make such a miracle yourself.
DIY candles for beginners: master class
For these candles, which are simple to make and can decorate any decor, the following will need:
- Actually, themselves candles - some
Important: it is quite possible to purchase the most ordinary candles in the household department of the store. True, they have a grayish tint due to the fact that they are not subjected to cleansing. However, this drawback is easily corrected if you plan to engage in painting.
- Capacity - A small pan. It is advisable to attach a clothespin to the edge. Paraffin, which is melted, is very hot, so some pen is simply necessary
- Mold -in our case, 2 forms of different sizes are needed
- Wick
- Plasticine
- Grater
- Oil
- Acrylic contours
- Small ones - We need wax
IMPORTANT: CHARCS based on oil will not be able to dissolve in wax - they should not be taken unambiguously.

We proceed to the manufacture:
First, all available cut the candles For small pieces. Remove the wick of them.

Process shafts with grater. It is best to rub each color separately.

It's time to put it surrending in a water bath Parafin. In the meantime, this follows, prepare a form - Lubricate it with oil.

And then paraffin melted! You can now add a chopped small thing.
Important: it is extremely important to thoroughly stir the dye until it disappears completely.

Now paraffin pours into a large mold. However, one should not be very carried away - the one that is smaller in size will fall later. Therefore, the level of filler will rise - you need to consider this.

Lubricate outside small mold - After that, it can submerge in a large one. It is recommended to place inside is plasticine.
Important: try to adhere to the "golden mean". With a meager amount of plasticine, the mold will not plunge, and with too large - it will go to the bottom.

A few hours later you can get a frozen cast. And immediately take care placement of a wick. The hole can be done with something thin like toothpick or brush.

Pass the wick. The bottom of the candle should be disguised With a hot spoon.

The other end of the wick is fixed on a toothpick. The toothpick, in turn, is placed across the candle and attached with plasticine.

Similarly, a diagram with a green paraffin, you melt the yellow. Pour it into the deepening of the future candle. Cut the wick So that the candle remains approximately 1 cm.
Important: do not forget to add paraffin into a recess near the wick.

After everything freezes, it will remain decorate a candle. And here an acrylic circuit is useful.

How to make and decorate wax candles with your own hands?
For the manufacture of beautiful wax candle in the form of a rose you will need:
- Actually, himself wax
- Stationery knife or at least his blade
- Burner
- Wick
- Mirror or glass small size
Important: However, if the workplace is even, then the glass is optional.
Primarily, melt the wax. And here the burner is just useful.

Further molten wax spilles on a flat surface. Wait for it to cool.

Wax the spot is cutwith a knife.

Now the wax is separated from the surface. One part of it is deposited for a while.

For one of the pieces vitila is superimposed. It follows wrap in wax.
Important: try to perform this procedure quickly, otherwise the wax will freeze.

In a similar way create other petals. Do not forget that their edges should be bent for maximum identity to a real flower.

How to make and decorate with paraffin candles with your own hands?
Will delight in the winter season icy candle from paraffin. No matter how paradoxical it sounds, but the ice and flame can be united, and you will need for this:
Candles paraffin household - 4 things.
Important: paraffin must certainly be high -quality. Otherwise, the candle will smoke, crack, spread an unpleasant odor, burn unevenly.
- Wax color small ones
- Ice cubes
- Knife
- Two bowls or pots. Keep in mind that their diameter should be different. In addition, dishes, usually used for cooking, are not suitable.
- Skewer or a small wood stick
- Concerning molds, then use in this case you can even a plastic cup
- Terry towel
- Some comfortable group and adhesive

Before starting work is worth cover the working surface with oilcloth. Then take it candle and equalize it is in size with a mold.

But besides this candle there are others - they need to cut into small pieces, having previously taken out the wick.

Pour water into a large pan And bring it to a boil, then reduce the fire. The turn has come small pots - pieces of paraffin are obsessed thereAnd all this is put in a water bath.
Important: it is extremely important to consider that paraffin is easily ignited. Therefore, do not warm it on an open fire or in a microwave. Do not be distracted from the process, but at hand, just in case, keep baking soda - it is with it that you need to extinguish a burning paraffin.

It’s fine with a knife cross the chalk. The principle is simple: the more chips, the more saturated the candle will be.

Pieces of a small thing are spilled into a small pan. Do not forget to stir.

The turn has come ice - Remove it from the freezer, put it on a towel, cover with another part of the towel and Grind. The sizes of ice creams should correspond to how you want to see the openwork - thin openwork patterns require small ice floes.

Fill in ice form. Wherein A piece of candle should be placed in the middle With wick, cut off at the very beginning of work.

Now molten paraffin can be poured into a mold, right on the ice.
IMPORTANT: Do not forget to use the seize.

Wait for cooling color paraffin. Then give a cast From the mold. It is recommended to do all this above the sink, as the melted ice will definitely drain. Heated with a knitting needle taken, you can melt the wick, if he was flooded with paraffin.

Just in case leave the candle to dry additionally. When using it it is worth taking a wide candlestick - Paraffin can melt.


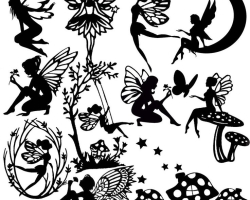
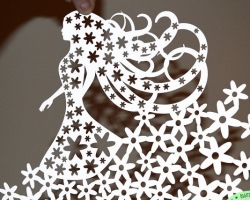
Beautiful carved candles with your own hands: Forms
Carved candles seem incredibly complicated, but some of them are simple. Prepare:
- Paraffin
- Form To your choice. It is better to start with something simple like outlines of an egg. As for the material, then due to the ease of extraction of a cast, it is recommended to choose silicon
- Wick or plexus of cotton threads
- Capacitance, in which a colored paraffin will be flooded. Unnecessary cups, saucepan or even canning cans are suitable in everyday life
- Special dyes Or wax crayons
- Hook and the crossbar to him
Important: select the hook size, taking into account the fact that it should be convenient for you to hold it in your hands.
- Bucket with water
- Paper napkins From the category of those that are soft to the touch
- Knife

Just like in previous workshops, melt paraffin in a water bath.Pour it in the format the same time leaving a long - at least 10 cm. – wick.
After The cast is extracted, follows a long wick hang it on the hook.

In a water bath heat paraffin with the addition of shades.
Important: to bring it to 60-80 degrees will be quite enough. At the same time, you need to stir, because paraffin settles.

Start let down suspended on the hook the workpiece in the container With the flowers you need. Try to do it Quickly, but at the same time smoothly. Let the paraffin drain, and then to fix the remaining lower the product in a bucket of water. There can be several dozen layers, because a hot paraffin gives a very thin layer.

We assume that these were the inner layers. Now carefully dip the workpiece alternately into the desired shades for obtaining the effect of the gradient. If spray is obtained, carefully remove them with a napkin.

Now hang the workpiece on the hook - and cut the patterns! To start cut the extra layers of paraffinwho formed the subclasses. It is possible for convenience make a sketch, since the possibilities of making amendments will not be presented.
Important: on average, paraffin cools in 10 minutes, so try to cut the patterns during this time.

Then cut the patterns as fantasy suggests. You can even tighten the cut strip and put it in the neckline - it will turn out an interesting effect.


Flowers It seems to be formed - certain patterns are cut, which bend in the right way. Can decorate the candle, for example, beads.


Of course, options for shapes and colors There may be a huge number:


How to make colored candles with colored fire with your own hands?
We wrote about how to make colored wax earlier. By the way, an interesting option - multilayer multi -colored candle. The main thing in this matter is leisurely, because each previous layer should dry before the formation of the subsequent.
Important: to cool such a product should at least 5 hours.


The secret color flame consists in burning salts. Moreover the composition of salts Depends on what shade you want to get:
- Yellow orange - salt
- Red - nitrate strontium or sodium chloride
- Blue - CHIC chloride
- Green - Barium chloride
- Violet - potassium chloride
Such candles are good in that not toxicand if they occasionally flow, then there will be practically no traces. However they flare up for a long time.

How to make aromatic candles with your own hands?
In order to create an aromatic candle, use appropriate oil. It's just wonderful if to certain notes of aroma will be selected corresponding shade of wax.
Important: you need to add oil to wax at the stage when it has already melted, but has not yet been poured into a mold.
Please note that:
- Bergamot in conjunction with lavender It will help to relax
- Lemon and rosemary will cleanse their heads of negative thoughts
- Equal part roses and geraniumsas well as exceeding them by half lavender They will return peace and help to find the balance of spirit after strong experiences.
- Lemon with cedar They will also relieve stress
- Cloves with orange Guaranteed to cheer up


Candles enchant, pacify, delight, inspire - how much purpose of this lighting source has! And, you see, it will be just great if you can independently regulate all these emotions, making candles with your own hands.


Like how you have done, but I don’t know how to buy it)