How to properly glue wallpaper on the ceiling: useful tips.
Content
- How to prepare the ceiling for wallpapering?
- Glue for ceiling wallpaper
- How to apply and glue liquid wallpaper on the ceiling?
- How to stick vinyl wallpapers correctly so that there are no joints?
- How to glue non -woven wallpaper correctly so that there are no joints?
- How to stick paper wallpapers correctly so that there are no joints?
- How to stick 3D wallpapers correctly so that there are no joints?
- How to properly glue wallpaper for painting, so that there are no joints and painting of wallpaper?
- How to stick the murals on the ceiling correctly?
- How to glue the right wallpaper on their own on the ceiling made of drywall?
- Elimination of cracks on the wallpaper, on the ceiling
- Wallpaper Praise Wallpaper with your own hands: tips
- Is it possible to glue wallpaper on the ceiling tile?
- Wallpaper on the ceiling: modern design
- Video: how to glue wallpaper on the ceiling, all the nuances, (repairs in the apartment)
Around the middle of the last century, people did not really bother about the appearance of the ceilings in their homes and apartments, so most often they simply whitened them with chalk. But approximately 15-20 years ago, such a repair lost its relevance and people began to transform their living space using brighter finishing materials. It was during this period that the fashion on the ceilings glued with wallpaper appeared.
Initially, they were glued exclusively paper wallpaper, but as vinyl, non -woven and liquid began to appear on sale, they were also used to update the ceiling space. If you also plan to glue the ceiling with wallpaper, then let's figure out how to make this coating serve you for many years.
How to prepare the ceiling for wallpapering?

If you want the ceiling space in the repair room after the completion of all work to look perfect, then be sure to preliminary preparation of this surface. It must be done in the way that the correct docking of individual pieces of wallpaper will depend on this stage of work.
In view of this, before starting updating the ceiling, be sure to make sure that it does not have any obvious defects. If you find cracks and recesses, then you will have to close them with special putty. If during a visual examination it will be seen that the ceiling has a wave -like shape, then you will have to spend money on its full leveling.
Yes, and do not forget, after the entire surface is in perfect condition, it will definitely need to be primed. If you want to update the ceiling with wallpaper after whitewashing, then you will need to wash all the chalk thoroughly as possible, wait until everything dries, grind everything again, and only after that it will be possible to start gluing.
Glue for ceiling wallpaper

If earlier it was possible to find only one type of glue on sale, now almost every company engaged in the production of wallpaper is trying to offer customers the glue of their brand. Of course, this simplifies the selection of an adhesive base, but still sometimes sellers do not sell people for earnings for earnings. That is why before you make a purchase, you must carefully see paper, vinyl or non -woven wallpaper.
You will also need to check the packaging with glue and make sure that they can fix the most heavy wallpapers on the ceiling. And, of course, do not forget that it is necessary to breed glue strictly according to the instructions. Even if it seems a little thick to you, do not try to add water to it. If you make it too liquid, then in the end it will not be able to ensure a good adhesion of the finishing material and the ceiling surface.
Types of glue:
- Special vinyl (for vinyl and cramped wallpaper)
- Paper (for light and thin wallpaper)
- Non -woven (suitable exclusively for non -woven wallpaper)
- Glue for fiberglass (for heavy wallpaper for painting and textile wallpaper)
- Universal (suitable for absolutely all types of finishing material)
How to apply and glue liquid wallpaper on the ceiling?

I immediately want to say that liquid wallpaper should be applied exclusively on perfectly even surfaces. If you try to update the ceiling, without having previously leveled it, then after the decorative material dries on the surface, all flaws will be visible. If you do everything right, then the ceiling in the repair room will look like a silk canvas playing with different shades.
Recommendations for applying liquid wallpaper to the ceiling:
- At the very beginning, you will need to tightly close all the doors and windows that are in the room
- After that, pour the dry substance that is in the package in a bucket or other deep container
- Add to a little water, coloring pigment and start to mix everything with a construction mixer
- Add water in small portions until the mass in the bucket becomes a consistency similar to a thick sour cream
- After that, let the mass stand for 20 minutes, mix it again and start applying to the surface
- To do this, put a small part of the wallpaper on the trowel and distribute the ceiling with semicircular movements
- It is necessary to start fixing the mass in the ceiling space from the corner of the room
- If you want to make the ceiling more textured, then approximately 4 hours after the end of the application go through it with a relief roller
How to stick vinyl wallpapers correctly so that there are no joints?

Vinyl wallpapers belong to those finishing materials that are well masked under the small flaws of surfaces. In view of this, if your ceiling coating is covered only with small cracks, then you can simply warm it and you can safely start the main stage of work.
So:
- To begin with, using a construction meter, measure the length of the first piece of wallpaper
- When this is done, spin a roll with wallpaper and measure the right amount
- Add a few centimeters to cutting to it and cut a piece
- Pour the wrong side of the wallpaper with special glue, paying special attention to the joints
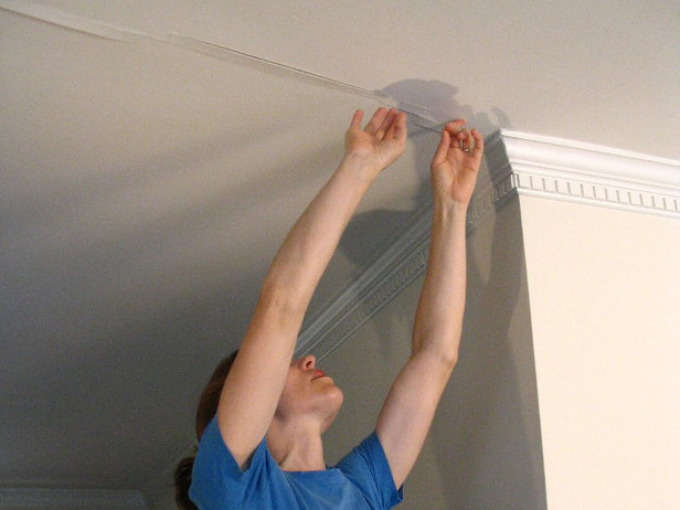
- After that, you can safely take a piece of wallpaper in your hands and fix it on the ceiling
- By applying at one corner, carefully stretch it over the entire length, and degre up the bubbles remaining under decorative material, foaming sponge
- Apply glue to that part of the wall on which you will fix the second cut -off piece
- Light with glue the second piece, fix it at the edge of the ceiling, and then begin to join the pieces among themselves
- Gently connect them with each other and make sure that the overlap does not form anywhere
- Drink and this canvas with a sponge, and then pick up a rubber roller and carefully pass it throughout the junction
How to glue non -woven wallpaper correctly so that there are no joints?

In principle, non -woven wallpaper is glued in the same way as vinyl, just in this case you will not need to additionally smear the wall with glue. The basis of this decorative material is made in such a way that even a small amount of adhesive contributes to a good clutch with the ceiling.
So:
- Dilute glue with water and let it brew
- While it swells, draw all the necessary measurements and cut the first two pieces from the roll
- L tam one of them with glue and attach to the ceiling parallel to the wall
- Drink it with a roller or soft rag
- Light with glue the second piece and incorporate it with the first, avoiding the formation of an overlap
- Continue glued pre -measured strips until the entire ceiling canvas is covered with wallpaper
- Pieces of material that hang on the walls remove with a sharp knife, after pressing them with a metal spatula
How to stick paper wallpapers correctly so that there are no joints?

As a rule, paper wallpapers have a small thickness and for this reason they cannot mask defects in the ceiling canvas. In view of this, if you give preference to this particular decorative material, then you will definitely need to put on putty, leveling, grinding and priming the ceiling surface. Also consider that this material is afraid of excess moisture.
Therefore, apply glue to it neatly, otherwise the paper canvas will become very soft and will begin to break even before you begin to fix it on the ceiling. Yes, and do not forget that in this case, the joints must be additionally drove with a rubber roller. If you do not do this, then after drying they will begin to disperse and will be very striking.
Play the ceiling with paper wallpaper:
- Pre -preparation of the ceiling
- Prepare glue (you can use universal)
- Cut pieces of the paper cloth of the desired length
- Pour glue first with glue, and then the canvas itself
- Attach it to the ceiling, carefully distribute it with your hands and roll it with a rubber roller
How to stick 3D wallpapers correctly so that there are no joints?

If you want to glue 3D wallpaper in your house, then be prepared for the fact that you will have to do everything as carefully as possible. This type of decorative material is so fragile that with improper work it can be easily damaged and as a result, you will not get the desired effect.
That is why, before you start gluing them, sit down and carefully study the instructions that are on the wallpaper roll and on a pack of glue. As for the glue, it must be prepared strictly following all those rules that are indicated on the pack.
And remember, if it is written that it needs to be mixed for five minutes, then this must be done. If you only mix it slightly, you will not get the desired consistency and you can’t correctly fix the wallpaper on the ceiling.
So:
- Measure the ceiling length from one angle to the second
- Cut two pieces of the same size from the roll
- Spread the ceiling with glue and begin to apply the canvas to it
- You need to start pasting from a corner, which the sun's rays do not fall
- With the help of a foam sponge or soft roller, expel all the air from under the canvas
- Apply glue to the stream again and begin to glue another piece
- Already at this stage, take measurements for the parallelism of the picture
- If the first two pieces are glued correctly, you can cut the rest and fix them on the ceiling surface
How to properly glue wallpaper for painting, so that there are no joints and painting of wallpaper?

Wallpaper for painting is good in that if you wish, you can easily change their color and even apply some original pattern on them. If you want to save on the paint, then give preference to non -woven wallpaper for painting. As practice shows, in order for such a wallpaper to look perfect, only one layer of paint needs to be applied to it.
Simple recommendations:
- Be sure to fill all the defects on the ceiling and mush it
- Cut a piece of the desired length from the roll and draw a brush moistened in the basket in its middle
- Next, begin to evenly distribute the glue over the entire surface of the canvas
- Fold the canvas with an accordion with a step of 25 centimeters
- Squeeze the ceiling with glue and begin to fix the wallpaper on it
- Press the canvas to the surface with a flexible spatula, and then drive out the remaining air and excess glue with a soft roller
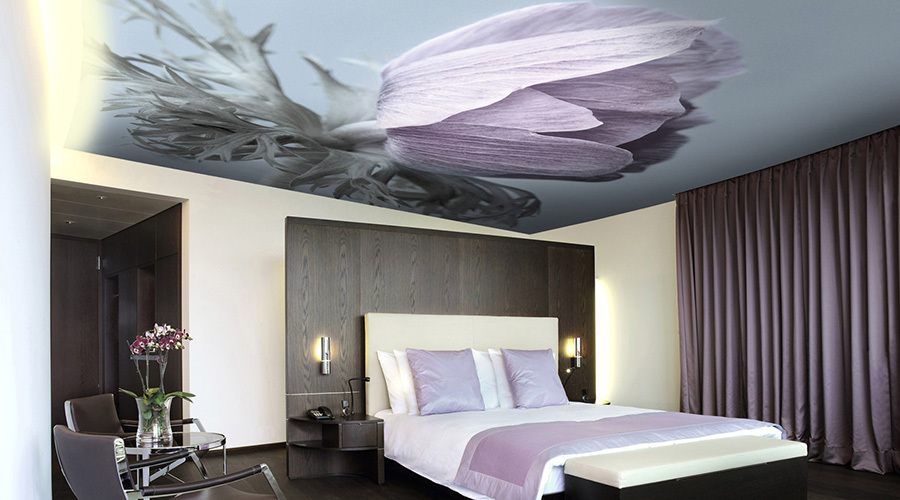
How to stick the murals on the ceiling correctly?

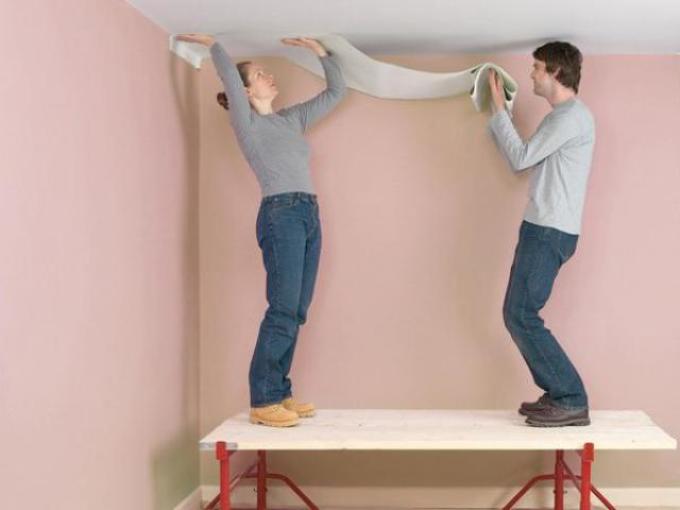
Although the murals are glued according to the same principle as ordinary wallpapers, it is still a little more difficult to update the ceiling with this method. In this case, you cannot afford to simply cut off pieces of the desired size from the roll and fix them on the ceiling. Since a photo is nothing more than a huge drawing, you will need to fold it like a puzzle and do it in a not very convenient position.
In view of this, it will be better if you will carry out such a decoration of space in the room with one of your relatives. In this case, a person who is from below will immediately be able to see that the drawing is folded incorrectly and you do not have to redo everything when most of the photo wallpaper is glued to the surface of the ceiling.
So:
- Initially decompose the photo in the room and look from how many parts it consists
- Cut all the white parts and fold it in such a way that you do not confuse the pattern
- Take the level and simple pencil and mark the ceiling
- Ideally, you should divide it into squares, the size of which should correspond to the size of a piece of photo wallpaper
- If you do not want to do this, then outline at least the first row of squares, and then move on already from them
- After the marking is made, you can smear the ceiling with glue and fix the parts of the photo wallpaper on it
How to glue the right wallpaper on their own on the ceiling made of drywall?
Some people believe that you can glue wallpaper on drywall without any preliminary preparation. But in fact, even such a perfectly even surface should be prepared for further decoration. If you try to update the ceiling, simply grunting the surface, then in the end all the joints that are between pieces of drywall will be visible on it.
So:
- Initially clean the surface of the drywall from dust and thoroughly grind it
- Next, take putty and fill all the seams
- When it dries, lay these areas with sandpaper
- Then again dilute the putty to the consistency of the thick sour cream, and this time stretch the entire ceiling canvas with it
- At the next stage, grind the surface again and warm everything again
- Когда грунтовка полностью высохнет, переходите к стандартной процедуре поклейки обоев
Elimination of cracks on the wallpaper, on the ceiling
If you saw a crack on the ceiling wallpaper, you should not be upset much. If you show a little patience, you can disguise this defect and you will not have to completely re -replace the ceiling space.
So:
- To begin with, prepare a sharp construction knife, universal glue and very little sealant in a tube with a gun. When everything will be ready, proceed to close up the resulting crack.
- To do this, sprinkle this place with water from a spray gun and wait for the wallpaper to move away from the ceiling. But do not overdo it, if you soak them too much, then in the end they can break and then the defect will definitely not be able to remove.
- As soon as the wallpaper begins to move away from the surface, take the knife and make a neat cut along all lines of the crack. Then dilute the wallpaper so that you can easily see the cracked ceiling.
- Carefully fill in the crack with sealant, smooth everything and wait until it grabs. At the final stage, grease the wallpaper with glue, wait 5 minutes and bring two parts together.
- You must glue these two halves as glued two pieces of wallpaper. If you do not rush, then you will not get an overlap, and after drying this place will seem perfectly even.
Wallpaper Praise Wallpaper with your own hands: tips
As you probably already understood if you adhere to generally accepted rules, then gluing wallpaper will pass without any problems. In view of this, in no case do not rush and try to do all the stages of this process as correctly as possible.
Tips that will help to properly glue ceiling wallpaper:
- Always prepare the ceiling for gluing first
- Dilute the glue strictly according to the instructions
- Follow that the temperature does not drop below +5 in the repair room and does not rise above +25
- During gluing and the entire period of drying the wallpaper, keep the windows and doors in the room closed
- The first strip glue in the brightest place of the room
- Apply the glue with a soft brush and make sure that its layer is not very large
Is it possible to glue wallpaper on the ceiling tile?
I immediately want to say that ceiling tiles are the most inappropriate base for wallpaper. If you glued it yourself, you probably know that it is quite easy to fall off. Now imagine that you will apply a wallpaper glue on it, and then fix the wallpaper itself.
It is clear that all this will have a weight that after some time violates the clutch between the tile and the ceiling, and in the end it will begin to disappear. And since the wallpaper will be pasted on it, they will fall off with her. In view of this, if you do not want to spend money in vain, then it is better to remove the tile from the ceiling and only then glue the wallpaper on it.
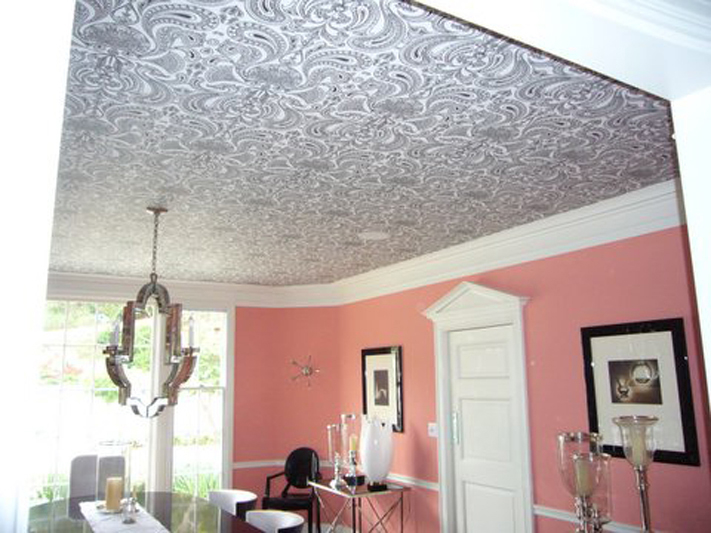
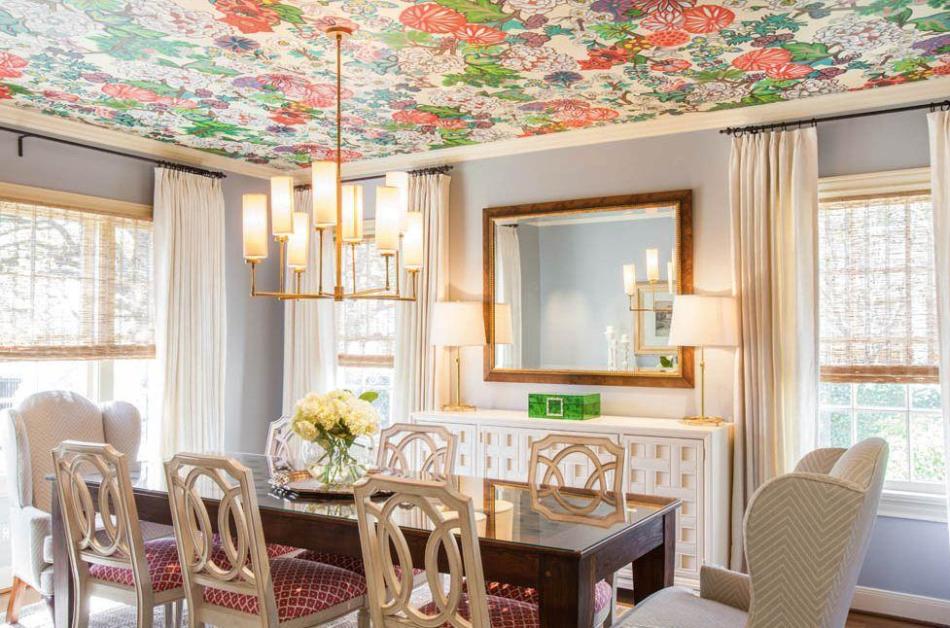
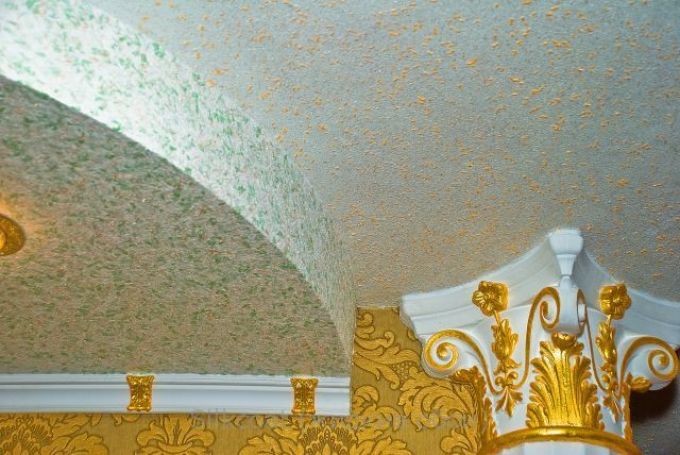
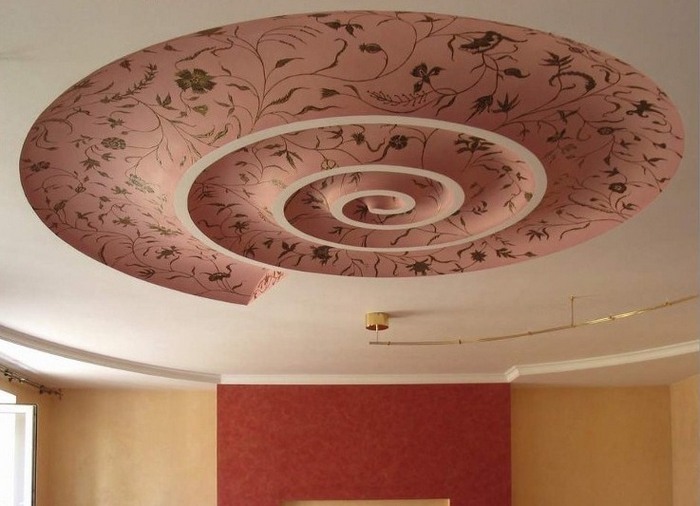
Wallpaper on the ceiling: modern design
A little lower you can see photos that depict the modern design of the ceiling space. After looking at them, you can get a more complete idea of \u200b\u200bhow beautiful and original the ceiling is glued by ordinary wallpaper.